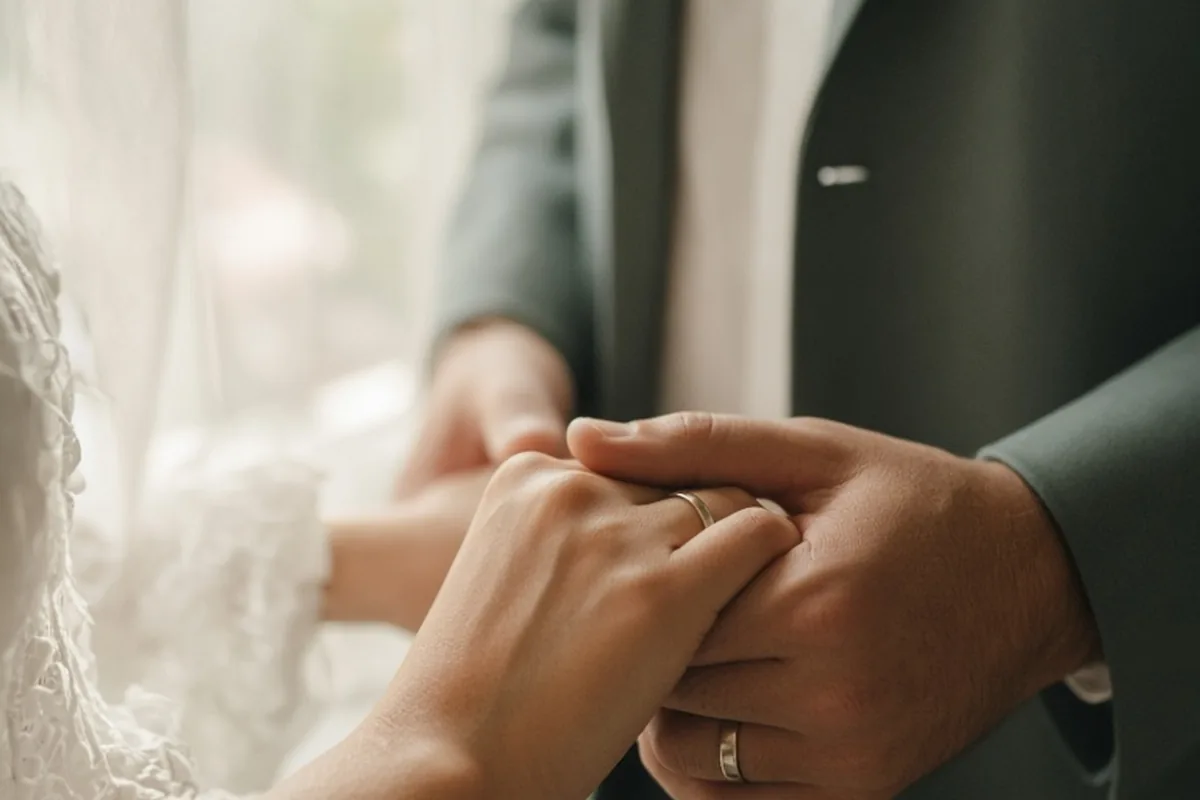
To capture a beautiful shot of a newly married couple's hands, focus on authentic contact, soft directional light, and relaxed finger placement rather than stiff, forced poses. Highlight meaningful details like wedding bands, intertwined fingers, or one partner gently resting a hand over the other's palm. Keep wrists relaxed and photograph from angles that showcase connection, texture, and subtle emotion without distorting hand proportions.
Photographs that highlight hands offer a uniquely quiet, poetic perspective on a wedding day, transforming a simple physical gesture into an enduring portrait of commitment and shared history.
Why Close-Up Hand Portraits Tell a Powerful Story
Photographs focusing on hands strip away the grandeur of ceremony backdrops, allowing the viewer to appreciate the quiet, personal core of a couple's bond. While wide-angle shots capture setting, attire, and celebration, macro and close-up compositions distill romance down to raw touch. For couples whose relationships evolved from deep-seated friendships, holding hands is often one of the earliest physical expressions of tenderness, carrying years of shared memories, unspoken support, and mutual trust into the marriage covenant.
Focusing on the hands also gives visual prominence to elements that might otherwise disappear in standard portraits. Rings, heirloom bracelets, cultural adornments, and even subtle skin textures tell a narrative of heritage and personal choice. When framing these images, the goal is not merely to document jewelry, but to convey a sense of grounding and belonging. A soft, deliberate touch between newly married partners communicates vulnerability and comfort in a way that formal portraits rarely manage on their own.
However, focusing strictly on hands requires careful compositional discipline. Because the human eye quickly detects unnatural tension in fingers and wrists, an overly engineered pose can look sterile or clinical rather than warm. The most evocative images balance intentional styling with effortless interaction, ensuring that the final frame feels like an observed private moment rather than an artificial product demonstration.
Natural Posing Techniques That Avoid Awkward Stiffness
The primary challenge in close-up hand photography is avoiding the appearance of stiff, claw-like fingers or strained tendons. When people are told to pose their hands, they often hold their muscles rigid, creating harsh angles and unnatural shadows. To circumvent this, encourage the couple to engage in dynamic touch rather than static placement. Asking one partner to slowly trace the edge of the other's palm or loosely interlock fingers while resting their arms on a textured surface creates organic curves and soft contact points.
A reliable technique is the nested handhold, where one partner places their open hand palm-up while the other rests their hand on top, allowing their fingers to curl naturally over the knuckles. Another classic configuration involves one partner cupping the other's hands from beneath, symbolizing support and shelter. For standing shots, having one partner rest their hand gently on the other's chest near the lapel or over their partner's forearm brings depth and clothing texture into the frame while keeping the grip loose and effortless.
Pay special attention to the position of wrists and thumbs. When wrists are bent at sharp ninety-degree angles, it disrupts the visual flow and can make forearms look compressed. Keep the lines of the arm and hand relatively straight and elongated. Suggesting that the couple take a slow breath, shake out their hands, and gently reconnect allows the fingers to settle into their natural resting curve.
Positioning Rings, Heirlooms, and Subtle Textures
While genuine emotion remains the priority, displaying new wedding bands and family heirlooms naturally enhances the storytelling quality of the image. The key is to arrange the hands so that the rings catch available light without twisting the couple's fingers into awkward contortions. Rather than forcing both partners' rings into parallel alignment facing the lens, allow them to sit at slightly varied angles, creating a more candid and dimensional look.
Incorporate surrounding textures to build visual contrast and tactile richness. The delicate fabric of a bridal gown, the weave of a tailored wool suit, an intricately embroidered veil, or the natural grain of a wooden bench can serve as an elegant backdrop. For example, placing joined hands over the folds of a bouquet's silk ribbon or directly against tailored suiting fabric adds depth and highlights the warmth of skin tones against fine textiles.
Be mindful of competing visual elements that can distract from the central focus. Overly busy lace patterns, reflective watch faces, or high-contrast floral arrangements can draw the eye away from the hands themselves. Check for chipped nail polish, dry skin, or lint on jackets prior to shooting close up, as macro lenses magnify minor imperfections that are easily resolved with a brief touch-up.
Mastering Lighting and Composition for Intimate Framing
Lighting for hand portraits should emphasize soft volume and gentle definition rather than harsh contrast. Directional, diffused natural light—such as daylight filtering through a sheer window curtain or open shade during late afternoon—is ideal. Positioning the couple so that light skims across the top of their hands creates subtle shadows that define bone structure, skin texture, and the polished facets of wedding jewelry without producing blown-out highlights.
Compositionally, applying the rule of thirds prevents the image from feeling like an uninspired catalog shot. Placing the primary point of contact—such as intertwined fingers or where a ring rests against a palm—slightly off-center produces a dynamic balance. Using a wide aperture, such as f/2.8 or f/4, softens the background into a smooth blur while keeping the critical details of the rings and skin in crisp focus.
A common technical pitfall is using an overly wide focal length too close to the subject, which distorts proportions and makes the hand nearest the lens appear unnaturally large. A focal length between 50mm and 105mm preserves realistic proportions, flattens distracting perspective distortion, and provides a comfortable working distance so the couple does not feel crowded by the camera gear.
Capturing Movement, Touch, and Spontaneous Connection
Some of the most moving shots of newly married hands occur during transitional, unprompted moments rather than structured poses. When a couple walks together between portrait locations, their natural hand swings, casual adjustments of each other's cuffs, or brief reassuring squeezes offer genuine expressions of connection. Keep your camera ready during these quiet intervals to document unscripted intimacy.
You can intentionally facilitate dynamic interaction by providing gentle micro-prompts. Ask the couple to recall a lighthearted memory from when they first became close friends, or prompt them to slowly adjust each other's rings as if seeing them on their fingers for the very first time. These subtle actions occupy their attention, shifting their focus away from the lens and allowing their fingers to move with uninhibited softness and warmth.
When photographing motion, ensure your shutter speed is fast enough to eliminate motion blur—typically 1/250s or faster for close-up action. Continuous shooting mode can also be beneficial here, capturing the subtle arc of fingers brushing past each other or the precise moment when hands settle into a comfortable, loving embrace.
Communicating Comfort and Relieving Couple Self-Consciousness
Many individuals feel self-conscious about their hands, worrying about visible veins, dry skin, or perceived clumsiness under close observation. Creating a calm, supportive environment is essential for helping the couple relax. Speak in a gentle, reassuring tone, and avoid calling out specific physical features critically. Instead of saying 'your fingers look tense,' offer constructive, positive cues like 'take a deep breath, soften your grip, and let your hands melt into each other.'
Encouraging the couple to focus entirely on their physical sensation rather than how they look in the camera helps ground them in the moment. Suggest that they pay attention to the warmth of their partner's palm, the weight of their new ring, or the fabric between their fingertips. This sensory grounding diverts their cognitive focus away from performance anxiety, resulting in visibly softer, more authentic body language.
Respect boundaries regarding personal comfort and fatigue. Fine-art macro portraits require patience, but holding hands in fixed positions for extended periods can cause muscle fatigue and trembling. Keep close-up hand sessions relatively brief—typically five to ten minutes—interspersed between wider, more active portraits to maintain energy and spontaneous warmth.
Essential Best Practices for Flattering Detail Shots
Achieving consistent, high-quality hand portraits involves combining technical preparation with thoughtful styling choices. Taking care of small practical details before stepping in front of the lens ensures that the final images look polished, timeless, and emotionally resonant.
Implementing a concise checklist helps avoid the most common styling and operational oversights that can diminish an otherwise beautiful photograph:
- Apply a non-greasy moisturizer ten to fifteen minutes before shooting to hydrate the skin without leaving an unwanted sheen on jewelry.
- Keep hands slightly elevated before the close-up session to reduce temporary venous pooling and ensure smooth, even skin tones.
- Check jewelry alignment so that the primary stones and bands sit straight without obstructing each other awkwardly in the frame.
- Use a micro-fiber cloth to buff out fingerprints, dust, and smudges from ring stones and metal surfaces just prior to shooting.
- Choose neutral, uncluttered backgrounds that complement the couple's clothing palette and avoid bright, distracting color casts.
Frequently asked questions
What is the best lens to use for close-up shots of hands?
A dedicated macro lens or a portrait prime between 85mm and 105mm is ideal. These focal lengths maintain realistic hand proportions, prevent perspective distortion, and allow you to capture crisp ring details with a softly blurred background.
How can a couple prevent their hands from looking stiff in photos?
Couples should focus on gentle, continuous movement rather than freezing in place. Shaking out the hands, taking a deep breath, and resting fingers lightly on soft surfaces or each other's palms helps release muscle tension naturally.
When is the best time during the wedding day to photograph hands?
Quiet windows during the couple's portrait session or right after the ceremony are best. Scheduling five to ten minutes during these unhurried moments ensures natural lighting, clean styling, and relaxed emotional focus.
Your next step
Plan a dedicated five-minute window during your portrait session to capture relaxed, softly lit hand details, giving attention to subtle touch, jewelry alignment, and comfortable, natural finger placement.