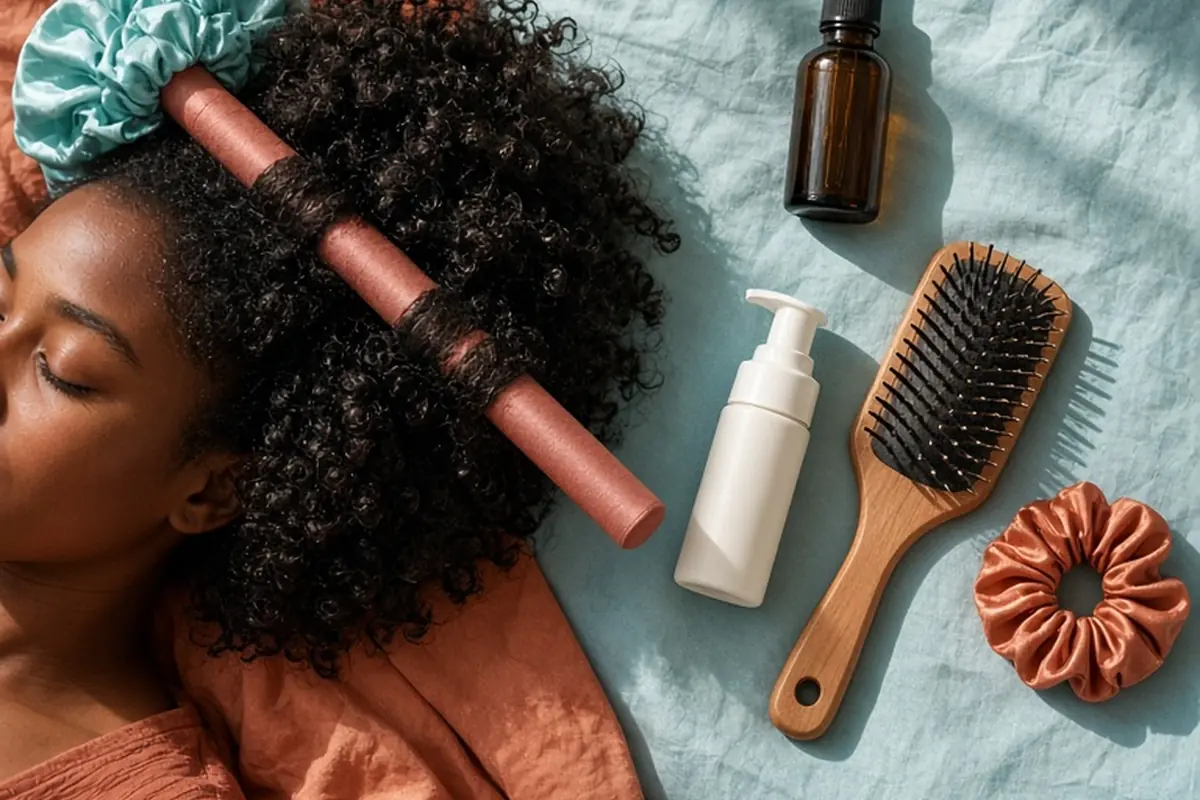
To do heatless curls on naturally curly hair, start with clean, 80 to 90 percent dry hair. Apply a leave-in conditioner followed by a lightweight styling foam for hold. Smooth sections with a brush to align the cuticle, then wrap hair firmly around a satin curling rod, flexi-rod, or robe belt. Secure ends with satin scrunchies, let dry completely overnight under a bonnet, and gently unroll with oiled fingers.
Styling naturally curly hair without heat offers an effective way to reshape uneven curl patterns, stretch tight coils into elongated waves, or achieve uniform ringlets without thermal damage. While viral heatless curl tutorials frequently cater to straight or wavy hair, textured strands require specific preparation, moisture management, and tension techniques to prevent frizz and ensure a smooth, lasting set.
Why Naturally Curly Hair Needs a Modified Heatless Technique
Most heatless curling methods popularized online assume hair starts straight, smooth, and low in volume. When applied to naturally curly, coily, or textured hair without modification, those standard approaches often produce tangled, frizzy, or uneven results. Naturally curly hair already possesses its own internal structural shape, driven by asymmetrical hair follicles and irregular disulfide bonding along the hair shaft. Trying to wrap dry, textured hair directly around a rod leaves the hair cuticle open, resulting in rough, matte curls that lack definition.
Conversely, wrapping soaking wet curly hair tightly around non-porous satin or foam rods traps excess water inside the bundle. Because naturally curly hair is often dense and porous, wet wraps can remain damp for over twenty-four hours, leading to limp, half-formed curls or scalp discomfort. The key to successful heatless styling on curly hair lies in temporary hydrogen bond resetting: stretching the hair while it is lightly damp, smoothing the cuticle under gentle mechanical tension, and allowing it to dry fully in its new form.
Another distinct consideration for curly hair is texture variation across the head. Many individuals have tighter curl patterns at the nape of the neck and looser, more fragile curls near the crown or hairline. A uniform wrapping technique that works for fine, loose textures may cause excessive tension or slipping on coarser sections. Adjusting section size and product application based on your head's specific texture zones ensures consistent definition from roots to ends.
Selecting the Best Heatless Curling Tools for Textured Hair
Different heatless tools yield significantly different curl sizes, hold levels, and sleeping comfort. The classic satin ribbon or flexible curling headband works well for medium to long curly hair when the goal is a smooth, voluminous blowout look or wide Hollywood-style waves. Because these single-piece bands sit across the top of the head, they allow you to wrap hair downward in sweeping motions, effectively elongating natural shrinkage without compressing individual curl clumps too tightly.
Flexi-rods and soft foam rollers provide superior customization for shorter lengths, uneven layers, or those seeking defined spiral ringlets. Flexi-rods allow you to choose different barrel diameters across your head, placing thinner rods where you need tighter curl matching and thicker rods where you want loose body. For naturally tight curls and coils, cylindrical perm rods or cold-wave rods offer maximum root-to-tip tension, though they are firmer and less comfortable for overnight sleeping than soft satin tubes.
Fabric-based alternatives, such as plush robe belts, cotton socks, or leggings, remain popular home options that offer high comfort. Soft cotton or microfiber materials provide slight grip, which helps prevent coarse or slippery textured hair from unraveling during the night. However, absorbent fabrics can pull essential moisture out of dry curls, so using a satin scarf barrier or ensuring hair is coated with a light oil or silicone-based serum prior to wrapping is essential when using household textiles.
Prepping and Hydrating Curly Hair Before Wrapping
The preparation phase determines whether your heatless set emerges glossy and defined or frizzy and unmanageable. Begin on freshly washed and conditioned hair, or thoroughly detangled second-day hair that has been lightly misted with a continuous water spray bottle. Your hair should feel cool and slightly damp to the touch, roughly 80 to 90 percent dry. If the hair is too wet, it will not set overnight; if it is completely dry, the hydrogen bonds will not reshape to the rod.
Layering the correct products creates slip, smoothness, and memory. Start with a lightweight water-based leave-in conditioner to deliver hydration without greasy weight. Next, apply a medium-hold styling foam, mousse, or wrap lotion through the mid-lengths and ends. Foams containing styling polymers or botanical gums create a flexible cast around each strand, which locks in the rod shape as the moisture evaporates. Avoid heavy, unrefined butters or thick petrolatum-based pomades before wrapping, as they slow down drying time and prevent the styling foam from forming a crisp, smooth set.
Before wrapping each individual section, detangle thoroughly with a flexible-bristle detangling brush or a fine-tooth tail comb, depending on your curl density. Smoothing the hair shaft with a brush immediately before winding aligns the cuticles and distributes product evenly across every strand. If a section begins to dry or frizz while you are working, lightly mist it with water and pass the brush through one more time to restore uniform alignment.
Executing the Wrap: Step-by-Step Method for Curly Hair
Divide your hair into clean, manageable quadrants: two front sections extending from the center part to behind each ear, and two rear sections. If using a central satin rod, secure it across the top of your head with a claw clip to keep it stable while you work. Take a two-inch section of hair from the very front of your hairline, smooth it forward with your fingers or a smoothing brush, and wrap it over and around the rod, directing the hair away from your face.
As you complete the first rotation, gather an additional slice of hair from beneath the first section, combining them together before wrapping around the rod again, similar to a French braid. Maintain firm, consistent tension throughout the winding process. This tension is what stretches your natural curl pattern into the smooth contour of the rod. Keep the hair flat against the surface of the tool rather than twisting the strand into a rope; twisting creates rippled, uneven textures, whereas flat wrapping creates wide, glossy ribbon curls.
Continue incorporating sections down the length of the rod until all hair on that side is integrated. Once you reach the ends, wrap them smoothly around the base of the rod. Secure the ends firmly using a soft silk or satin scrunchie. Avoid standard rubber bands or tight elastic ties, which leave visible indentations on curly hair and can cause mechanical breakage. Repeat the entire process on the opposite side of your head, ensuring both sides maintain symmetrical angle and tension.
Overnight Protection and Complete Drying Verification
Heatless curls set through the natural evaporation of moisture while hair is held under tension. To protect the wrap from friction and premature unraveling while you sleep, enclose the entire set inside a large satin or silk bonnet. Alternatively, wrap a silk square scarf around the perimeter of your hairline and tie it securely at the crown. This barrier prevents your pillowcase from roughing up the surface cuticles, reducing overnight frizz along the hairline and crown.
Sleeping position can impact the longevity of the wrap. If using a single long rod, cross the two hanging ends behind your head and tie them loosely in front, or secure them with a soft clip on top of your head in a halo arrangement. This keeps the firm base away from your neck and ears, allowing you to sleep comfortably on your back or side without displacing the rollers.
Never unravel heatless curls while any section remains cool or damp to the touch. Even a small pocket of internal moisture will cause curly hair to instantly revert to its natural, uneven shrinkage as soon as it meets ambient humidity. In the morning, gently feel the core of each wrapped bundle. If you detect dampness, keep the rods in place and use the cool or low-warmth setting on a hooded dryer or diffuser for ten minutes to finalize the set before removing the fasteners.
Takedown Technique: Separating and Setting Without Frizz
The takedown requires patience and minimal friction to preserve the smooth curl structure you created overnight. Begin by carefully removing the satin scrunchies from the ends of the hair. If you used a claw clip at the crown, remove it now. Rather than pulling the rod straight down through your hair, which creates unnecessary friction and disrupts the curl direction, gently unwind each section in reverse or lift the rod upward out of the center, allowing the curls to fall naturally around your shoulders.
Dispense two to three drops of a lightweight hair oil, such as jojoba, squalane, or argan oil, onto your palms and rub your hands together until they are lightly coated. This lipid barrier softens any crunchy cast left by the styling mousse and prevents static electricity during separation. Gently cup each formed curl ribbon from the bottom and squeeze upward to break the cast without disturbing the strand alignment.
To achieve seamless volume, use your oiled fingers to gently separate each large curl into two or three smaller ribbons. Follow the natural twist of the curl as you separate it, twirling the individual pieces around your finger to encourage them to lock into place. To blend the roots and eliminate visible parting lines from your sectioning, place your fingertips flat against your scalp at the roots and gently shake your hands back and forth. Do not rake your fingers through the mid-lengths or ends, as this will turn defined curls into generalized volume.
Troubleshooting Uneven Patterns, Straight Ends, and Premature Dropping
If you notice that your roots appear puffy or maintain their natural zigzag pattern while the mid-lengths are smooth, the issue stems from wrapping too far down the hair shaft. To correct this on your next set, ensure the very first wrap starts as close to the scalp as comfortably possible, maintaining upward tension before wrapping downward. For an immediate fix on a finished style, use a small dab of edge control or styling gel smoothed along the roots with a soft-bristle toothbrush to blend the texture.
Straight, fishhook, or crinkled ends occur when the final inch of hair is not wrapped flat against the rod or when a scrunchie is secured directly over uncurled tips. To avoid this, fold a small piece of end paper or a satin strip around your ends before applying the scrunchie, ensuring the very tips curve smoothly around the rod. If your ends come out straight, lightly dampen just the tips with water, apply a drop of styling foam, and wrap that individual section around a single flexi-rod for twenty minutes to reshape it.
When heatless curls drop prematurely throughout the day, the primary culprit is usually insufficient styling hold or high ambient humidity penetrating an unsealed cuticle. Ensure your preparation routine includes a styling foam with proven hold polymers rather than relying solely on leave-in conditioners or oils. For long-lasting wear over two to three days, protect your finished curls at night by gathering them loosely at the very top of your head in a high pineapple ponytail secured with a silk scrunchie, covered by a satin bonnet.
Frequently asked questions
Can I do heatless curls on completely dry curly hair?
Doing heatless curls on bone-dry curly hair usually yields weak definition and high frizz because the hair's hydrogen bonds cannot reset without moisture. For best results, mist dry hair with water until it is roughly 15 to 20 percent damp, smooth with a brush, and apply a light foam before wrapping.
How do I prevent my heatless curls from getting frizzy while wrapping?
Frizz during wrapping happens when the hair cuticle is not aligned or when sections dry out mid-process. Work in small sections, thoroughly detangle each piece with a smoothing brush immediately before winding, and apply a styling foam to provide slip and hold.
How long do heatless curls last on naturally curly hair?
With proper prep, adequate drying time, and a medium-hold mousse, heatless curls on textured hair typically last two to four days. Preserving them requires sleeping in a satin bonnet and keeping moisture and steam from the shower away from the set.
Will heatless styling stretch or damage my natural curl pattern?
Heatless styling does not cause permanent structural or heat damage to natural curls. However, wrapping hair with excessive scalp tension can cause mechanical stress or traction breakage, so keep tension firm on the strand without pulling tightly at the root.
Your next step
Assess your natural curl density and choose a flexible satin rod or flexi-rod set that matches your desired curl size, then test your next style on 80 percent dry hair using a medium-hold styling foam.