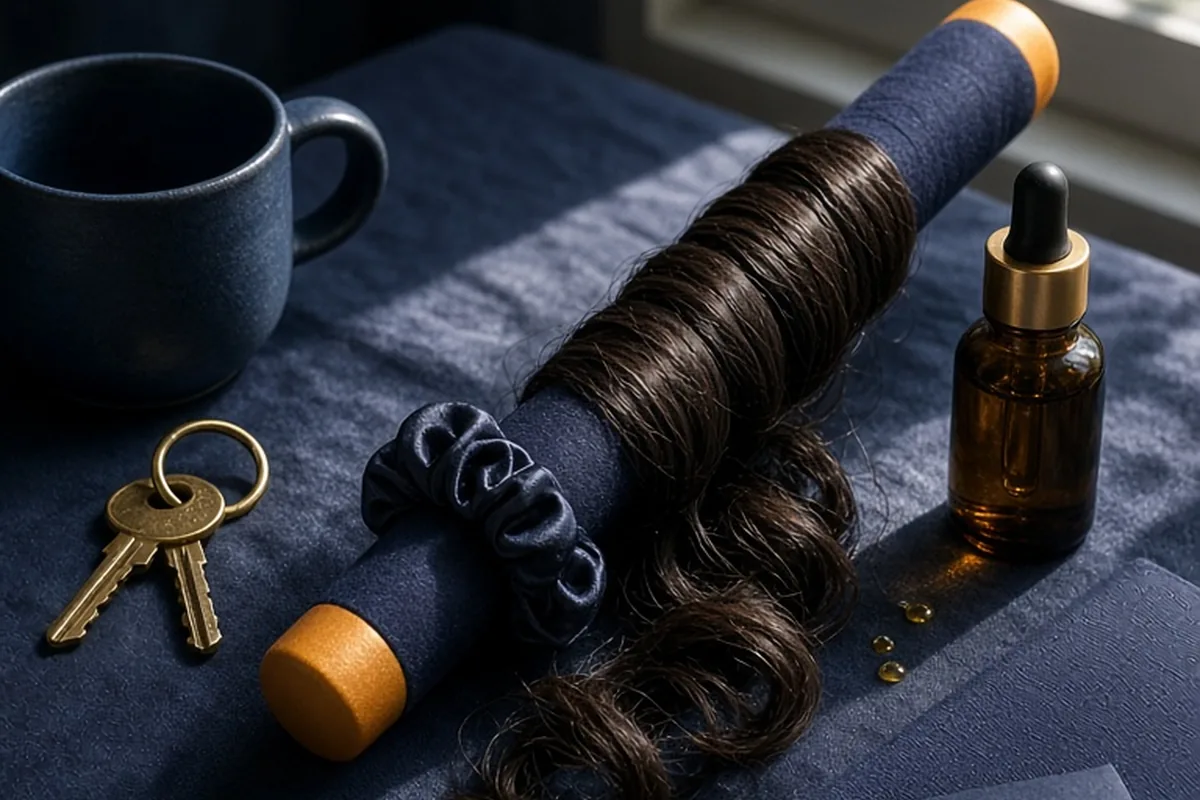
To achieve long-lasting heatless curls while protecting hair health, start with slightly damp, detangled hair prepped with a lightweight leave-in conditioner and styling mousse. Wrap sections firmly around a satin or silk curling rod, flexi-rod, or soft wrap, securing the ends with gentle scrunchies. Allow the hair to dry completely for six to eight hours or overnight before gently unrolling the rod. Separate curls using a few drops of hair oil on your fingertips to reduce friction and lock in shine.
Transitioning away from high-heat styling tools is one of the most effective ways to preserve moisture, prevent split ends, and reduce mechanical cuticle wear over time. Mastering heatless curl methods requires understanding the balance between moisture, wrapping tension, and setting time rather than relying on thermal restructuring.
Choosing the Right Heatless Curling Tool for Your Hair Length and Texture
The market offers a wide variety of heatless curling accessories, ranging from padded satin ribbons and cylindrical foam rods to flexible rollers, robe ties, and mesh wrap systems. Selecting the correct diameter and material is the foundational decision that dictates your final curl shape, curl longevity, and overall hair comfort. Satin and silk curling rods provide the smoothest surface, generating minimal friction against the hair cuticle as you sleep. They work exceptionally well for loose waves and soft, blowout-style body on medium to long hair lengths. Foam or wire flexi-rods offer tighter structural control and come in multiple diameters, making them ideal for shorter hair or when you want bouncy, springy ringlets rather than gentle S-waves.
When matching a tool to your hair type, consider your strand thickness and density alongside length. Fine hair often responds best to medium-diameter rods covered in silk, as overly large rods will create volume that falls flat quickly without sufficient mechanical bend. Thick, coarse, or naturally textured hair requires either a firmer grip, such as structured foam rollers, or sectioning across multiple smaller tools to ensure airflow reaches the center of each wrap. If your hair is shoulder-length or shorter, single-piece headband-style rods can slide out during sleep; opting for individual flexi-rods or wrap rollers pinned securely at the base delivers superior stability and prevents overnight unraveling.
Prepping Hair with the Correct Moisture Balance and Styling Products
The single most common mistake in heatless curling is wrapping hair while it is either completely wet or entirely dry. Hair relies on hydrogen bond reconfiguration to change shape without heat. When hair is wet, hydrogen bonds break; as the hair dries into a new shape, those bonds reform, locking the curl in place. If hair is dripping wet when wrapped around an impermeable satin rod, the internal sections cannot dry, leaving you with limp, damp strands that immediately lose shape upon release. Conversely, wrapping completely dry hair without any product fails to reform those bonds, producing faint waves that vanish within an hour. The ideal starting point is hair that is approximately eighty to eighty-five percent dry—barely cool and damp to the touch, with no pooled water.
Layering the right products before wrapping determines both the smoothness and longevity of the style. Begin by applying a lightweight water-based leave-in conditioner through the mid-lengths and ends to maintain elasticity and prevent brittle ends. Follow this immediately with a setting product that provides medium, flexible hold without crunch. A medium-hold styling mousse, a curl-setting foam, or a lightweight styling lotion coats the cuticle, creating the necessary tension and grip during the drying phase. If you have straight or low-porosity hair that resists holding curls, avoid heavy oils or rich silicone serums before wrapping, as heavy emollients create a slippery barrier that prevents the styling polymers from bonding to the hair shaft.
Step-by-Step Wrapping Techniques for Waves, Ringlets, and Voluminous Bounces
Achieving your desired curl pattern comes down to wrap geometry and sectioning. For classic ribbon waves or a polished blowout look, secure a single long satin rod across the crown of your head using a claw clip. Divide your hair into two equal left and right halves. Starting at the front hairline, take a one-to-two-inch section of hair and loop it over the rod, pulling it backward away from your face. As the strand loops under the rod and returns to the front, gather a new slice of hair and incorporate it into the working strand, much like a French braid. Continue this over-and-under pattern down the length of the rod, keeping tension firm and even without pulling uncomfortably at your scalp.
For tighter, more defined curls or retro ringlets, alternate your wrapping direction. Divide the hair into four to six quadrant sections and wrap each onto individual flexi-rods or spiral wraps using a candy-cane spiral pattern where the hair wraps alongside itself rather than overlapping directly on top of previous layers. Directing sections alternatingly toward and away from the face creates natural separation and prevents the curls from coalescing into a single monolithic wave. Once all hair is wrapped around the rod or roller, secure the very end with a gentle satin scrunchie, leaving roughly one inch of uncurled ends if you prefer a modern, lived-in aesthetic, or wrapping the ends fully around the base for a uniform vintage curl.
Preventing Overnight Scalp Tension, Friction, and Morning Frizz
While heatless methods eliminate thermal damage, poor overnight technique can introduce mechanical tension and friction breakage. Tightly pulling hair at the roots or securing clips directly against the scalp can stress hair follicles and lead to traction sensitivity or tension headaches by morning. To avoid root stress, anchor your curling rod loosely at the top of the crown during the wrapping process and rely on the grip of the woven strands rather than pulling the initial front pieces excessively taut. Once the hair is fully wrapped, remove the top claw clip before going to sleep to eliminate uncomfortable pressure points against your skull.
Protecting the integrity of the wrapped hair while sleeping requires minimizing contact with rough fabrics. Sleeping on a cotton pillowcase can pull moisture from the hair fibers and disrupt the smooth surface of your wrapped strands through nocturnal friction. Wrap your head in a silk or satin bonnet, or tie a square silk scarf around the perimeter of your hairline to keep the rods immobilized and shield the hair cuticle from abrasive movement. If you are a side or stomach sleeper, position the tails of the curling rod tied behind your neck or gently crossed over the crown like a halo to keep the bulk of the foam away from the sides of your face.
Unwrapping, Separating, and Preserving Shape Throughout the Day
The moment you remove your heatless curling tool dictates whether your curls look smooth and defined or disrupted and frizzy. Never pull or yank the curling rod straight out of the hair. Begin by removing the satin scrunchies from the ends. Next, gently hold the top of the rod and loosen the bottom wraps with your fingers. Slowly lift the rod upward or slide it gently downward through the spirals, allowing each section to unfurl naturally into a defined, spring-like ringlet without snagging. At this stage, resist the urge to immediately run a brush through your hair; the curls need a few moments to adjust to ambient humidity and room temperature.
To break up the curls into natural, flowing waves, dispense two to three drops of a lightweight finishing oil—such as argan, jojoba, or squalane—onto the palms of your hands and rub them together to warm the product. Coat your fingers and gently rake them through the underside of the hair, lifting at the roots and shaking the curls free. If you prefer a softer, Old Hollywood wave, use a wide-tooth comb or a natural boar-bristle brush, starting at the ends and working upward in gentle, controlled strokes. Finish by misting with a flexible-hold, humidity-resistant hairspray from ten inches away to lock in the hydrogen bond structure against environmental moisture.
Troubleshooting Uneven Roots, Limp Ends, and Lingering Dampness
Even with consistent practice, you may encounter specific styling hurdles such as flat root zones, uneven curl patterns between sides, or sections that remain damp in the morning. When roots lack lift while mid-lengths remain curly, it is usually because the initial wrap began too far down the hair shaft or pulled the hair downward along the face. To create root volume, direct the hair forward and upward toward the ceiling before bringing it over the rod on your first wrap. Alternatively, place velcro rollers at the crown on damp roots or use a root-lifting spray before wrapping to ensure the crown maintains vertical lift.
If your hair emerges from the wraps feeling cold and damp to the touch, the curl will collapse rapidly if left unassisted. To save the style without starting over, keep the hair wrapped on the rod and use a blow dryer set to low heat and low airflow for two to three minutes across the outer wraps, followed by a two-minute cool shot to set the hydrogen bonds. If you discover one side of your head has tighter curls than the other, you likely wrapped one half with significantly higher tension or incorporated thinner sections. Balance future sets by counting your section slices equally on both sides and checking your mirror to ensure symmetrical rod placement before going to sleep.
Adapting Heatless Curls Across Fine, Thick, and Naturally Textured Hair
Hair texture and strand diameter fundamentally change how hair responds to mechanical setting. Fine, naturally straight hair has a smooth, slippery cuticle that often struggles to retain mechanical bends. For fine strands, prepare hair with a volumizing or texturizing mousse on damp lengths, and choose a smaller rod diameter to produce slightly tighter initial curls that will relax into your desired wave throughout the day. Avoid heavy styling creams, butters, or deep conditioners immediately before wrapping, as excess product weight will pull the curl pattern straight within hours.
Thick, coarse, or type 3 and 4 textured hair requires a different strategic approach centered on moisture preservation and thorough drying. Thick hair holds substantial internal moisture, which can lead to prolonged drying times. For dense hair, section the hair into four to eight smaller subsections using individual flexi-rods or wrap rollers rather than a single large headband rod to maximize airflow. For naturally curly or coily hair seeking stretched, uniform heatless waves, start with clean, deeply conditioned hair that has been blown out on cool or stretched using tension banding, then apply a rich curl cream and styling foam before wrapping onto smooth satin rods.
Frequently asked questions
Can I do heatless curls on completely dry hair?
Yes, but you must introduce a small amount of moisture or flexible hold to reform the hair's hydrogen bonds. Lightly mist your dry lengths with a fine water spray, leave-in conditioner, or styling mousse before wrapping, or the resulting curls will fall flat quickly.
How long do heatless curls need to stay wrapped to set?
Heatless curls generally require six to eight hours to dry and set completely, making overnight wear the most practical choice. If you are styling during the day, ensure hair is fully dry to the touch before unwrapping, as any lingering dampness causes the curl structure to drop.
Do heatless curls cause hair damage or breakage?
Heatless curls eliminate thermal heat damage, but improper wrapping can cause mechanical stress. Avoid pulling the hair excessively tight at the scalp, use smooth satin or silk materials instead of rough cotton, and secure ends with gentle scrunchies to prevent split ends and tension headaches.
Your next step
Assess your hair texture and select a satin curling rod with a diameter that matches your target curl size, then test your moisture balance on damp hair tonight.