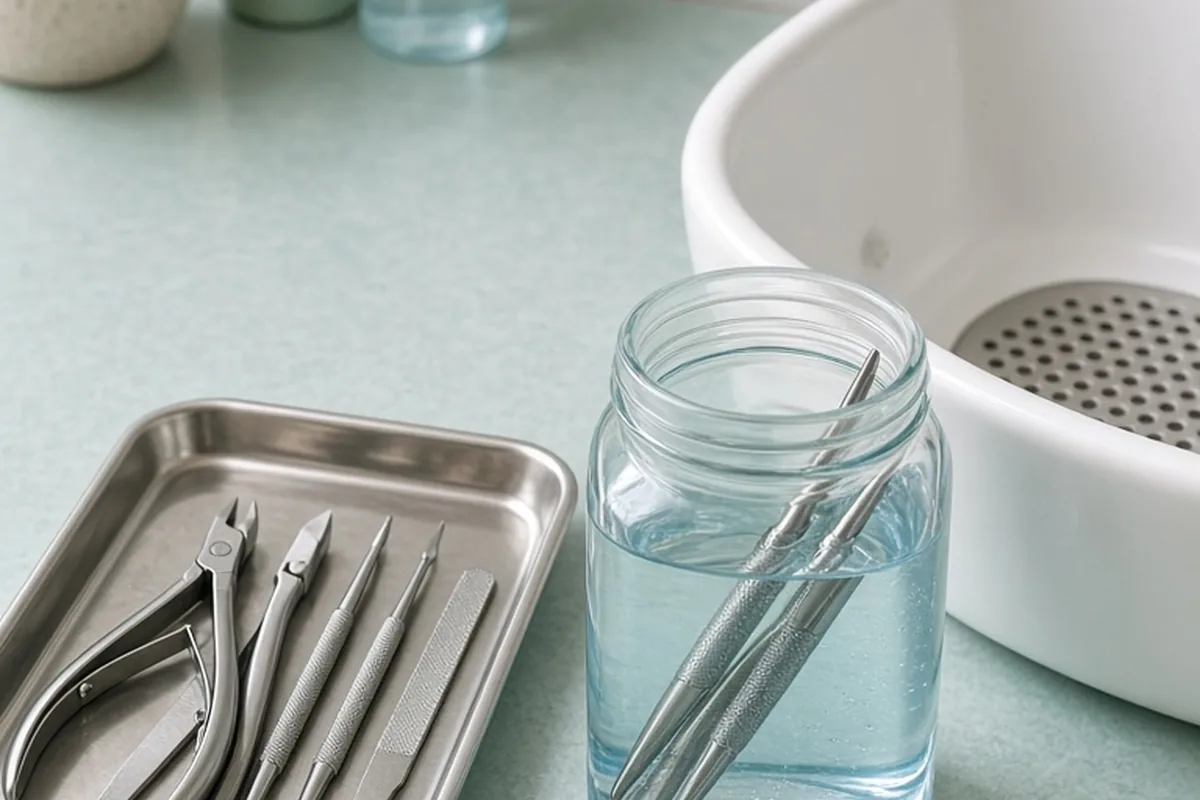
To disinfect pedicure tools properly, wash metal implements with warm water and soap to remove physical debris, rinse, and thoroughly dry them. Next, fully submerge multi-use tools in an EPA-registered, hospital-grade disinfectant for the manufacturer specified contact time, typically ten minutes, or process them in an autoclave. Porous, single-use items such as wooden sticks, sanding bands, and pumice pads must be discarded after every appointment.
Maintaining pristine hygiene standards during a pedicure appointment protects both the client and the technician from bacterial, fungal, and viral cross-contamination. Whether you are auditing the practices of a professional nail salon or refining an at-home pedicuring routine, following a structured sanitation workflow ensures every footbath, nipper, and file meets rigorous cleanliness standards.
Understanding the Distinction Between Cleaning, Disinfecting, and Sterilizing
A reliable tool sanitization protocol begins with understanding the distinct levels of decontamination. Cleaning is the foundational mechanical process that removes visible soil, dead skin cells, oils, and organic debris from tool surfaces using warm water, liquid detergent, and a dedicated scrub brush. Cleaning does not kill microscopic pathogens on its own, but skipping this step significantly compromises chemical treatments because organic matter acts as a physical shield against germicides.
Disinfection is the subsequent chemical stage designed to destroy pathogenic microorganisms on non-porous surfaces. This process relies on specialized broad-spectrum liquid solutions to neutralize bacteria, viruses, and fungi. For routine multi-use implements such as stainless steel cuticle pushers and toenail clippers, hospital-grade disinfection serves as standard salon practice. However, disinfection is distinct from sterilization, which completely eradicates all microbial life, including resistant bacterial spores.
Sterilization represents the highest possible level of decontamination and is achieved through high-pressure steam in an autoclave or through dry-heat ovens. While some regulatory jurisdictions allow liquid chemical disinfection for stainless implements, autoclaving provides absolute assurance against persistent pathogens. When planning a pedicure checklist, it is important to remember that tools must proceed sequentially through these phases: no implement can be effectively disinfected or sterilized without thorough prior cleaning.
Step-by-Step Disinfection Protocol for Metal Implements
Stainless steel implements require a systematic cleaning and chemical immersion routine between every service. Immediately after completing a service, the technician must submerge dirty metal tools in warm soapy water and scrub every surface, hinge, and crevice with a clean nylon brush. Once all visible residue is eliminated, the tools must be thoroughly rinsed under running tap water and dried completely with a clean towel or lint-free wipe. Placing wet instruments directly into disinfectant liquid dilutes the active chemicals and can render the solution ineffective.
The dried tools are then fully immersed in a freshly prepared, hospital-grade, EPA-registered disinfectant bath. Every portion of the tool, including handles and joint pivots, must remain submerged beneath the liquid surface for the exact contact time listed on the product label, which is typically ten full minutes. Leaving tools in the liquid for less than the specified dwell time fails to achieve certified germicidal kill rates, while leaving them submerged indefinitely can cause corrosion and dull cutting edges.
After the immersion timer elapses, the technician removes the implements using clean tongs or gloved hands, rinses them under clean water to remove chemical residues that could irritate client skin, and dries them completely. The tools must then be transferred immediately into a clean, dust-free, closed container or packaged individually into sealed sterilization pouches. If a tool accidentally touches an unwashed countertop or personal item after this step, the entire cycle must be repeated from the beginning.
Categorizing Single-Use Versus Multi-Use Pedicure Supplies
A critical component of any appointment safety checklist is identifying which items can be properly decontaminated and which items must be discarded immediately after use. Non-porous implements made of medical-grade stainless steel, glass, or hard non-absorbent plastics can safely undergo full chemical disinfection or autoclaving. These items include cuticle nippers, nail clippers, curettes, metal foot rasp handles, and diamond-coated metal file cores.
Conversely, porous or absorbent materials cannot be reliably disinfected because chemical solutions cannot penetrate their microscopic pores to eliminate trapped skin cells, moisture, and microbes. These single-use items must be unsealed in front of the client and thrown into the trash immediately after the appointment concludes. Attempting to spray or soak porous items with disinfectant degrades the material and fails to meet hygiene standards.
The following list categorizes essential pedicure supplies to help clients and technicians quickly verify single-use versus reusable status:
- Single-use items to discard: Wooden cuticle pushers, foam toe separators, disposable flip-flops, standard emery boards, sanding bands for electric files, and porous pumice stones.
- Multi-use metal implements to disinfect: Stainless steel toenail nippers, precision clippers, dual-ended curettes, and metal pushers.
- Multi-use foot smoothing tools: Metal foot files with replaceable single-use grit strips, or etched glass foot files that can withstand hospital-grade immersion.
Pedicure Basin, Footbath, and Jet Sanitation Procedures
Pedicure footbaths present unique sanitation challenges due to constant exposure to water, skin flakes, and cosmetic lotions. Basins are generally divided into piped whirlpool spas, pipeless magnetic-jet tubs, and non-whirlpool standalone basins. Piped whirlpool systems require the most intensive maintenance because organic debris and biofilms can accumulate inside internal pipes where standard surface wiping cannot reach.
Between every client appointment, the basin must be drained completely, scrubbed with a liquid detergent and clean brush to dislodge all residues, and rinsed with clean water. For piped and pipeless whirlpool systems, the basin must then be refilled with clean water, dosed with the correct volume of hospital-grade disinfectant, and run for the full contact time specified by the manufacturer (typically ten minutes). Once the circulation cycle finishes, the tub is drained, rinsed once more, and dried with a clean cloth.
End-of-day maintenance requires an additional deep-cleaning routine. Technicians must remove detachable components, such as jet covers, impellers, inlet screens, and drain plugs, to scrub away trapped hair and debris before soaking these individual parts in disinfectant. Many salons now use disposable, single-use plastic tub liners as an extra barrier; however, even when liners are used, the underlying basin must still be cleaned and wiped down between clients to prevent cross-contamination beneath the film.
Client Pre-Appointment Checklist: What to Observe in the Salon
When arriving for a professional pedicure appointment, clients can look for visible operational cues that indicate whether a salon adheres to strict hygiene standards. A reputable salon maintains a clean, clutter-free workspace, displays valid operator and establishment licenses, and provides visible sanitization records for foot spas upon request. Technicians should always wash their hands with soap and water or apply a fresh pair of disposable gloves before touching a client's feet.
Clients should carefully observe how tools are introduced at the start of the service. Multi-use metal tools should be removed from sealed sterilization pouches that show a color-changed chemical indicator mark, or taken directly from a designated, clearly labeled sanitization tray. If a technician retrieves loose, unwrapped nippers from a drawer or uses an emery board that shows prior wear marks, clients have the right to pause the appointment and ask for freshly sanitized tools.
Consider this quick checklist of observational markers before allowing a pedicure service to begin:
- Tool presentation: Implements arrive in freshly opened sealed autoclave pouches or clean, covered containers.
- Abrasives and buffers: Files, buffer blocks, and toe separators are brand new and pulled from sanitary storage.
- Footbath condition: The basin is dry and clean before filling, with no standing water or residue from prior services.
- Skin condition assessment: The technician inspects the client's feet and refrains from using razor blades or credo blades to cut calluses, which is illegal in many regions.
- Personal hygiene: The technician washes their hands or dons new gloves prior to the start of the service.
Proper Storage and Post-Disinfection Handling
The sanitation cycle does not end once tools are removed from the disinfectant solution; improper storage can quickly re-contaminate clean implements. Freshly sanitized tools must never be placed on open counters, stored in unsealed utility drawers alongside dusty supplies, or carried in technician aprons. Exposure to airborne dust, skin particulates, and ambient salon moisture compromises their sterile state.
Clean, dry implements should be stored in closed, lined containers that are wiped down with disinfectant regularly. Alternatively, packaging clean tools in self-sealing sterilization pouches keeps them protected until the exact moment of the client's appointment. Ultraviolet (UV) light cabinets are frequently used in salons for tool holding, but it is important to understand their operational limits. UV cabinets serve only as clean, dry storage units to maintain cleanliness; they do not possess the penetrating heat or chemical capability to disinfect or sterilize contaminated tools on their own.
Disinfectant storage requires equal diligence. Chemical immersion jars must be kept covered to prevent evaporation and airborne contamination. The liquid inside immersion trays must be replaced daily, or immediately if the solution becomes cloudy or visibly soiled, because active germicidal agents degrade over time when exposed to air and organic matter.
Managing Chemical Hazards and Tool Maintenance
Working with professional-grade disinfectants involves managing chemical safety and preserving tool longevity. Most salon-grade germicides rely on quaternary ammonium compounds, accelerated hydrogen peroxide, or phenolic blends. Technicians must always wear protective gloves and eyewear when mixing concentrates, follow precise manufacturer dilution measurements, and keep chemical safety data sheets accessible in the workspace.
Over-soaking is one of the most common mistakes made during tool processing. While adequate immersion time is vital for pathogen reduction, leaving stainless steel instruments in chemical solutions for hours or overnight causes pitting, rusting, and premature degradation of the metal. If tools develop rust or pitting, microscopic crevices form where pathogens can hide, making proper disinfection impossible and requiring the immediate replacement of the damaged implement.
Maintaining sharp cutting edges on toenail nippers and clippers is another essential safety consideration. Dull blades crush rather than cleanly snip tissue, increasing the likelihood of painful tears or cuts on surrounding skin. Regular professional sharpening, followed by thorough cleaning to remove metal dust before immersion, ensures tools remain both safe and effective throughout their operational lifespan.
Illustrative Scenarios
Identifying Proper Hygiene Standards at a Nail Appointment
A client arrived for a scheduled pedicure at a new salon and noticed that the technician took metal clippers out of an open drawer and prepared to use an emery board with visible white dust from a previous client. The client politely paused the service and asked if new files and autoclaved instruments were available. The technician promptly disposed of the used file, retrieved a sealed sterilization pouch with an active color indicator, and opened brand new disposable buffers.
Key point: Speaking up respectfully before a service begins allows clients to ensure their appointment utilizes fresh, single-use supplies and properly sterilized metal tools.
Frequently asked questions
Can UV light boxes sterilize pedicure tools?
No, standard salon UV light cabinets do not sterilize tools. They function as clean storage units to prevent airborne dust accumulation on already disinfected implements, but they lack the temperature and penetration needed to replace autoclaves or chemical immersion.
How often should disinfectant solutions in tool jars be changed?
Disinfectant solutions should be mixed fresh and replaced daily at a minimum. If the solution becomes cloudy, discolored, or contains visible floating debris during the day, it must be drained and replaced immediately.
Are pumice stones reusable if soaked in disinfectant?
Traditional natural pumice stones are porous and cannot be effectively disinfected between different clients. In a professional salon setting, porous pumice stones should be treated as single-use disposables or given to the client to take home.
Is it safe to get a pedicure if I have a small cut or bug bite on my leg?
It is best to postpone your pedicure until any open cuts, scrapes, or active skin breaks have fully healed. Submerging open skin in footbaths increases the risk of bacterial entry and localized skin irritation.
Your next step
Before your next pedicure service, review the salon checklist to verify that metal tools are opened from sealed pouches, single-use items are fresh, and the footbath is properly cleaned before use.