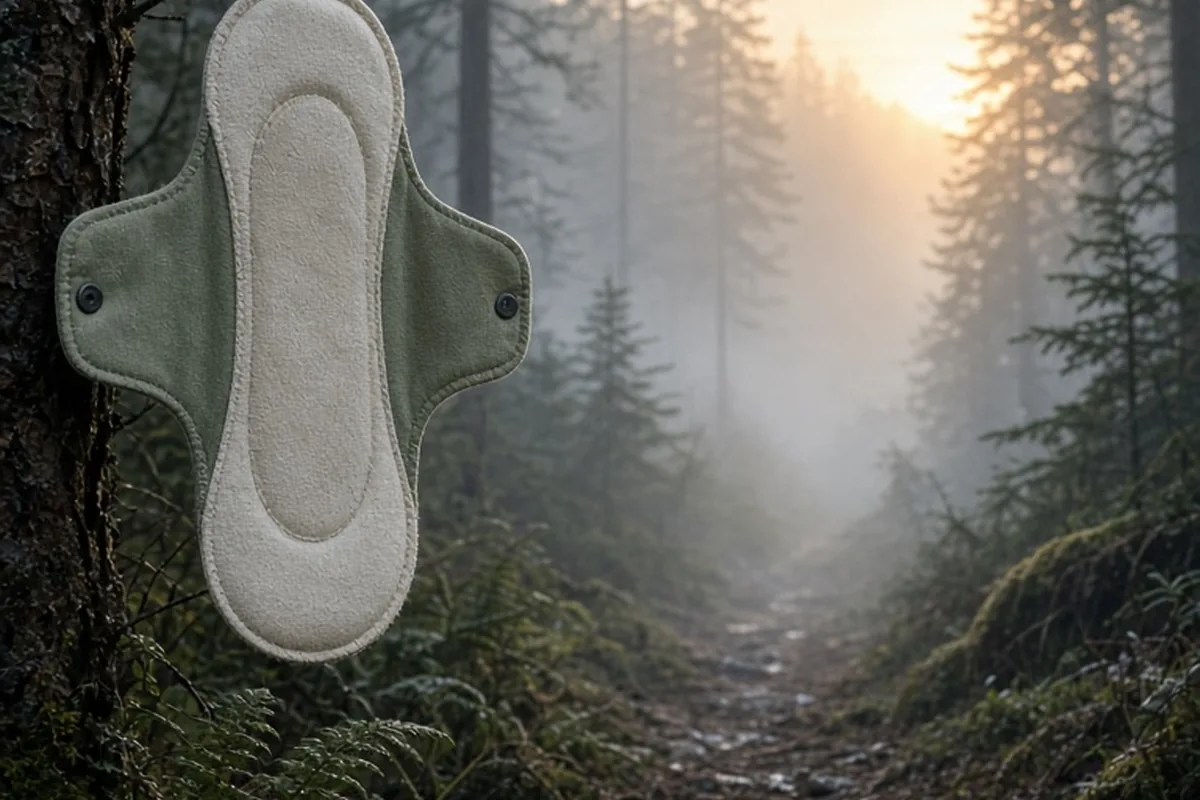
To make reusable cloth menstrual pads, cut an absorbent core from fabrics like bamboo fleece or cotton flannel, stitch it to a soft topper fabric, back it with leak-resistant polyurethane laminate or polar fleece, and sew the layers together with wing flaps. Adding plastic snaps to the wings secures the pad around underwear, producing a washable, custom-fitted menstrual product.
Switching to handmade cloth pads allows you to customize pad length, absorbency, and fabric textures to match your body and daily routine while reducing recurring household waste.
Selecting the Right Fabrics for Each Layer
A cloth menstrual pad consists of three primary components: the top layer that sits against your skin, the inner absorbent core, and the bottom leak-resistant backing. Choosing suitable fabrics for each component ensures the pad absorbs fluids quickly without feeling damp, bulky, or stiff. Natural fibers and specialized technical textiles each offer distinct performance benefits, so understanding how they interact helps you pick the right combination for your needs.
For the top layer, breathable fabrics like cotton flannel, cotton jersey, and bamboo velour feel soft against sensitive skin and allow moisture to pass through rapidly into the core. Athletic wicking jersey (AWJ) is another popular option that draws moisture away to provide a stay-dry feel during active movement. For the absorbent core, dense natural textiles such as organic cotton fleece, hemp fleece, and bamboo terry hold significant moisture without adding excessive thickness. Upcycled 100 percent cotton towels or old flannel receiving blankets can also serve as reliable core materials if you prefer working with repurposed household items.
The backing layer serves as your primary defense against moisture transfer to your clothing. Polyurethane laminate (PUL) is a lightweight, flexible polyester fabric bonded with a waterproof polyurethane film that prevents leaks while remaining thin and pliable. Alternatively, high-density polar fleece or anti-pill fleece offers water resistance through hydrophobic fibers that repel moisture back into the core while offering enhanced breathability. While polar fleece is softer and easier to sew, PUL provides superior protection for moderate to heavy flow days.
Drafting and Customizing Your Pad Pattern
Designing your own pattern gives you control over length, contouring, and wing placement, ensuring the pad stays securely positioned in your specific underwear styles. Commercial disposable pads often come in standardized dimensions that may bunch, shift, or fail to cover areas where you need protection most. Drafting a custom template takes only a few minutes using standard paper, a ruler, and a pencil.
Begin by sketching a central body that reflects your preferred coverage area. Standard pantyliners typically measure 7 to 8 inches in length, regular daytime pads range from 9 to 10.5 inches, and overnight pads extend from 11 to 14 inches with a flared rear section to catch fluid when lying down. The central width between the wings should match the crotch width of your underwear when snapped, which is typically between 2.5 and 2.75 inches. Draw wings that extend outward from the center by approximately 1.25 to 1.5 inches on each side to allow sufficient overlap for snap installation.
Always add a 1/4-inch seam allowance around the entire perimeter of your pattern if you plan to use an interior turn-and-topstitch construction method. If you prefer to finish the raw edges with a serger or an overlock stitch, you can cut the fabric directly to the finished dimensions without adding extra seam allowances.
Essential Tools and Sewing Notions
Gathering the correct sewing tools before cutting into your materials prevents frustrating construction mistakes and ensures long-lasting durability. Because cloth pads are laundered frequently under demanding conditions, strong seams and sturdy fasteners are necessary to prevent delamination or fraying over time.
A standard home sewing machine equipped with a ballpoint or universal size 80/12 needle works well for most pad fabrics. Use 100 percent polyester thread rather than cotton thread; cotton thread can wick moisture along the seam line from the interior core to the outer edges, leading to damp underwear seams. Sewing clips are preferable to traditional straight pins when assembling pads with PUL backing, as standard pins puncture permanent holes through the waterproof membrane that compromise leak protection.
To secure the wings beneath your underwear, install polyacetal resin snaps (commonly known as KAM snaps, size 20) using a hand press or snap pliers. Plastic snaps are rust-proof, smooth against the skin, and hold up through hundreds of washing cycles without losing grip. If you do not have snap pliers, heavy-duty sew-on metal snaps or thin hook-and-loop fasteners can work, though hook-and-loop tape can feel scratchy against inner thighs if not positioned precisely.
Step-by-Step Pad Construction Using the Turn-and-Topstitch Method
The turn-and-topstitch method creates fully enclosed seams with a neat, professional appearance without requiring specialized serging equipment. Before cutting, pre-wash and dry all natural fabrics on high heat to prevent future shrinkage from distorting the finished shape of the pad after laundering.
Start by cutting your fabric pieces: one top layer, one backing layer, and your designated number of core layers. The core layers should be cut slightly smaller than the outer pattern, omitting the wings entirely so bulk remains concentrated in the center channel. Center the core layers on the wrong side of either the top fabric or backing fabric, and quilt them in place using vertical or diamond stitching lines. Quilting stabilizes the absorbent material and prevents it from shifting or bunching inside the pad during daily wear and washing.
Place the top fabric and backing fabric right sides together, sandwiching the quilted core inside. Clip the edges together securely. Stitch around the entire perimeter using a 1/4-inch seam allowance, leaving a 2-inch opening along one side of the central body. Trim excess seam allowance at the curves and corners to reduce bulk, taking care not to snip into your stitches. Turn the entire pad right side out through the turning gap, using a blunt chopstick or point turner to push out the wing curves smoothly.
Fold the raw edges of the turning gap inward so they align with the rest of the perimeter. Press the edges flat with an iron on a low-to-medium synthetic setting, taking care not to touch an iron directly to the exposed laminate side of PUL. Topstitch around the entire perimeter roughly 1/8 inch from the edge, which seals the turning gap closed and keeps the edges flat. Finish by piercing the wings with an awl and clamping your male and female snap components onto opposite wings.
Calibrating Core Absorbency for Different Flow Needs
Different days of a menstrual cycle demand distinct levels of fluid retention, meaning a single core thickness will rarely fit every scenario. Building a balanced collection of pads with varied internal constructions provides reliable protection without unnecessary bulk during lighter days.
For daily liners and spot-protection, a single layer of cotton flannel or lightweight bamboo fleece combined with a breathable fleece backing provides sufficient absorption while remaining virtually undetectable under fitted clothing. For moderate daytime flow, two layers of heavy bamboo fleece or one layer of specialized super-absorbent textile (such as Zorb) paired with a PUL backing handles steady volume for several hours.
Heavy flow days and overnight use require three to four layers of dense core fabric or a combination of hemp and bamboo fleece. Because hemp absorbs large quantities of fluid slowly and bamboo absorbs rapidly, layering bamboo fleece over hemp fleece produces a balanced core that prevents surface pooling and deep saturation leaks. Adding extra length and an asymmetrical wide flare to the back of overnight pads ensures coverage when reclining, sleeping on your back, or turning during the night.
Laundering, Stain Removal, and Long-Term Care
Proper cleaning routines protect the absorbency and waterproof integrity of cloth pads, allowing them to remain hygienic and functional for several years. Blood contains proteins that coagulate and permanently set into textile fibers when exposed to warm or hot water, so temperature control during the initial rinse is essential.
After removing a used pad, rinse it thoroughly under cold running water until the runoff is clear, or submerge it in a cold water basin. If you prefer to wash a full batch at the end of your cycle, you can store rinsed, damp pads in an open-air dry pail or a breathable wet bag for up to two days before machine washing. Avoid sealing wet pads in airtight plastic containers, which can encourage mildew growth and sour odors.
Wash the pads in your washing machine on a normal cycle using regular laundry detergent. Avoid fabric softeners, dryer sheets, and liquid chlorine bleach; softeners coat natural and synthetic fibers in a thin waxy layer that repels moisture instead of absorbing it, while bleach breaks down PUL membranes and elastic fibers. Tumble dry on low to medium heat or hang them in direct sunlight, which acts as a natural deodorizer and stain lightener.
Troubleshooting Fit, Shifting, and Edge Leaks
If you encounter occasional leaking or shifting while wearing cloth pads, minor adjustments to your pattern or underwear pairing usually resolve the issue. Unlike disposable pads, cloth pads do not use adhesive backing, relying instead on underwear tension and friction to stay centered.
Pad shifting or flipping often happens when wearing loose-fitting underwear or synthetic fabrics like slippery nylon. For best results, pair cloth pads with snug-fitting underwear made from cotton or cotton-spandex blends that hold the wings firmly against the body. If sliding persists, you can sew small silicone dots onto the fleece backing or use a textured cotton corduroy backing layer to increase mechanical friction against the underwear gusset.
Compression leaks occur when fluid is squeezed out of an overly saturated core under physical pressure, such as sitting down quickly or cycling. If you experience compression leaks along the sides, verify that your core does not extend into the wings where pressure from the inner thighs is highest. Adding an extra absorbent layer to the center or switching from cotton terry to hemp fleece increases storage capacity without expanding the footprint of the pad.
Frequently asked questions
How many reusable cloth pads do I need to make for a full cycle?
Most people need a rotation of 10 to 18 pads to cover an entire menstrual cycle comfortably without daily laundry. This typically includes three to four liners, six to eight daytime pads, and three to four overnight pads depending on your washing frequency.
Can I make reusable cloth pads without a sewing machine?
Yes, you can construct cloth pads entirely by hand using a strong backstitch for the perimeter and a running stitch to quilt the core layers. Hand sewing takes more time, but the resulting pads are just as durable and functional as machine-stitched alternatives.
How long do homemade cloth menstrual pads last?
When constructed with quality materials and washed without fabric softeners or harsh bleach, handmade cloth pads generally last between three and five years. The plastic snaps and core fibers endure hundreds of wash cycles before showing significant wear.
Your next step
Trace and cut a test pad pattern from scrap fabric today to check its fit against your favorite underwear style before cutting into your main absorbent and waterproof textiles.