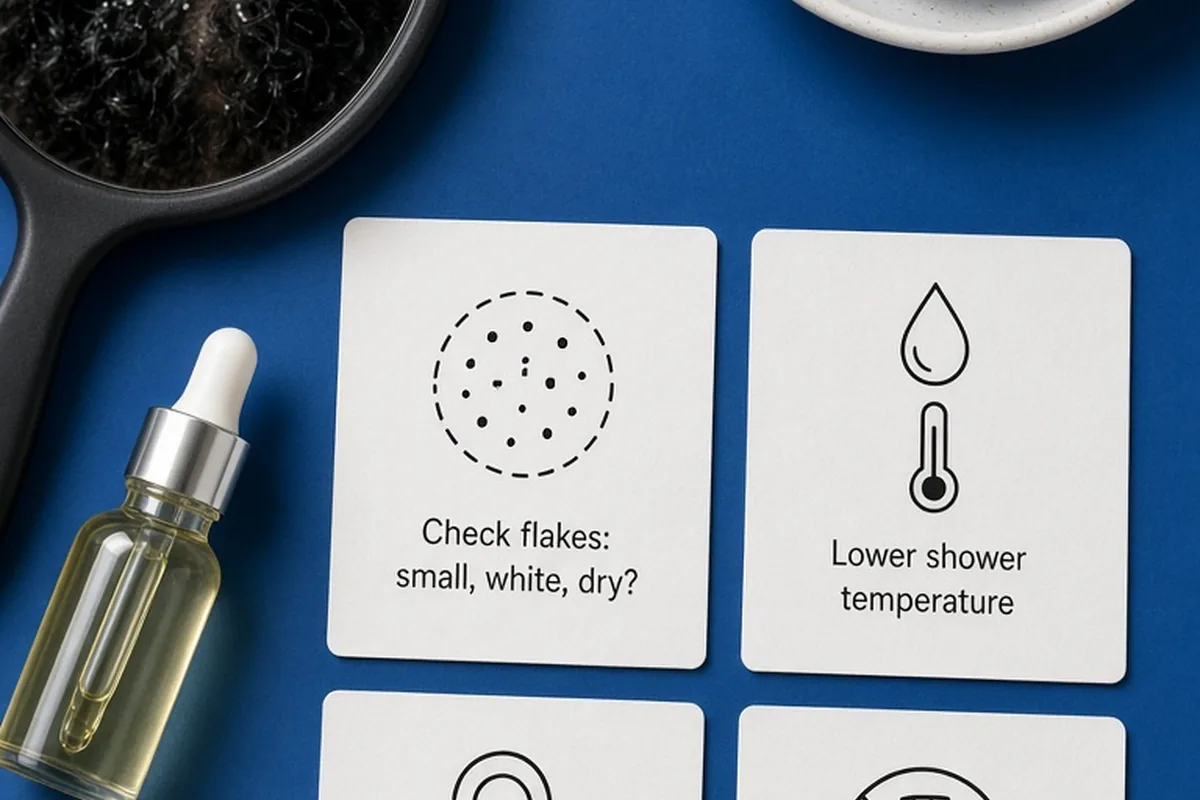
To prepare for dry scalp care, first distinguish true moisture loss from fungal dandruff or product residue by checking whether flakes are small, white, and dry. Next, lower your shower temperature, pause harsh clarifying washes and heavy styling waxes, and patch-test a lightweight humectant or soothing plant-based oil behind your ear twenty-four hours before full application.
A tight, itchy, or flaky scalp usually signals a compromised moisture barrier rather than inadequate hygiene. Rushing into intensive treatments without proper groundwork often leads to wasted products, increased irritation, or mistaken diagnoses that worsen dryness over time.
Distinguishing Scalp Dehydration from Dandruff and Product Buildup
Before introducing specialized scalp treatments, you must accurately evaluate the root cause of your discomfort. True dry scalp occurs when the skin on your head lacks sufficient moisture and natural sebum, resulting in small, loose, white flakes, persistent tightness, and mild surface itching. In contrast, dandruff—often linked to an overgrowth of Malassezia yeast or seborrheic dermatitis—tends to produce larger, oily, yellowish flakes accompanied by localized inflammation and redness. Product buildup from dry shampoos, edge controls, and heavy silicone conditioners presents as a powdery or gummy film around hair follicles that sheds when disturbed.
Treating dry scalp with aggressive anti-dandruff formulations that contain harsh antimicrobials or high concentrations of zinc pyrithione can strip essential lipids and exacerbate dehydration. To assess your scalp status accurately, part your hair in several sections under bright, natural light after allowing it to rest unwashed for two days. Gently brush a clean fingertip across your parted roots; if the skin feels rough like parchment and sheds fine dust without an oily residue, your barrier requires hydrating and moisturizing interventions rather than antifungal clarifying agents.
Auditing Your Current Hair Washing Habits and Water Quality
The foundation of any successful scalp care regimen begins with your shower environment. Washing hair in steaming hot water strips the stratum corneum—the outermost layer of the scalp—of natural protective oils, accelerating transepidermal water loss. Lowering the water temperature to lukewarm preserves natural lipids and prevents reactive tightness immediately after bathing. Additionally, evaluate the frequency of your wash schedule: shampooing daily with strong anionic surfactants can deplete sebum, while under-washing can trap environmental debris and dead skin cells against the skin.
Water hardness also plays a substantial role in scalp health. Hard municipal or well water contains high concentrations of dissolved minerals, primarily calcium and magnesium, which react with shampoo surfactants to form an insoluble film. This film interferes with scalp hydration and makes rinses less effective, leaving behind mineral deposits that cause chronic dryness and dull hair strands. If you notice persistent residue or chalky build-up around your shower fixtures, consider installing a basic shower filter to remove chlorine and minimize mineral crystallization on your scalp.
Selecting Targeted Pre-Cleansers, Hydrating Tonics, and Scalp Serums
Preparing your product lineup requires choosing formulations that deliver humectants, emollients, and barrier-repair lipids without clogging hair follicles. Humectants like hyaluronic acid, vegetable glycerin, panthenol (pro-vitamin B5), and aloe vera draw ambient moisture directly into the upper epidermal layers. When selecting leave-on scalp serums or pre-wash oils, look for non-comedogenic emollients such as jojoba oil, squalane, or argan oil, which mimic the molecular profile of natural human sebum and soften dry patches without suffocating the follicle.
Equally important is identifying ingredients that should be temporarily eliminated prior to starting treatment. Steer clear of scalp products with high percentages of denatured alcohols, synthetic fragrances, menthol, or strong essential oils like undiluted peppermint and eucalyptus, as these can trigger contact dermatitis and neurosensory stinging on compromised skin. Heavy mineral oils and petroleum-based pomades should also be sidelined, as they form an occlusive barrier that repels water-based moisture when applied to an unhydrated scalp surface.
Adjusting Dry Scalp Care for Textured, Curly, and Coily Hair
Textured hair types, including curl patterns from 3A to 4C, require a distinct preparation strategy because natural sebum travels down the curved hair shaft much slower than down straight strands. Consequently, the scalp may experience dehydration even while the mid-lengths require heavy creams and butters. When preparing for scalp treatment on textured hair, avoid applying heavy styling butters directly onto the scalp tissue itself. Instead, direct rich formulations strictly to the hair fiber, reserving the scalp zone for lightweight, water-based hydrators and non-greasy carrier oils.
If you wear protective styles such as box braids, cornrows, twists, or locs, preparing the scalp requires targeted delivery methods to avoid tension and unraveled styling. Utilize fine-tipped applicator bottles or spray misters to apply soothing botanical waters, aloe liquids, or watery peptide solutions directly between parts. Make sure not to saturate the bases of braids with heavy pastes that cannot be easily rinsed out, as trapped moisture mixed with styling residue creates an ideal breeding ground for microbial imbalance and mechanical irritation.
Preparing Your Scalp for Physical Exfoliation and Massage
Physical stimulation can help loosen stubborn micro-flakes and encourage surface circulation, but aggressive mechanical scrubbing can cause micro-tears and secondary inflammation on an already fragile scalp. Before using physical tools such as silicone scalp massagers or exfoliating brushes, prepare the area by applying a small amount of slip—such as a gentle pre-wash oil or a moisturizing conditioner—to reduce friction along the hair cuticle and scalp surface.
When performing a scalp massage, rely entirely on the soft pads of your fingertips or flexible silicone nubs, moving in slow, gentle circular motions across distinct zones of the head. Avoid using fingernails or rigid bristle brushes, which scratch the epidermal layer and trigger reactive flaking. Limit pre-wash mechanical massage to three to five minutes once or twice per week, ensuring you never force or drag tools through tangled hair strands.
Modifying Styling Habits and Environmental Exposure Before Treatment
The external environment and daily styling habits directly impact how well your scalp responds to new care routines. Direct heat from blow dryers, diffusers, and hooded dryers can rapidly evaporate surface hydration and bake existing flaking into hard crusts. Before starting your new routine, adjust heat styling tools to low or medium heat settings, keep the nozzle at least six inches away from the scalp, and switch to air-drying whenever practical during the initial restoration phase.
Environmental factors such as dry indoor winter heating, low-humidity air conditioning, and sun exposure can undermine scalp recovery. To counteract environmental moisture loss, consider using an indoor room humidifier to maintain balanced ambient humidity in your bedroom. If you spend significant time outdoors in strong sunlight, wear a breathable, wide-brimmed hat or a silk-lined cap to protect your scalp from ultraviolet damage, which impairs epidermal barrier repair and accelerates flaking.
Knowing When to Pause Home Routines and Consult a Dermatologist
While routine scalp dryness responds well to improved hydration, gentle washing, and environmental adjustments, certain signs indicate conditions that home treatments cannot resolve. If you experience thick, silvery plaques, widespread weeping or crusting, intense burning sensations, follicular pustules, or sudden hair thinning, pause all DIY treatments and over-the-counter serums immediately. These symptoms often point to plaque psoriasis, folliculitis, severe seborrheic eczema, or allergic contact dermatitis.
Before scheduling a consultation with a board-certified dermatologist, keep a simple record of the hair care products, styling tools, and wash frequencies you have used over the past two weeks. Bringing this list to your appointment helps the medical professional identify potential contact allergens or prescribe targeted topical therapeutics—such as corticosteroid lotions or prescription antimycotic washes—without guesswork.
Frequently asked questions
How often should I apply dry scalp treatments when starting out?
Begin by applying a gentle hydrating treatment once or twice per week rather than daily. This conservative frequency allows you to monitor how your skin responds and prevents product congestion around your follicles.
Can applying hair oil directly to a dry scalp make the condition worse?
Yes, applying heavy oils to an unhydrated scalp can trap dead skin cells and exacerbate irritation without providing moisture. Oils act as sealants rather than hydrators, so always apply a water-based toner or serum before sealing with a lightweight oil.
Should I wash my hair immediately before applying a dry scalp treatment?
It depends on the formula: pre-shampoo oils and exfoliating balms are designed for application to a dry or damp scalp prior to washing, whereas hydrating leave-on tonics and serums work best on a clean, damp scalp directly after cleansing.
How do I perform a patch test for a new scalp serum?
Apply a pea-sized amount of the product to a clean area behind your ear or along your upper inner forearm. Leave it undisturbed for twenty-four hours to ensure no redness, swelling, burning, or itchiness develops before applying it across your head.
Your next step
Inspect your scalp under bright natural light today to verify flake texture, then complete your next hair wash using lukewarm water and a fragrance-free gentle cleanser before introducing a single hydrating serum.