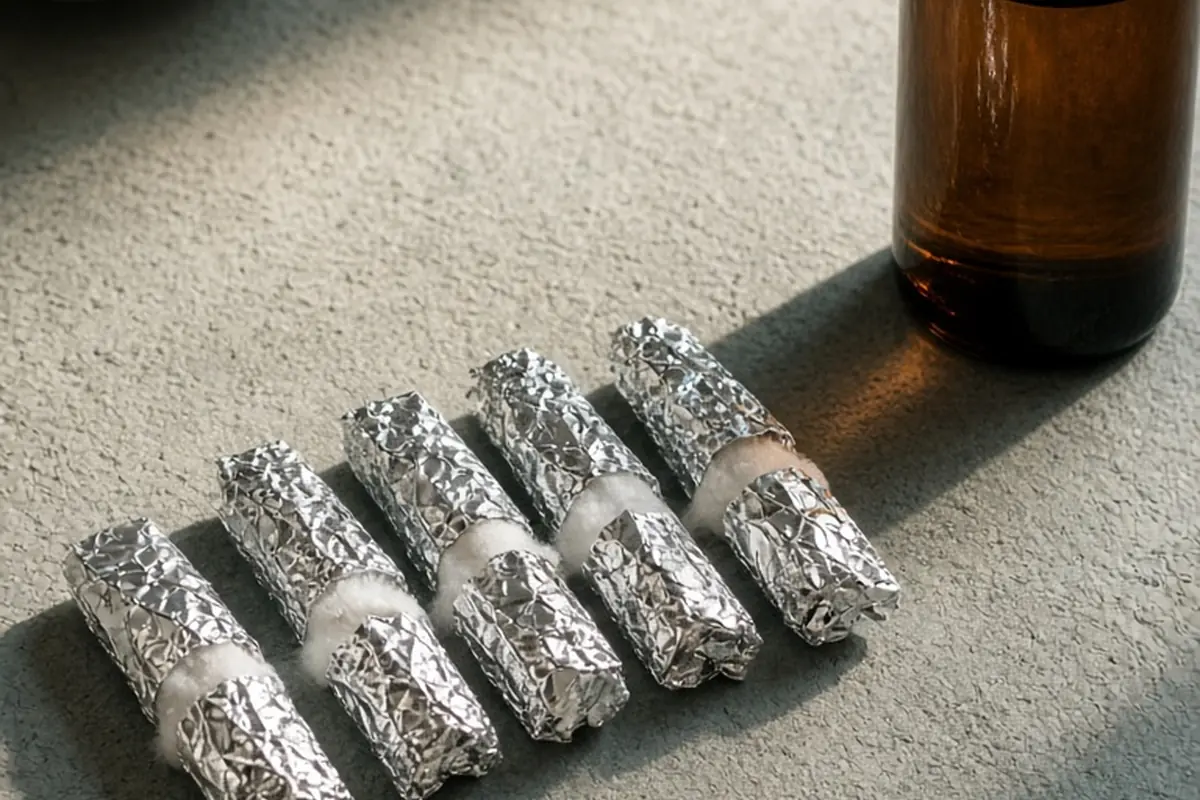
To remove gel polish safely, buff away the shiny topcoat with a medium-grit file, soak cotton pieces in pure acetone, place them over each nail, and wrap tightly with aluminum foil for ten to fifteen minutes. Once the gel crumbles, gently slide it off using an orange wood stick without scraping. Wash your hands thoroughly and finish with hydrating cuticle oil.
Gel manicures provide durable shine and chip-resistant wear, but their chemical resilience makes the removal phase critical for maintaining healthy natural nails.
Essential Supplies for a Safe Removal Process
A safe gel polish removal begins with having the correct materials within arm's reach before you start. The most critical ingredient is one hundred percent pure acetone, as standard non-acetone polish removers lack the solvent strength required to break cross-linked gel polymers. Attempting to use gentle or diluted removers often leads to extended skin exposure and frustration, prompting people to pry or scrape at stubborn product prematurely. Alongside pure acetone, gather a 180-grit nail file, ten small cotton pieces cut to match the size of your nail plates, precut aluminum foil squares measuring roughly three by three inches, an orange wood cuticle stick, and a nourishing cuticle oil.
Choosing targeted wraps instead of submerging your entire fingertips in an open bowl of acetone minimizes chemical contact with surrounding delicate skin. While nail clips are a reusable alternative to foil, foil provides a tighter, heat-trapping seal that accelerates the breakdown of the polish. Keep a rich hand cream and a gentle buffing block nearby to complete the session once the product is cleanly detached. Setting up your workspace on a clean, acetone-resistant surface—such as a glass or ceramic tabletop lined with a dark towel—prevents accidental cosmetic damage to household furniture.
Step-by-Step Preparation: Breaking the Topcoat Seal
The clear topcoat applied in gel manicures acts as an impermeable barrier designed to resist water, cleaning agents, and everyday wear. Because acetone cannot easily penetrate this cured outer layer on its own, mechanically breaking the seal is an indispensable first step. Take a medium-grit file, typically 180 grit, and lightly file across the entire surface of each nail. Focus on eliminating the high-gloss shine until the polish appears cloudy, chalky, and matte. Pay special attention to the free edge and the sides of the nail, where the technician likely capped the layer to prevent premature lifting.
Precision and light pressure are vital during this filing stage to avoid thinning your natural nail plate. Your goal is strictly to disrupt the topmost seal, not to grind through the color layers. Stop filing immediately if you see any raw natural nail or feel heat generating from friction. For instance, if you notice the colored pigment beginning to fade significantly in the center of the nail, shift your focus to remaining shiny patches near the edges. Over-filing at this stage weakens the keratin matrix beneath, making the nail prone to bends, ridges, and sensitivity during subsequent weeks.
The Targeted Foil Wrap Method and Soaking Times
Once every nail is properly buffed, saturate a small cotton piece with pure acetone. The cotton pad should be thoroughly damp but not dripping profusely. Position the saturated cotton directly against the nail bed, ensuring it covers the colored polish completely while touching as little surrounding skin as possible. Place a foil square beneath your fingertip, fold the top down over the pad, and wrap the sides tightly around the finger to lock in moisture and body heat. The trapped warmth encourages the acetone molecules to dissolve the gel polymers substantially faster than open-air soaking.
Allow the wraps to sit undisturbed for twelve to fifteen minutes. Avoid the temptation to unwrap your fingers early to check progress, as exposing the acetone to air causes it to evaporate rapidly, which allows the partially loosened gel to re-harden on the nail plate. If your hands run cold, consider resting them inside a warm towel or wearing a pair of clean winter mittens over the foil caps. This subtle increase in temperature speeds up the chemical breakdown without introducing harsh manual force or skin irritation.
Gently Lifting Softened Product Without Scraping
After the designated soaking time, address one finger at a time while leaving the remaining wraps securely intact. Apply slight pressure to the top of the foil and twist gently as you slide the wrap off the fingertip. The cured gel should look noticeably wrinkled, lifted, or cracked, resembling a softened shell. Take a flat-angled wooden cuticle stick and smoothly push the loose gel toward the free edge of the nail. The material should glide off with minimal resistance under light guidance.
If you encounter stubborn patches that remain firmly bonded to the nail plate, resist any impulse to scrape forcefully, gouge with metal tools, or peel the product backward. Forcing adhered gel off the nail pulls away superficial layers of natural keratin, resulting in classic white patches, peeling, and structural weakness. Instead, re-saturate your cotton pad with fresh acetone, re-wrap the stubborn nail, and wait an additional five to seven minutes. Safe removal requires patience rather than physical pressure, ensuring your underlying nail remains smooth and intact.
Navigating Hard Gels, Builder Gels, and Dip Powders
It is essential to understand that not all salon-applied enhancement systems respond to acetone in the same manner. Standard soak-off gel polish and dip powders are formulated to dissolve when exposed to pure solvents, but hard gels and certain builder gels feature tightly cross-linked molecular structures that are completely non-porous. Pure acetone will not soften true hard gel extensions, no matter how long the product is soaked. Attempting to soak hard gel for extended periods merely dehydrates the surrounding skin without loosening the enhancement.
If you discover that your manicure utilizes hard gel overlay, the safest home strategy is to file down the excess bulk carefully with a 180-grit file, leaving a very thin protective base layer over your natural nail plate rather than trying to remove every trace down to the bare bed. Alternatively, schedule an appointment with a licensed nail professional who can gently debulk the structure with an electric file. Recognizing which product is currently on your hands prevents accidental chemical overexposure and protects the natural nail from aggressive, fruitless scraping.
Immediate Post-Removal Hydration and Keratin Care
Pure acetone is an effective degreasing solvent that temporarily strips your skin and nail plates of natural sebum and essential moisture. Immediately after all gel remnants are removed, wash your hands with lukewarm water and a mild, fragrance-free cleanser to neutralize any remaining solvent traces. Lightly smooth any minor surface unevenness using an ultra-fine 240-grit buffer, making sure to use only two or three gentle strokes in a single direction rather than vigorous back-and-forth friction.
Once your hands are dry, immediately replenish the lost lipid barrier by massaging a generous amount of high-penetration cuticle oil into the nail beds, cuticles, and lateral nail folds. Oils containing small molecular structures—such as jojoba seed oil, squalane, or sweet almond oil—absorb deeply into the keratin layers to restore flexibility and prevent brittle cracking. Follow with an occlusive hand balm containing ceramides or shea butter. For optimal recovery, allow your natural nails to remain unpolished for at least two to three days while applying oil twice daily.
Common Removal Mistakes and Safe Alternatives
The single most destructive habit in gel manicure maintenance is picking, peeling, or biting lifted edges. When gel polish lifts naturally from everyday wear, moisture and friction create micro-gaps beneath the product. Prying these lifted corners tears away up to fifty percent of the natural nail's superficial dorsal keratin layers. This habit creates visible thinned hollows, chronic flaking, and extreme sensitivity to warm water or pressure. If an edge catches on clothing, file it smooth or wrap that single nail in acetone immediately rather than pulling the coating free.
Another frequent misstep is using open bowls of acetone or using abrasive metal scrapers with sharp corners. Soaking entire hands in a bowl exposes wide areas of skin to unnecessary drying, increasing the risk of contact dermatitis and cracked cuticles. Metal tools, if held at an incorrect angle, can easily dig gouges into softened natural plates. By adhering to targeted cotton wraps and single-use wooden sticks, you establish a controlled, predictable routine that preserves natural nail thickness and strength over repeat manicures.
Frequently asked questions
Can regular nail polish remover take off gel polish?
Standard non-acetone polish removers are not concentrated enough to break down the cured polymer structure of gel polish. Using them usually leads to prolonged scrubbing, which can damage the surface of the nail plate without effectively lifting the gel. Always use one hundred percent pure acetone for a clean and efficient soak-off.
How long should gel polish soak in acetone wraps?
Most standard soak-off gel polishes loosen sufficiently within ten to fifteen minutes when properly sealed with aluminum foil. If the polish does not slide off smoothly after this period, re-saturate the cotton pad and soak for an additional five minutes rather than applying physical force.
What should I do if my nails feel weak after removing gel polish?
Nails frequently feel temporarily soft immediately after soaking because acetone and moisture temporarily soften the keratin structure. Apply a lipid-rich cuticle oil containing jojoba or squalane multiple times a day, keep the free edges filed short, and give your nails a few days of rest before applying another full manicure.
Your next step
Inspect your nails right now to determine if your gel is lifting, gather pure acetone, foil, and a wooden stick, and dedicate twenty uninterrupted minutes to soaking the product off gently instead of peeling it away.