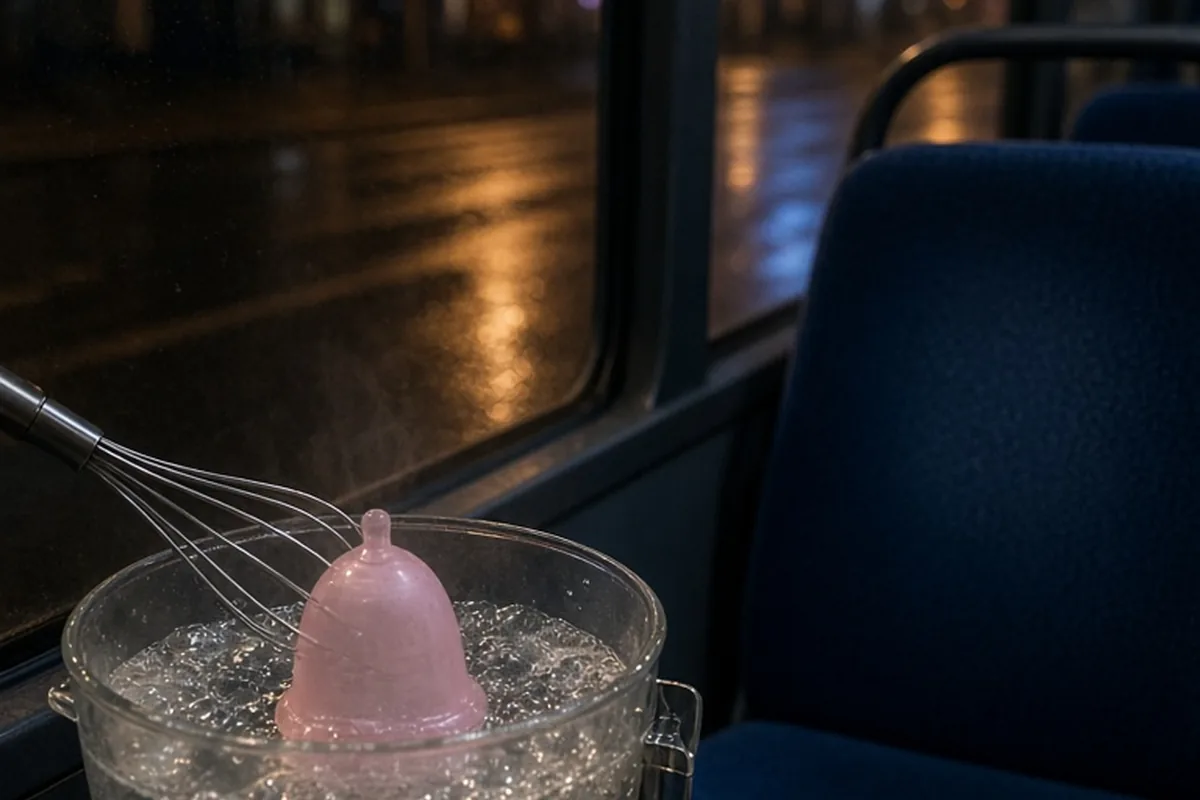
To sterilize a menstrual cup, submerge it completely in a pot of boiling water for five to ten minutes, keeping it elevated from the bottom with a wire whisk or tongs to prevent scorching. Allow the cup to air-dry completely before storing it in a breathable cotton pouch. This heat cycle clears lingering bacteria between monthly uses without degrading medical-grade silicone.
Switching to a reusable menstrual cup reduces waste and simplifies period management, but maintaining consistent hygiene is essential for vaginal comfort and product longevity. While quick wash routines handle active daily wear, periodic deep sanitization resets the cup between menstrual cycles, clearing stubborn residues, neutralizing subtle odors, and preventing microbial transfer.
The Boiling Water Method: Step-by-Step Stovetop Guidelines
Stovetop boiling remains the most accessible and widely recommended method for sterilizing a menstrual cup. High water temperatures effectively break down biological material and neutralize common microorganisms that collect during a week of use. To perform this properly, choose a small saucepan designated specifically for personal care items or thoroughly wash a standard cooking pot before starting. Fill the pot with enough water so that the cup can float freely without touching the bottom or sides, which typically requires around four to six cups of water.
The primary risk during boiling is accidental heat damage. If the silicone or elastomer rests against the metal base of a pot exposed to direct burner heat, the localized temperature can exceed the material melting point, warping or charring the cup within seconds. An effective practical technique is placing the menstrual cup inside the wire loops of a stainless steel kitchen whisk before submerging it in the water. The whisk acts as a protective cage, suspending the cup safely in the center of the rolling boil.
Maintain a steady, active boil for five to seven minutes. Setting a strict kitchen timer or phone alarm is critical because distracted boiling frequently leads to dry pots and melted devices. Once the timer ends, turn off the heat and use clean tongs to lift the cup onto a clean paper towel or freshly laundered cloth to cool. Avoid boiling beyond ten to fifteen minutes, as unnecessary prolonged heat exposure can gradually soften and degrade certain polymer structures over years of use.
Microwave Sanitizing and Dedicated Electric Steamers
For people living in dorms, shared rentals, or spaces without private kitchen access, boiling a menstrual cup on an open stove can feel uncomfortable or impractical. Microwave sanitizing containers and compact electric cup steamers offer a discreet, fast alternative using high-temperature steam rather than submersion in a rolling pot. These methods rely on the same principle of thermal disinfection, achieving high surface temperatures through contained vapor.
To use a microwave-safe sanitizing cup—often sold as a collapsible silicone container—place the rinsed menstrual cup inside, fill the container roughly three-quarters full with tap water, and rest the lid loosely on top. Leaving the lid unsealed is vital to let steam escape safely without building internal pressure. Microwave on high power for two to three minutes. Allow the container to sit undisturbed inside the microwave for an additional two minutes after heating to avoid steam burns when handling.
Dedicated plug-in electric steamers streamline the process even further. These devices feature a small heating plate that vaporizes a measured teaspoon of water beneath an enclosed plastic dome. The steam circulates around the suspended cup for roughly three to five minutes before automatically shutting off. While electric steamers involve a small upfront purchase, they remove the risk of pot scorching entirely and provide a quiet sanitization routine right on a bathroom vanity.
Cold-Water Tablet Soaking for Travel and Low-Utility Setups
When traveling, camping, or staying in locations where clean boiling facilities are unavailable, cold-water chemical disinfection offers a viable alternative. This method relies on effervescent sanitizing tablets, typically formulated with mild sodium dichloroisocyanurate or chlorine compounds commonly used for infant feeding equipment and water purification. These tablets dissolve in cold water to destroy surface pathogens without requiring electricity or open heat sources.
To sanitize with cold water, dissolve one tablet in the manufacturer-specified volume of clean, potable water inside a clean plastic or glass vessel. Submerge the menstrual cup completely, ensuring no air bubbles are trapped inside the bowl, and leave it immersed for the exact duration listed on the packaging, which is usually fifteen to thirty minutes. Never leave a cup in a chemical solution for hours or days, as extended exposure to oxidizing agents can bleach or weaken silicone over time.
A critical final step with cold-water tablet disinfection is rinsing. After removing the cup from the solution, thoroughly flush it with clean, drinkable water to remove any chemical residue. Inserting a cup carrying concentrated disinfectant residues can irritate sensitive vaginal mucosa and disrupt natural microbial balance. If you are in an area without reliable tap water, use bottled or pre-filtered water for this final rinse step.
Routine Mid-Cycle Washing Versus End-of-Cycle Sterilization
A common point of confusion for new menstrual cup users is knowing when a simple wash is sufficient versus when full thermal sterilization is necessary. During your active period, you do not need to boil or steam your cup every single time you empty it. Washing the cup with warm running water and an appropriate soap during mid-cycle reinsertions keeps the surface clean without adding unnecessary steps to your daily routine.
Deep thermal or chemical sterilization is primarily reserved for the transition points between cycles: once right before your period starts to ensure the cup is fresh after weeks in storage, and once immediately after your period ends before you pack it away. During heavy flow days, washing your hands thoroughly, emptying the cup into the toilet, and rinsing it thoroughly at the sink is completely adequate for regular reinsertion.
Pay special attention to the small suction release holes located beneath the rim during your daily rinses. If dried fluid or biological residue clogs these tiny openings, the cup may fail to form an airtight seal, resulting in unexpected leaks. You can clear these holes by filling the cup completely with warm water, placing your palm flat over the open rim, turning the cup upside down, and squeezing the base firmly to force water jets outward through the small channels.
Substances and Habits That Damage Menstrual Cups
Medical-grade silicone and thermoplastic elastomers are durable materials, but they are vulnerable to chemical degradation from common household cleaners. Never use harsh antibacterial soaps, dishwashing detergents, rubbing alcohol, hydrogen peroxide, scented body washes, or chlorine bleach for routine washing. These chemicals can break down the surface integrity of the silicone, creating microscopic pitting where bacteria can lodge and multiply.
In addition to damaging the product, chemical residues absorbed into porous or degrading material can cause severe irritation, burning, and contact dermatitis when placed against delicate vaginal walls. Oil-based cleansers, castile soaps with essential oils, and coconut oil lubricants should also be avoided, as oils bond with silicone and cause it to swell, become sticky, and lose its structural firmness.
If you prefer using a cleansing agent rather than plain warm water during your cycle, select a fragrance-free, oil-free, water-based cleanser with a balanced pH between 4.0 and 5.5, or a wash created specifically by a cup manufacturer. If your cup ever accidentally falls into a toilet bowl, skip basic hand soap entirely; give it a rigorous wash with mild soap followed by a full ten-minute boiling session before considering reinsertion.
Drying, Storage, and Managing Lingering Odors or Stains
How you store your menstrual cup after sterilization is just as important as how you clean it. Once you finish boiling or steaming, place the cup on a clean, lint-free surface and let it air-dry completely before packing it away. Storing a damp cup in a closed space creates a humid microenvironment that encourages mold, mildew, and fungal growth.
Always store your sanitized cup in a breathable container, such as the natural cotton or linen drawstring pouch provided by most brands. Never store a menstrual cup in an airtight plastic container, a sealed plastic bag, or an unventilated medicine cabinet case. Airflow allows residual ambient moisture to evaporate and prevents stale odors from concentrating inside the cup material.
Over several months of use, iron content in menstrual blood can cause natural discoloration, giving clear or light-colored cups a yellowish or brownish tint. This staining is cosmetic and does not mean the cup is unhygienic. If you wish to reduce discoloration or neutralize a persistent odor, place the clean, dry cup in direct sunlight on a windowsill for a few hours. Ultraviolet rays act as a gentle, non-destructive bleaching agent that lightens stains without chemical damage.
Material Variations: Silicone, TPE, and Natural Latex
Understanding what your menstrual cup is made of helps you choose the safest sanitization method and avoid accidental heat damage. Most mainstream cups are crafted from medical-grade silicone, a platinum-cured material engineered to withstand high temperatures up to several hundred degrees Fahrenheit. Silicone handles standard boiling and microwave steaming with high thermal resilience, provided it does not directly touch dry heating elements.
Other popular cups are molded from Thermoplastic Elastomer (TPE), a recyclable polymer that softens more readily at lower temperatures to mold to body contours. While TPE cups can still be boiled safely, they have a lower heat deflection threshold than silicone. When sterilizing a TPE cup, keep boiling times strictly between three and five minutes and never leave the pot unattended, as TPE can warp out of round more quickly if water levels drop.
A small minority of cups are manufactured from natural rubber latex. Natural latex requires special care because excessive boiling, oil contact, and intense UV exposure break down natural rubber proteins much faster than synthetic polymers. Always consult the specific manufacturer documentation provided with your brand to confirm the exact recommended temperature limits and exposure times for your cup model.
Frequently asked questions
How often do I need to boil or sterilize my menstrual cup?
You only need to sterilize your menstrual cup once per menstrual cycle, either right before your period begins or immediately after it ends. During your active flow days, simply rinsing the cup with warm water and an oil-free, gentle soap between uses is entirely sufficient.
Can I use boiling water from an electric kettle instead of a stove?
Pouring kettle water over a cup in a mug can help rinse it, but it does not maintain the continuous high temperature required for true sterilization. To properly sterilize using hot water, the cup must remain submerged in actively boiling water for five to ten minutes.
What should I do if my menstrual cup accidentally touches the bottom of the pot and burns?
If a menstrual cup scorches, melts, or develops a sticky or discolored burn spot from touching hot metal, it must be discarded and replaced. Damaged material loses its structural integrity and can release degraded polymer particles or harbor bacteria in uneven crevices.
Your next step
Before your next cycle begins, inspect your menstrual cup for surface damage, secure it inside a stainless steel whisk, and boil it in a pot of water for five to seven minutes.