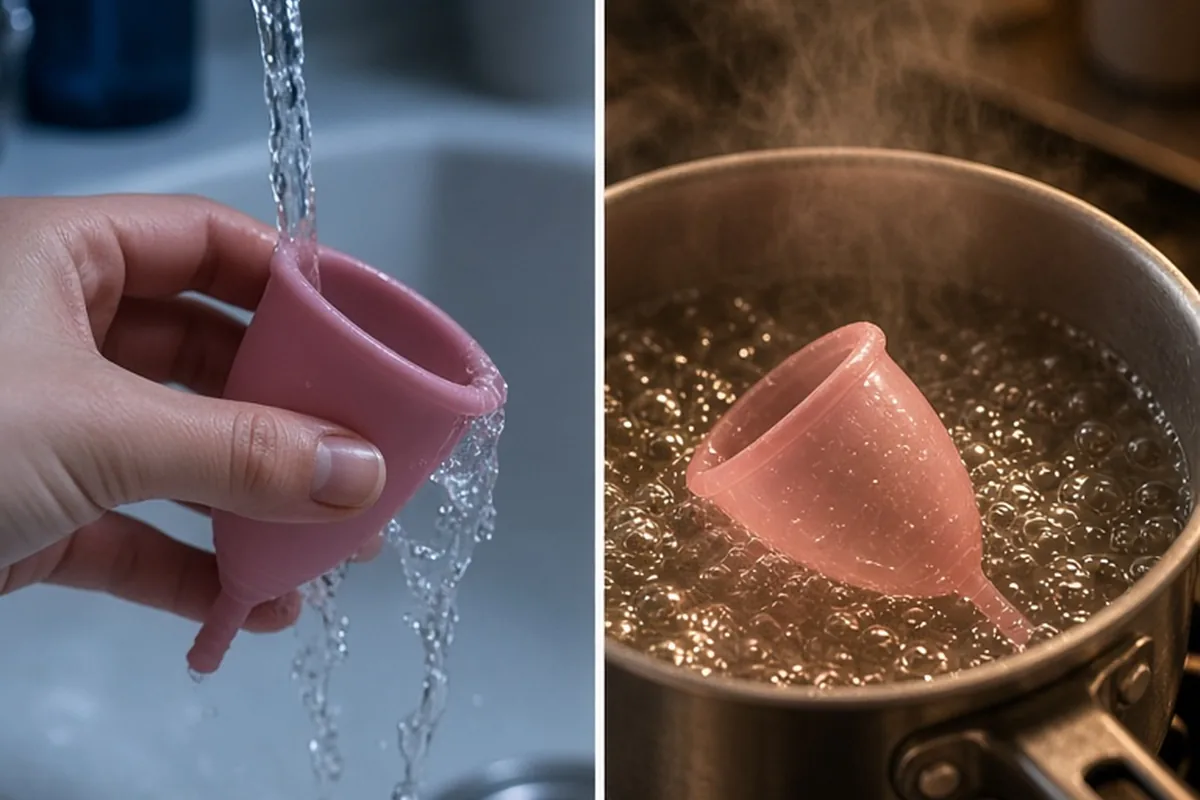
To wash a menstrual cup during your cycle, rinse it with cold water first to prevent stains, then wash it thoroughly with warm potable water and a mild, oil-free, unscented soap. Rinse away all soap residue before reinserting. Between cycles, sanitize the cup by boiling it in water for five to ten minutes.
Proper cup hygiene protects your delicate vaginal flora from irritation while helping medical-grade silicone, rubber, or elastomer last for several years. Developing a reliable cleaning routine makes menstrual cup maintenance quick, intuitive, and manageable in any environment.
Step-by-Step Daily Washing During Your Cycle
Every time you remove your menstrual cup to empty it during your period, begin by thoroughly washing your hands with soap and water. Empty the collected fluid into the toilet, then take the cup to the sink. Always start by rinsing the cup with cool or cold running water. Using hot water immediately can bind the proteins in blood directly to the surface of the silicone or elastomer, leading to premature discoloration and persistent staining over time.
After the initial cold rinse, switch to warm water and apply a small drop of suitable cleanser. Work the lather over both the interior and exterior surfaces, paying close attention to the rim and the base where grip rings can trap fluid. Once the cup is clean, rinse it meticulously under running water for at least fifteen to twenty seconds to remove every trace of soap lather. Any residual soap left on the cup can cause vaginal burning, itchiness, or disrupt your natural pH balance once reinserted.
If you are immediately reinserting the cup, there is no need to dry it, as clean water can act as a natural lubricant during insertion. However, if you plan to set it aside briefly, place it on a clean paper towel rather than directly on a bathroom counter surface to minimize contact with household germs.
Choosing the Right Soap and Ingredients to Avoid
The delicate balance of the vaginal microbiome is highly sensitive to external chemicals and residues. Selecting the wrong cleanser can degrade your cup material or cause contact dermatitis and bacterial vaginosis. Ideal options include specialized menstrual cup washes, gentle foaming facial cleansers labeled fragrance-free and oil-free, or basic liquid soaps formulated without heavy conditioning agents.
When evaluating a cleanser, review the ingredient list carefully. Certain additives pose high risks to both your body and the structural integrity of the cup material. Avoiding these ingredients preserves the flexibility and surface smoothness of medical-grade silicone.
A trade-off exists between convenience and chemical safety. While standard antibacterial hand soaps or moisturizing body bars might be within arm's reach at your bathroom sink, their dense fragrances, essential oils, and antimicrobial agents frequently leave a persistent film. If an appropriate gentle soap is temporarily unavailable, washing the cup thoroughly with plain warm potable water alone is far safer than using a harsh, heavily fragranced body wash.
- Oil and lipid bases, including coconut oil, mineral oil, and plant butters, which can degrade silicone and create a sticky surface film.
- Synthetic perfumes, dyes, and fragrances that provoke tissue irritation and allergic contact reactions.
- Antibacterial agents like chloroxylenol or heavy triclosan alternatives that wipe out beneficial lactobacilli bacteria.
- Dishwashing detergents, bleach, rubbing alcohol, and concentrated vinegar, which can pit, weaken, or corrode flexible polymers.
Sanitizing Between Menstrual Cycles
While routine washing with gentle soap and water is adequate for daily use during your flow, deep sanitization is recommended at the start and end of every cycle. Sanitizing eliminates lingering surface bacteria, mold spores, and micro-contaminants that standard washing might leave behind during multi-week storage periods.
The standard and most reliable sanitization method is boiling. Fill a small, dedicated saucepan with enough water to fully submerge the cup without letting it touch the bottom. Bring the water to a vigorous rolling boil, then lower the cup into the water using a pair of clean tongs or place it inside a metal kitchen whisk. The whisk suspends the cup in the boiling water, preventing the silicone from resting directly against the superheated base of the pan where it could melt or burn. Boil the cup for five to ten continuous minutes.
Be careful not to leave the boiling pot unattended. If the water boils off completely, the cup will scorch, melt, and produce toxic fumes, ruining both your cookware and your menstrual device. For those living in shared dorms or without access to a private stovetop, compact silicone microwave steam bags or specialized electric cup sterilizers provide effective alternative sanitizing options using controlled steam cycles.
Washing in Public Restrooms and on the Go
Emptying and rinsing a menstrual cup in a public bathroom stall without a private sink can feel intimidating, but simple preparations make the task completely manageable. Because menstrual cups can safely remain in place for up to twelve hours depending on flow volume, you can often time your changes for home, but unexpected heavy days require practical stall routines.
Before entering the stall, wash your hands thoroughly at the communal sink. Carry a small bottle of drinking water with you into the stall. After removing and emptying the cup into the toilet bowl, hold the cup over the bowl and pour the bottled water directly over and inside the device to flush away the majority of residual fluid. Once rinsed, reinsert the cup immediately. You can then wrap any used toilet paper around your fingertips, re-dress, and wash your hands again at the shared sink.
If carrying water is not an option, you can wipe the cup thoroughly with clean, dry toilet paper or individually packaged menstrual cup wipes made with water-based, fragrance-free solutions. While dry-wiping leaves a small amount of fluid residue, it is a practical temporary fix. Once you return to a private sink, you can remove the cup for a thorough wash with soap and warm water.
Cleaning Air Holes, Stems, and Grip Grooves
Most menstrual cups feature two to four miniature air suction holes located just beneath the upper rim. These holes create the gentle seal necessary to keep the cup in place and prevent leaks. Over time, clotted fluid and cellular matter can lodge inside these tiny openings, weakening suction and making the cup difficult to pop open properly.
To clear blocked air holes quickly during a routine wash, fill the cup completely to the brim with warm water. Place the flat palm of your hand firmly over the open top of the cup to create a tight seal. Turn the cup upside down while squeezing the flexible base briskly. The pressure forces the trapped water outward through the tiny air holes, instantly clearing out accumulated debris.
For stubborn or dried residue in holes and grip grooves, bend the silicone gently under running water to flex the openings. You can use a soft-bristled baby toothbrush, an interdental brush, or a soft cotton swab soaked in water to dislodge buildup. Avoid using sharp sewing needles, safety pins, or toothpicks, as pointed tools can puncture, tear, or create micro-abrasions in the silicone where bacteria can multiply.
Managing Stains and Lingering Odors Safely
Even with meticulous hygiene, menstrual cups naturally develop yellow or brownish stains after months of regular contact with hemoglobin and iron. In some instances, hormonal fluctuations or prolonged wear can also cause the material to retain a slight metallic or stale odor. Stains are purely cosmetic and do not indicate that your cup is dirty, provided it has been properly washed and sanitized.
To lift stubborn stains, soak the clean cup in a shallow dish containing a 1:1 solution of warm water and standard 3% hydrogen peroxide for a few hours. The bubbling oxidation breaks down iron pigment without dissolving the silicone matrix. Once the natural color returns, remove the cup, wash it thoroughly with soap and water, and boil it for five minutes to eliminate any peroxide residue. Limit peroxide treatments to once or twice a year, as excessive soaking can gradually weaken the elasticity of certain elastomer blends.
To neutralize odors naturally, place your washed cup on a clean windowsill where it can receive several hours of direct natural sunlight. UV rays act as a mild, chemical-free deodorizer and natural bleaching agent. Never attempt to remove odors or stains using household bleach, concentrated tea tree oil, or scented household cleaners, as these chemicals absorb into silicone and release toxic vapors or irritants when worn internally.
Proper Storage and Signs It Is Time for a Replacement
How you store your menstrual cup between cycles is just as important as how you wash it. After boiling your cup at the end of your period, allow it to air-dry completely on a clean cloth or paper towel. Storing a damp cup in an unventilated space encourages the growth of mold and anaerobic bacteria.
Store the fully dried cup in a breathable container, such as the breathable cotton or satin drawstring pouch that typically accompanies the product. Never store a menstrual cup in an airtight glass jar, plastic zipper bag, or sealed snap-lock container, because trapped moisture and lack of airflow create an ideal breeding ground for odors and microorganisms. Keep the pouch in a dry, room-temperature drawer or cabinet away from direct heat sources and curious household pets.
With proper washing and storage, high-grade medical silicone cups can last between two and ten years depending on the manufacturer guidelines. However, you should inspect your cup before every cycle. Replace your cup immediately if you notice any of the following warning signs:
If your cup passes physical inspection, exhibits no stickiness or structural cracks, and continues to seal securely, you can continue using it safely cycle after cycle.
- A sticky, greasy, or tacky texture on the surface that does not wash away, signaling silicone degradation.
- Visible cracks, splits, tears, or fraying along the rim, base, or stem.
- A chalky, powdery white film or flaking on the exterior walls.
- A strong, sour, or rancid odor that persists even after boiling and thorough sunning.
Frequently asked questions
Can I use regular dish soap or hand soap to wash my menstrual cup?
You should avoid regular dish soaps and heavily fragranced hand soaps because they contain harsh degreasers and synthetic perfumes that leave irritating residues. If you do not have dedicated cup wash, use a mild, oil-free, fragrance-free facial cleanser or rinse the cup thoroughly with plain warm potable water.
How often do I need to wash my menstrual cup during my period?
You should empty and wash your menstrual cup at least every eight to twelve hours, or more frequently if you experience a heavy menstrual flow. Always wash it with clean water and gentle soap before reinserting it for your next wear window.
What should I do if I drop my menstrual cup in the toilet?
If your cup drops into the toilet bowl, do not simply rinse and reinsert it. Wash it thoroughly with antibacterial or gentle soap and running water, then sanitize it in a rolling boil for a full ten minutes before placing it back in your body.
Your next step
For your next cycle, set aside a dedicated gentle, fragrance-free soap by your sink and check that your storage pouch is clean, breathable, and ready for use.