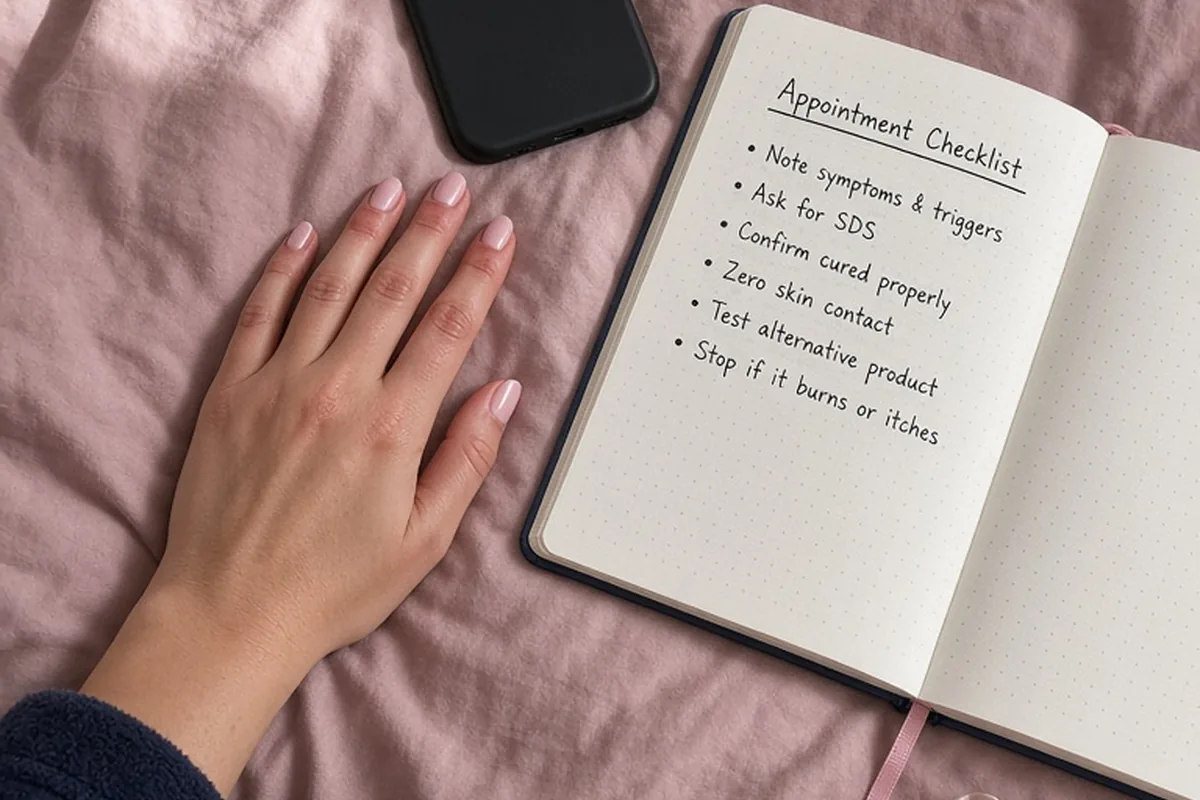
A nail allergy to gel polish appointment checklist organizes practical precautions before, during, and after visiting a salon if you suspect or experience sensitivity to UV-cured enhancements. It involves auditing past reaction triggers, vetting salons for proper lamp calibration and hygiene, requesting Safety Data Sheets, insisting on zero skin contact, testing alternative products cautiously, and knowing when to immediately halt service if irritation or heat sensations begin.
Experiencing itching, redness, or swelling around your cuticles after a manicure can be alarming. UV-curable nail products rely on reactive chemistry that, when mishandled or under-cured, can cause permanent contact sensitization to acrylates. Walking into an appointment without a clear safety strategy leaves you vulnerable to repeated exposure, escalating symptoms, and long-term nail bed damage. Using a structured appointment checklist ensures you communicate your physical boundaries, verify your technician's technical discipline, and make informed choices about which products touch your hands.
Pre-Appointment Audit: Documenting Symptoms and Past Formulas
Before you book your next service, spend time gathering concrete details about your past reactions. Contact allergies in the nail unit typically represent Type IV delayed hypersensitivity, meaning symptoms often surface twenty-four to seventy-two hours after exposure rather than immediately under the lamp. Note the exact timeline of when tingling, micro-blisters, throbbing, or skin peeling first appeared, as well as whether you noticed separation between your natural nail plate and nail bed. If you have photographs of your hands during a flare-up, organize them chronologically to show a nail professional or medical provider.
Equally important is identifying the specific brands and product categories involved in your previous manicures. Traditional three-step gels, all-in-one builder gels in a bottle, hard gels, and hybrid dip powders contain differing concentrations and types of monomers. If your prior salon used unbranded or unlabelled bottles imported without standard regulatory disclosures, note that as well. While an informal symptom diary cannot replace medical epicutaneous patch testing performed by a dermatologist, it gives your nail technician essential context to prevent repeating an identical product application.
- High-resolution photos of active periungual redness, blistering, or flaking from previous reactions
- Estimated elapsed time between lamp exposure and the onset of discomfort
- Names of base coats, builder gels, color polishes, and top coats used during prior services
- A clear record of any secondary symptoms, such as eyelid swelling or facial rash from touching your face
Salon Vetting Checklist: Selecting an Allergy-Conscious Professional
Not every salon possesses the technical training or equipment standards required to safely handle clients with known or suspected product sensitivities. When contacting a potential nail studio, ask direct questions about their sanitation standards, dust collection infrastructure, and manufacturer-matched curing systems. A professional who understands chemical safety will welcome these inquiries and speak comfortably about curing chemistry, whereas a salon that dismisses your concerns as trivial is unlikely to follow the strict application boundaries you need.
One of the primary contributors to acrylate sensitization is the use of mismatched curing lamps. Nail lamps are engineered with specific light wavelengths, radiant flux, and bulb placements calibrated to fully polymerize their corresponding gel formulations. When a salon uses generic, low-cost LED or UV lamps across every brand in their inventory, the gel may appear hard on the surface while remaining under-cured and chemically active underneath. This allows mobile monomers to leach through the natural nail plate over several days. Prioritize salons that use complete, closed-system product lines where lamps and gels originate from the exact same manufacturer.
- Does the salon employ dedicated source-capture dust extractors at the manicure table?
- Does the technician use the specific lamp calibrated by the manufacturer for the chosen gel brand?
- Are tool implements cleaned and sterilized in an on-site hospital-grade autoclave?
- Is the technician willing to conduct a dry consultation or patch review before applying product?
Ingredient Screening: Navigating Formulations and Chemical Claims
When reviewing salon menus and product lines, look closely at ingredient labels rather than marketing slogans. The nail industry frequently uses broad claims like 'hypoallergenic,' 'non-toxic,' or 'clean,' none of which carry standardized regulatory definitions for UV-curable monomers. Hydroxyethyl methacrylate, commonly known as HEMA, is a frequent sensitizer due to its small molecular size, which enables it to easily penetrate skin cells and the nail plate. However, products labeled 'HEMA-free' often replace HEMA with alternative acrylates such as hydroxypropyl methacrylate, isobornyl acrylate, or ethyl methacrylate, which can still cause cross-reactions in sensitized individuals.
Request the Safety Data Sheet (SDS) or the complete ingredient list on the primary packaging before allowing any chemical base or bonder onto your nail. If you have already received diagnostic patch testing from a medical doctor, compare the specific allergen identified on your medical report against the salon's product documentation. Remember that there is a distinct trade-off when selecting alternative specialty lines: while they may exclude specific notorious sensitizers, they still require adequate light energy to cure safely and cannot guarantee that cross-reactivity will not occur if your immune system is already primed.
Day-of Preparation: Protecting Skin Integrity and Nail Walls
How your skin is treated on the day of your appointment directly influences your likelihood of absorbing sensitizing chemicals. Intact skin serves as your primary biological barrier against environmental allergens. If your technician trims, nips, or aggressively e-files your proximal nail fold—frequently mislabeled as the cuticle—they create microscopic tears in the protective seal surrounding the nail root. Monomers that touch newly abraded skin encounter the immune system's Langerhans cells far more readily, dramatically increasing the risk of an allergic response.
Instruct your technician to perform gentle, dry cuticle care using manual tools rather than deep mechanical abrasion, and explicitly decline any cutting of living tissue. Ensure your hands are free of open cuts, active eczema flares, or severe hangnails before entering the salon. If you are uncertain about whether a new formulation will trigger an adverse reaction, arrange for a single-nail trial rather than a full set. Applying product to one isolated fingernail and waiting three to four days allows you to observe your body's immune response without exposing ten fingers to potential trauma.
- Inspect fingers the morning of the appointment for open cracks, cuts, or active skin irritation
- Request that no living periungual skin or proximal folds be clipped with nippers or abraded with aggressive carbide bits
- Wash hands thoroughly with mild soap and water before service begins, avoiding scented salon scrubs that contain alcohol
- Establish a single-nail trial protocol if attempting a new product family for the first time
At-the-Table Checklist: Monitoring Application Technique and Curing
During the manicure, active observation is your strongest defense against chemical contact. Watch your technician's brush precision closely throughout the application of primers, base coats, colors, and top coats. The golden rule of professional nail care is zero contact between uncured product and the surrounding skin. A disciplined technician leaves a deliberate hairline gap of approximately one millimeter between the product and the lateral skin folds, ensuring the coating rests exclusively on the keratinized nail plate.
Pay equal attention to how clean-ups are handled if an accidental touch occurs. If wet product touches your skin, the technician should never simply swipe it away with a dry fingernail or an acetone-soaked brush while leaving residue behind. Acetone breaks down the gel vehicle and thins the uncured monomers, which can facilitate deeper penetration into the skin barrier. Instead, the area should be cleared immediately with dedicated cleansers, washed if necessary, and re-prepped. Furthermore, verify that your hand sits completely flat inside the lamp so that thumbs and edge fingers receive equal, uninterrupted light exposure for the full recommended curing cycle.
- Ensure a visible gap remains between the gel edge and all surrounding living skin folds
- Confirm that your fingers are placed flat on the lamp floor, aligned with the internal LED bulbs
- Do not remove your hands early from the lamp, even by a few seconds, to maintain full cure depth
- Stop the service immediately if you experience severe burning, itching, or an intense heat spike under the light
Alternative Services Checklist: Exploring Lower-Risk Manicures
If prior reactions make returning to UV-curable gels inadvisable or uncomfortable, bring a list of low-reactivity alternatives to your appointment. High-quality traditional air-drying lacquers remain one of the safest options for sensitized individuals because they dry through simple solvent evaporation rather than chemical cross-linking or polymerization. Although regular lacquer does not offer the two-to-three-week chip resistance of cured gel, pairing a clean traditional polish with a high-shine vinyl top coat provides several days of wear without exposing your nail folds to reactive monomers.
Another practical route involves custom press-on enhancements adhered with adhesive tabs rather than liquid cyanoacrylate glues. High-grade press-on nails can be pre-painted and fully cured by an artist off of your body, eliminating the risk of uncured gel sitting against your skin during the appointment. When applied with medical-grade adhesive tabs, there is minimal chemical transfer to the nail bed. Be cautious, however, with traditional dip powder or acrylic enhancements; many dip systems rely on cyanoacrylates and fine acrylate polymers that frequently trigger cross-reactions in individuals sensitized to gel products.
- Traditional solvent-based nail lacquer paired with a long-wear, fast-drying top coat
- Pre-cured, custom-fitted press-on nails applied with hypoallergenic adhesive tabs
- Natural dry buffing manicures that impart a lasting glass-like shine using natural waxes without polish
- Rigid peel-off protective barrier bases designed for short-term wear and water-based release
Post-Appointment Monitoring and Flare-Up Action Plan
Your safety protocol does not conclude when you leave the salon chair. Maintain a careful watch over your fingertips for up to four full days following the appointment. Early signs of an allergic flare often begin subtly as mild tightness, mild heat, or minor tenderness along the lateral nail walls. If left unaddressed, this can quickly progress to intense nocturnal itching, small deep-seated vesicles resembling dyshidrotic eczema, and separation of the nail plate from the underlying bed.
If you notice symptoms developing, take immediate, measured steps rather than attempting aggressive at-home remedies. Do not aggressively pick, tear, or scrape the product off your nails, as tearing off adhering gel pulls away the delicate dorsal layers of the nail plate and exacerbates inflammation. Contact your nail professional to discuss a gentle, non-abrasive removal, or consult a board-certified dermatologist for medical evaluation and appropriate topical treatment. Keep your hands moisturized with plain, fragrance-free ointments, and avoid exposing the sensitized skin to household detergents, cleaning chemicals, or additional nail solvents until the barrier has fully healed.
Illustrative Scenarios
Illustrative Consultation: Implementing Safety Steps After Periungual Irritation
A regular salon client noticed mild redness and itching around her ring fingers two days after a routine gel manicure. Rather than rebooking an immediate standard fill, she scheduled a consultation using a structured checklist. She brought photos of the reaction, reviewed the salon's gel base ingredient labels, and discovered the service had utilized an unbranded lamp with mismatched wattage. Together with her technician, she opted to remove the product gently, allow her skin barrier to rest for eight weeks, and perform a single-nail trial with a fully calibrated, closed-system formula while leaving living cuticle tissue untouched.
Key point: Systematic communication, verifying matched equipment, and testing isolated products prevent severe contact dermatitis while helping clients make clear, non-reactive decisions about their beauty routines.
Frequently asked questions
Can I safely wear gel polish if a brand claims to be HEMA-free?
Not necessarily. While HEMA is a common sensitizer, HEMA-free formulas frequently use substitute methacrylates or acrylates that can trigger identical allergic contact reactions in sensitized individuals. Always review the full ingredient list and consider a single-nail trial or medical evaluation first.
How long should I wait after an allergic reaction before getting another manicure?
It is generally advisable to wait until the skin barrier has completely healed and the nail plate shows healthy regrowth, which often takes several months depending on symptom severity. Rushing into another service while periungual skin remains inflamed significantly increases the likelihood of worsening chronic sensitization.
What should I do if my fingers start tingling or burning while under the UV lamp?
Remove your hand from the lamp immediately and inform your technician. While a brief, mild heat spike can occasionally occur from rapid polymer contraction on thin nails, persistent tingling, sharp pain, or itching indicates skin irritation or product contact that requires immediate reassessment.
Your next step
Save this checklist on your phone to review with your nail technician before your next visit, ensuring every product, lamp, and technique respects your skin's health.