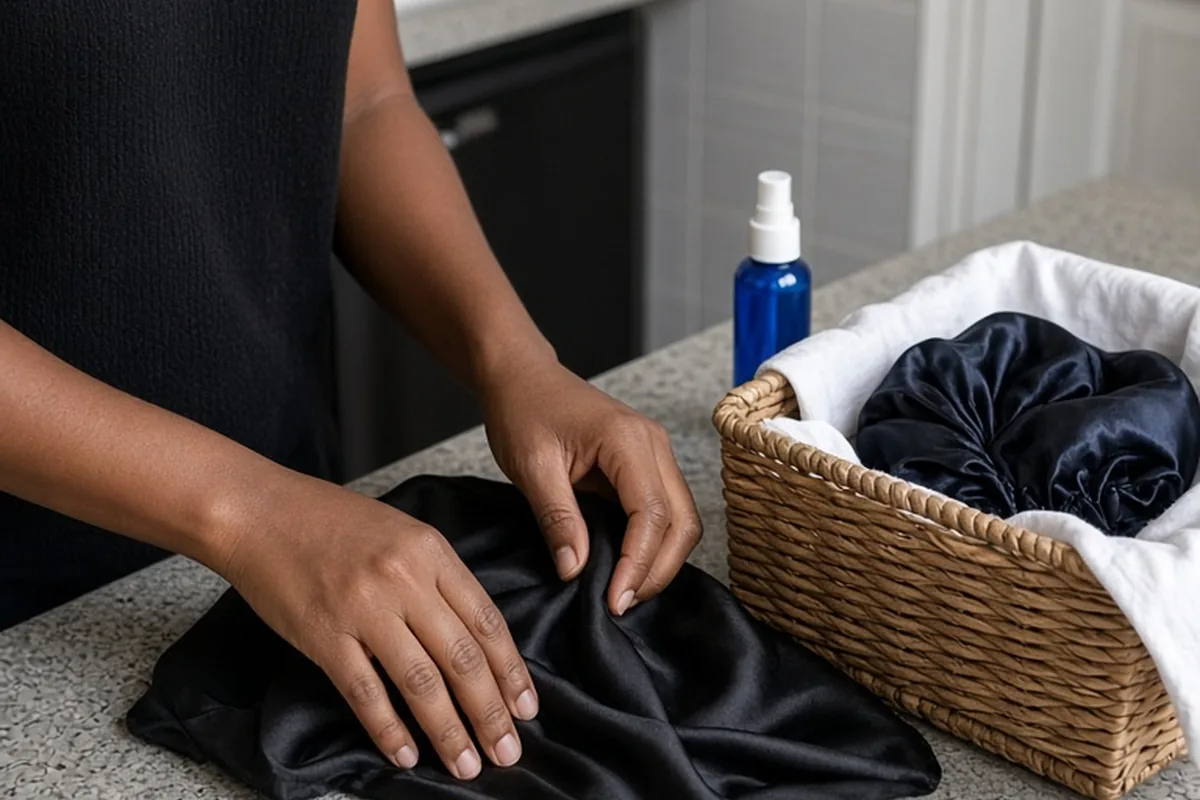
A healthy protective hairstyles routine for beginners consists of four connected phases: thorough cleansing and deep conditioning before styling, tension-free installation, continuous hydration and scalp hygiene while the hair is tucked away, and slow, lubricated takedown. Begin with detangled, balanced strands, hydrate your scalp using lightweight liquid sprays rather than heavy butters, protect your hair overnight under satin, and remove the style before matting, excessive new growth, or root tension develops.
Protective styling keeps delicate ends tucked away to reduce daily mechanical stress, environmental friction, and moisture loss. While styles such as two-strand twists, knotless braids, flat twists, and cornrows provide relief from day-to-day manipulation, wearing them successfully requires an intentional routine before, during, and after installation to safeguard your scalp and hair follicles.
Pre-Installation Hair Preparation: Cleansing, Hydrating, and Stretching
The success and longevity of any protective style depend entirely on the health and cleanliness of the foundation beneath it. Before installing braids, twists, or weaves, your hair must be free of residual oils, silicones, and product buildup that accumulate from daily styling products. A clarifying shampoo clears the scalp and hair shafts so moisture can penetrate evenly. Follow this cleansing step with a rich deep-conditioning treatment formulated to restore hydration and elasticity. Strands that are brittle or under-moisturized before being tucked away are significantly more prone to snapping under the weight or friction of added hair extensions.
After washing and conditioning, gently stretch your hair to minimize tangles during parting and braiding. You can stretch textured hair without relying on blistering heat. Methods such as banding with soft satin scrunches, creating large loose braids on damp hair, or blow-drying on a low to warm setting with a heat-protectant serum will elongate your curl pattern comfortably. Take time to work through sections slowly with a wide-tooth comb or flexible detangling brush, starting at the ends and working toward the roots. Thorough pre-styling preparation prevents painful snags, reduces installation time, and ensures your natural hair sits smoothly within the chosen style.
Choosing Your First Beginner-Friendly Style: Twists, Braids, or Updos
Beginners often feel overwhelmed by the wide array of protective options, but your initial choice should prioritize scalp comfort and manageable maintenance over elaborate designs. Two-strand twists created with your natural hair are one of the simplest entry points because they place minimal tension on the perimeter of your scalp, allow easy access for washing, and can be redone individually if a section unravels. If you prefer the look and longevity of extensions, knotless box braids are far gentler on first-timers than traditional box braids. Because knotless styles begin with your own hair and gradually feed in synthetic fibers, they eliminate the rigid, heavy knot at the root that frequently causes immediate soreness.
Cornrows and flat-twist updos represent another dependable category, particularly for active individuals who exercise regularly or prefer their hair completely off their neck and shoulders. Flat styles keep your ends shielded against clothing friction and make bedtime wrapping straightforward. However, cornrows require a braider who understands proper tension distribution, as pulling too tightly along the hairline can stress fragile follicles. When deciding on your first look, consider the weight of the hair, your willingness to perform daily scalp spritzing, and how easily you can reach your scalp beneath the style.
Tension Management and Scalp Safety During Installation
A common and dangerous misconception in hair care is that a protective style must hurt initially to look neat or last a long time. Pain, throbbing sensations, raised white bumps at the base of the hair shaft, and tightness that prevents you from turning your neck or blinking comfortably are clear indications of mechanical trauma. Excessive, prolonged tension pulls hair follicles from their anchoring structures beneath the skin, potentially triggering traction alopecia, an inflammatory condition that can lead to permanent thinning along the delicate edges and temples.
Clear communication with your stylist—or patience with yourself if styling at home—is your primary defense against over-tensioning. Before installation begins, ask the stylist to use a lighter grip around the hairline and nape, which contain the finest and most fragile strands. If an individual braid or twist feels painfully tight as it is being formed, speak up immediately rather than hoping it will loosen over the coming days. A reputable stylist will gladly adjust their tension. Protecting your hair means prioritizing follicle preservation over razor-sharp parting lines.
Daily and Weekly Moisture and Scalp Care While Wearing Your Style
Tucking your hair away does not mean abandoning your moisturizing habits. Natural sebum produced by the scalp struggles to travel down braided or twisted lengths, leaving enclosed hair vulnerable to drying out. For daily upkeep, apply a lightweight, water-based leave-in mist or plain filtered water mixed with a few drops of vegetable glycerin or aloe vera juice directly down the lengths of the style. Avoid thick raw butters, heavy pomades, or petroleum-based greases along your scalp or at the base of your parts. Dense products cannot easily evaporate or wash away in a protective style; instead, they attract lint, trap dead skin cells, and form gummy plaques that complicate takedown.
Scalp hygiene during a protective style requires a gentle touch. Cleanse your parts once a week or every two weeks using a diluted gentle shampoo in an applicator bottle, or wipe your scalp down with cotton rounds soaked in an alcohol-free astringent, such as witch hazel infused with tea tree or peppermint oil. When rinsing or wetting the style, ensure your natural hair underneath dries completely. Trapped moisture inside thick braids or under weave tracks can breed mold, mildew, and sour odors. Use a hooded dryer, a diffuser attachment on a low-heat setting, or allow your hair ample outdoor drying time on a warm day before bundling it up.
Nighttime Friction Control and Environmental Defense
Bedtime protection is non-negotiable for preserving both the neat appearance of the style and the moisture levels inside your hair fibers. Cotton pillowcases and sheets act like desiccant sponges, actively absorbing natural oils and water from your hair while you sleep. Furthermore, the coarse texture of cotton creates friction every time you turn your head, causing individual strands to fuzz, fray, and work their way loose from the braids or twists. Protecting your investment requires an uninterrupted satin or silk barrier between your hair and your bedding.
Secure your style before sleep by loosely gathering long braids or twists with a soft satin scrunchie into a low ponytail or pineapple on top of your head, taking care not to pull on the roots. Wrap your perimeter with a wide-band satin edge scarf to keep the front secure, then cover the lengths with a spacious satin bonnet. For added insurance, sleep on a satin pillowcase in case your bonnet slips off during the night. In daily life, watch out for mechanical friction from car seat belts, heavy coat collars, and rough purse straps, all of which can catch on your ends and cause localized thinning over time.
Gentle Style Takedown and Shedding Management to Prevent Breakage
The takedown process is the most vulnerable phase of a protective hairstyle routine. Hair naturally sheds between fifty and one hundred strands every day as part of its normal biological growth cycle. When your hair is secured in braids or twists for multiple weeks, these shed hairs have nowhere to fall; they remain trapped inside the structure alongside dried sebum, lint, and residual product. Seeing a substantial ball of shed hair during takedown is entirely normal and expected, but rushing the process can turn normal shedding into catastrophic breakage.
Never begin a takedown when you are tired or pressed for time. Work in small, isolated sections, unraveling each braid or twist methodically with your fingers or the smooth tail of a comb. Crucially, do not drench your hair with water before removing the accumulated lint ring at the root. Water causes shed hair and product buildup to swell, lock together, and form stubborn, felt-like knots. Instead, saturate the root area with a slippery carrier oil or a high-slip detangling melt, use your fingertips to loosen and separate the shed strands, and gently comb through the section from ends to root before your post-style wash.
Evaluating Professional Salon Costs, Booking Inquiries, and Stylist Red Flags
If you decide to hire a professional braider or stylist rather than working at home, understanding pricing structures and service boundaries will protect your budget and your hair. Professional protective styling fees vary widely depending on your geographic location, the braider's experience, whether synthetic or human hair is included in the package, and the desired length or parting size. Micro-braids and small parts command significantly higher rates and longer appointment times than medium or jumbo variations. Be sure to confirm upfront whether hair washing, blow-drying, and detangling are included in the quote or billed as separate add-on services.
When consulting with a prospective stylist, inquire directly about their installation methods and hygiene standards. Ask whether they require you to arrive with your hair pre-stretched or blown out, what brand of extension fiber they recommend, and whether they pre-rinse synthetic hair in an apple cider vinegar solution to remove manufacturing alkaline coatings that trigger scalp itchiness. Red flags include stylists who insist on braiding tightly to make styles last, those who decline to loosen tension when you express discomfort, and those who apply heavy edge-control gels indiscriminately over dry, damaged hairlines.
Frequently asked questions
How long should a beginner leave a protective hairstyle in place?
Most stylists recommend leaving beginner protective styles in for four to six weeks, with eight weeks serving as an absolute maximum for smaller installations. Keeping hair tucked away past this window invites root matting, excessive new growth weight that pulls on follicles, and difficult buildup removal. Listen to your scalp: if you notice persistent itching, irritation, or slipping, take the style down earlier.
Can I wash my hair while wearing braids or twists?
Yes, you can and should keep your scalp clean while wearing a protective style. Focus cleansing on the scalp rather than vigorously scrubbing the lengths of the braids to prevent frizz. Use an applicator bottle filled with diluted clarifying or sulfate-free shampoo, massage gently with the pads of your fingers, rinse thoroughly, and ensure the hair dries completely to prevent trapped moisture issues.
Why does synthetic braiding hair make my scalp itch intensely?
Synthetic braiding hair is typically manufactured with an alkaline chemical coating designed to improve heat resistance and prevent mold during shipping. This coating frequently irritates sensitive skin, causing an allergic contact reaction that manifests as severe itching and redness. Soaking synthetic hair in a bath of warm water and apple cider vinegar before installation neutralizes this coating and prevents scalp discomfort.
How long should I wait between protective styles?
Give your hair and scalp at least one to two weeks of rest between protective styles. This intermission allows your follicles to recover from weight and tension, lets you assess overall hair retention, and provides an opportunity for protein treatments, deep hydration masks, and any necessary end trims while your hair is free.
Your next step
Assess your scalp's current sensitivity and hair elasticity today, then schedule a dedicated prep day to clarify and deep condition your hair before attempting your first style.