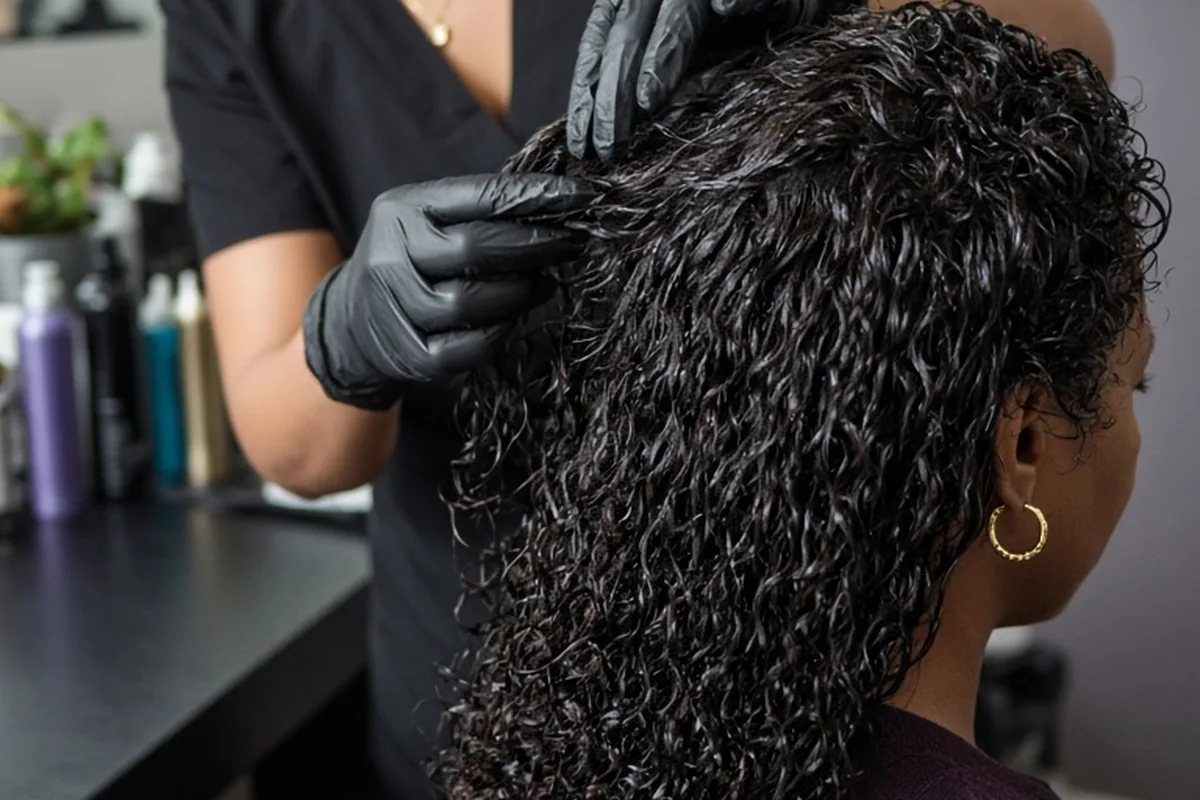
A beginner textured hair stylist routine begins with methodical morning station setup, followed by a structured four-stage client flow: comprehensive curl consultation, slip-focused cleansing and detangling at the bowl, moisture-retaining product layering with tension-controlled styling, and indirect heat drying. The routine finishes with client maintenance education, station disinfection, and evening tool sanitization to protect hair strand health and maintain a predictable appointment schedule.
Stepping behind the chair to work with wavy, curly, coily, and tight textured hair patterns requires a deliberate balance of technical skill, product knowledge, and time management. Developing a structured daily routine helps new stylists build confidence, protect delicate hair cuticles, and deliver consistent, beautiful results for every client who sits in their chair.
Morning Station Preparation and Tool Organization
A smooth day behind the chair begins well before the first client arrives. For a beginner textured hair stylist, physical station readiness directly affects timing and service quality. Start each morning by organizing your mechanical tools based on the day's scheduled appointments. Textured hair services require specialized implements that must be fully sanitized, completely dry, and arranged in order of use. Your station should feature wide-tooth detangling combs, flexible multi-row detangling brushes, carbon tail combs for precision parting, duckbill sectioning clips, and heavy-duty butterfly clamps capable of securing high-density hair without snagging.
Equally important is preparing your wet styling station. Fill continuous mist spray bottles with clean, warm filtered water, as cold water can cause cuticle contraction and hinder product absorption during dry styling touch-ups. Ensure your hooded dryer, ionic hand dryer, diffuser attachments, and salon steamers are wiped down, plugged in, and functioning properly. Keep clean microfiber towels and cape protectors stacked within arm's reach. Setting up clean towels, styling capes, neck strips, and a broad spectrum of leave-in conditioners, styling foams, curl creams, and botanical gels eliminates mid-service hunting and keeps your attention centered on the client.
The Initial Consultation: Evaluating Porosity, Density, and Elasticity
Every successful textured hair service starts with a thorough consultation before the client ever reaches the shampoo bowl. Greet your client and evaluate their hair in its dry, natural state. Begin by asking open-ended questions about their current home regimen, wash frequency, preferred daily maintenance, and long-term hair goals. Note whether they wear protective styles, use direct heat frequently, or have chemical treatments such as permanent color or relaxers remaining on their ends.
Next, perform a hands-on physical assessment to evaluate three crucial variables: density, porosity, and elasticity. Density dictates how small your working sections must be during cleansing and styling; high-density hair requires substantially smaller subsections to ensure even product distribution. Porosity dictates your product formulation; low-porosity strands require lightweight humectants and gentle heat to open tightly sealed cuticles, whereas high-porosity strands benefit from protein-balanced leave-in treatments and richer emollients to patch compromised cuticles. Gently test elasticity by selecting a small, shed strand or single curl, stretching it gently when damp, and observing whether it bounces back, stays stretched, or snaps. This physical diagnosis informs your shampoo selection, deep conditioning protocol, and styling method.
Textured Hair Stylist Wash-Bowl Workflow: Cleansing, Slip, and Sectioned Detangling
The shampoo bowl is where the foundation of healthy textured styling is built. Never attempt to wash textured hair as a single, gathered mass, as this leads to severe friction and knotting. Divide the hair into four to six manageable quadrants before or immediately upon saturating the hair with warm water. Begin with an initial clarifying cleanse if the consultation revealed heavy silicone, butter, or oil buildup, focusing lather purely on the scalp with the pads of your fingers. Follow this with a hydrating, sulfate-free shampoo to cleanse the hair fiber without stripping natural lipid barriers.
After rinsing the cleanser, apply a generous amount of high-slip rinse-out conditioner or treatment masque from ends to roots on saturated hair. Slip is the lubricity that allows tools and fingers to glide through tangled fibers without causing mechanical breakage. Use your fingers first to gently separate larger tangles within each quadrant, then switch to a wide-tooth comb or flexible detangling brush, working methodically from the ends upward toward the scalp.
If hair is extremely dense or parched, place the client under a warm mist steamer with conditioner applied for ten to fifteen minutes before final detangling. The combination of thermal warmth and water vapor softens the hair cuticle, increasing elasticity and significantly reducing mechanical tension. Once detangled, rinse with tepid water, leaving a baseline of hydration in the hair shaft, and wrap the head in a soft microfiber towel to blot excess water without causing surface friction.
Sectioning, Moisture Balancing, and Precision Product Layering
Once your client is back in the styling chair, work quickly while the hair retains optimal moisture. For defined curl sets, wash-and-go styles, twist-outs, or rod sets, textured hair responds best when styled soaking wet or evenly damp. Keep your continuous mist bottle nearby to re-wet sections that begin to air-dry. Divide the hair into clean, four-quadrant sections using your butterfly clips, working systematically from the nape of the neck upward to ensure uniform definition across the entire head.
Subdivide each quadrant into thin horizontal sub-sections no thicker than one-half to one inch, depending on hair density. Apply your chosen leave-in conditioner first to establish a hydrated base, distributing it thoroughly with a wet brush or smoothing palms. Layer your primary styler—such as an anti-humectant gel for maximum hold, a curl-defining custard for bounce, or a setting foam for sets—over the leave-in. Use deliberate tension techniques: rake the product through with your fingers, smooth down the strand using the praying-hands method to flatten the cuticle, or use the edge of a styling brush to encourage individual curl clumping.
Pay special attention to the crown and perimeter, where curl patterns often differ from the back of the head. Adjust product volume and tension to match varying curl diameters across the scalp. Avoid touching or raking through sections once they have been set and defined, as unnecessary manipulation at this stage separates curl clumps and causes immediate surface frizz.
Drying Protocols: Diffusers, Hood Dryers, and Heat Preservation
Drying is the phase that locks in the shape, definition, and longevity of textured styles. Moving a client too quickly from wet styling to the final look without thorough drying can ruin an otherwise flawless application. For wash-and-go definitions and structural sets, seat the client under a hard-hood dryer on medium heat with low to medium airflow for thirty to forty-five minutes. Hooded drying evenly evaporates water while allowing gel and foam casts to harden around curl bundles without physical disturbance.
When using a handheld dryer with a bowl diffuser, practice a strict hands-off approach during the initial drying phase. Hover the diffuser around the perimeter and root area on medium heat to set the outer shell before gently cupping ends toward the scalp. Never vigorously scrunch or knead the curls while they remain damp, as this breaks the delicate cast prematurely and creates unwanted halo frizz.
Confirm the hair is completely dry all the way to the root before performing any finishing steps. Test by gently squeezing the interior sections near the crown and nape. If any damp coolness remains, allow another five to ten minutes under the dryer. Complete dryness is required before breaking the cast, separating curls, or performing dry perimeter trimming.
Finishing Touches, Client Education, and Rebooking Conversations
With the hair fully dry, begin the finishing steps to customize volume and softness according to the client's style preferences. Dispense a few drops of a lightweight, non-comedogenic oil or dry serum onto your palms. Gently squeeze the hardened gel cast along the lengths of the hair to soften the feel while preserving the internal definition. If extra volume at the crown is desired, insert a wide-tooth pick or carbon lift comb directly at the roots, lifting outward one to two inches without combing through the ends.
Use this finishing window to provide actionable, easy-to-understand client home-care coaching. Explain how to protect the style at night using the pineapple method, a silk or satin bonnet, or a satin pillowcase to reduce nocturnal friction. Recommend specific cleansing schedules and product categories suited to their porosity, emphasizing how to refresh the style mid-week using light steam or water-based refresher sprays rather than heavy raw oils that cause product buildup.
Before removing the cape, summarize what services you performed and recommend a realistic maintenance timeline. For natural curl sets and shaping, suggest a return visit within eight to twelve weeks; for protective installations or treatments, recommend four to six weeks. Booking the next appointment while the client is still in your chair ensures continuous hair health and builds a consistent clientele.
End-of-Day Sanitation, Tool Maintenance, and Station Reset
A professional daily routine concludes with proper sanitation and preparation for the following workday. Textured hair styling products frequently contain butters, plant gels, and polymers that can accumulate on tools and surfaces if not thoroughly removed. Begin by clearing all shed hair from combs, detangling brushes, and sectioning clips. Immerse all non-porous tools in warm soapy water to break down product residue, scrub them clean with a dedicated brush, rinse thoroughly, and fully submerge them in an EPA-registered hospital-grade disinfectant solution for the manufacturer's required contact time.
Wipe down your entire styling station, client chair, shampoo bowl, and product bottles using a surface disinfectant. Inspect hooded dryer hoods and diffuser bowls for stray hairs and wipe the interior cones clean. Empty continuous mist spray bottles, allow them to air dry to prevent mineral buildup and microbial growth, and restock your retail and backbar shelves with conditioners, shampoos, and stylers. Finally, review your appointment schedule for the next morning so you can arrive prepared for your upcoming client textures and service plans.
Frequently asked questions
How long should a beginner textured hair appointment take?
A standard beginner appointment for a wash, treatment, and defined style typically ranges from ninety minutes to two hours. As your detangling efficiency, product familiarity, and sectioning precision improve over time, you can gradually streamline your chair time without compromising care.
What is the biggest mistake beginners make when detangling textured hair?
The most common mistake is attempting to detangle dry or insufficiently lubricated hair from the roots downward. Always work on saturated hair with a high-slip conditioner, using small subsections and working carefully from the ends upward toward the scalp.
How do you choose between a curl cream, mousse, or gel?
Curl creams provide moisture, softness, and light elongation for coarse or dry textures but offer minimal hold. Mousses and foams provide lightweight volume and rapid drying for fine textures or rod sets, while botanical and firm-hold gels offer maximum definition and longevity against humidity.
Should textured hair be cut wet or dry?
Both methods are valid depending on the desired result. Dry cutting in the hair's natural curl state allows you to see the true shape, shrinkage, and fall of individual curl patterns, whereas wet cutting is ideal for precision blunt lines, blowouts, or uniform layering.
Your next step
Audit your station tomorrow morning to ensure you have a continuous mist bottle, high-slip conditioner, butterfly sectioning clips, and a flexible detangling brush organized before your first client arrives.