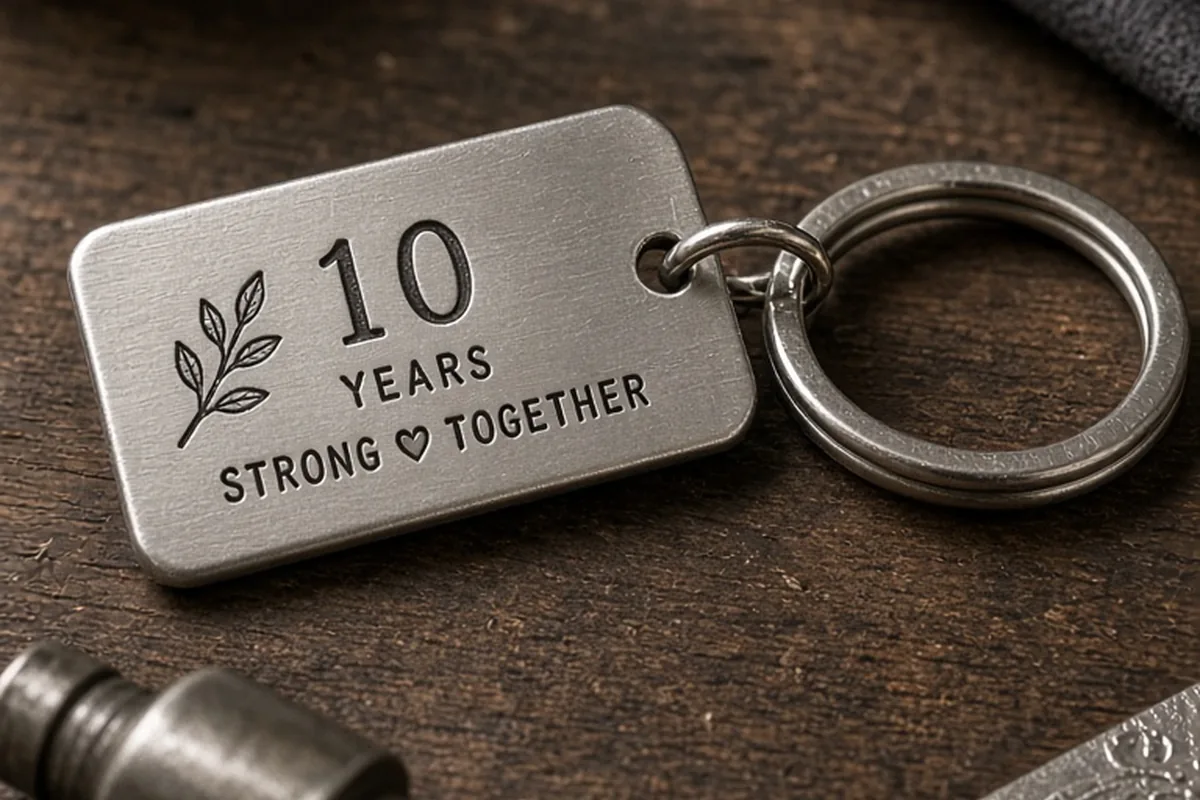
Meaningful DIY tenth anniversary gifts for him combine thoughtful personalization with the traditional ten-year symbols of tin or aluminum, representing durability and flexibility. Successful handmade projects range from stamped aluminum milestone keychains and etched tin date-night organizers to custom-bound decade memory books and handcrafted beverage kits. Focus on his daily routines, favorite hobbies, or shared memories to create a functional keepsake that reflects ten years together.
Reaching a ten-year milestone marks a full decade of shared growth, resilience, and mutual commitment. Making a gift by hand allows you to weave personal inside jokes, meaningful dates, and shared achievements into a physical item that store-bought presents cannot duplicate.
Working with Traditional Tin and Aluminum at Home
The traditional gift for a tenth wedding anniversary is tin or aluminum. These metals were historically chosen because they do not rust easily and bend without breaking, serving as a fitting metaphor for a marriage that has weathered ten years of life changes. For a handmade project, aluminum is exceptionally user-friendly. It is soft enough to cut, punch, stamp, and shape with basic hand tools, yet durable enough to last for decades without degrading.
To begin working with aluminum at home, you need only a basic metal stamping kit, a steel bench block, a brass hammer, and metal blanks. You can purchase aluminum sheets or pre-cut tags from hardware or craft supply stores. Secure the blank to the steel block with masking tape, align your metal letter punch, and strike the top of the punch firmly once with the brass hammer. Hitting it once prevents ghosting or double impressions. Once your text is stamped, you can darken the impressions using an enamel marker or black acrylic paint, wiping away the excess with an alcohol swab so the lettering stands out clearly.
While aluminum is accessible, it has practical limitations to keep in mind. Thinner aluminum sheets can warp under heavy hammer strikes, and steel punches require a solid, unyielding work surface such as a garage workbench or a sturdy kitchen counter over a support leg. If you prefer to avoid metal stamping entirely, you can repurpose vintage decorative tins as presentation vessels for other handmade elements, blending authentic vintage tinplate with modern personalization.
Designing a Curated Decade Memory Book
Over the course of ten years, couples amass thousands of digital photographs across smartphones, hard drives, and social media feeds. A physical, hand-bound memory book pulls those moments out of the digital ether and turns them into a tangible record of your decade together. Unlike a standard printed photo album, a DIY memory book allows you to incorporate ticket stubs, handwritten notes, handwritten transcripts of voicemails or vows, and physical artifacts collected over ten years.
To structure a decade album effectively, break the project into chronological chapters or thematic milestones. Limiting yourself to three to five standout photographs per year keeps the project manageable and prevents the album from feeling cluttered. Use high-weight, acid-free cardstock or watercolor paper for the pages to ensure the book endures without yellowing. You can bind the pages using Chicago screws (screw posts), a Japanese stab-binding stitch, or a heavy-duty leather-wrapped binder. Accompany each year with a short written entry recalling a challenge you solved together, a favorite trip, or an everyday routine that defined that particular season of your marriage.
The primary challenge with memory books is project scope. It is easy to feel overwhelmed by ten years of archives, which can lead to decision fatigue. To streamline the process, select your photographs before buying materials, print them in standard sizes (such as three-by-four or four-by-six inches), and lay out the chronology on a flat table before applying adhesive.
Crafting a Custom Date Night Capsule for Year Eleven
After ten years of partnership, everyday responsibilities can occasionally sideline intentional one-on-one time. A date-night capsule provides twelve pre-planned, fully customized experiences for the upcoming year, housed inside an embossed or personalized tin container. This gift balances the traditional metal theme with a forward-looking experiential focus, emphasizing that your relationship continues to grow into its second decade.
To build this project, source twelve envelopes, heavy cardstock tags, or small metal tins. Design one date for each month of the year, categorizing them to suit your partner's interests and your shared lifestyle. For example, balance low-key home dates with adventurous outdoor outings or reservations at places he has wanted to try. Write clear instructions and details on each card, seal them in individual envelopes, and stamp each envelope with an aluminum tag indicating the month it should be opened.
When assembling the dates, practical flexibility is essential. Avoid attaching non-refundable tickets or rigid dates too far in advance, as schedules inevitably shift. Instead, include gift certificates, activity vouchers, or curated themes—such as an at-home artisanal pizza night paired with a specific movie—that can be redeemed anytime during the assigned month.
- Four seasonal outdoor activities, such as a scenic hike, a kayak rental, or a stargazing evening with hot drinks.
- Four culinary exploration dates, including custom cooking challenges, local brewery visits, or a reservation at a new restaurant.
- Four low-friction home dates, such as a vintage board game tournament, living room vinyl listening session, or DIY cocktail tasting.
Building Everyday Carry Gear with Stamped Metal Details
If your partner appreciates functional items he can use daily, combining heavy-duty leather or waxed canvas with stamped aluminum hardware offers an ideal balance of utility and sentiment. Everyday carry accessories—such as key fobs, desk valet trays, and tool rolls—gain a refined, rugged quality when constructed by hand, and they integrate the tenth-anniversary metal motif naturally.
A leather catchall valet tray is an approachable woodworking and leathercraft project for beginners. Cut a piece of eight-ounce vegetable-tanned leather into an eight-by-eight-inch square. Bevel and burnish the edges using a wooden slicker and gum tragacanth or water. Punch holes in the four corners and pinch them together using solid aluminum or brass rivets. In the center of the tray, mount a polished, hand-stamped aluminum plate displaying your anniversary date, GPS coordinates of your wedding venue, or a short message.
Working with leather and metal requires basic hand safety. Always wear protective eye gear when hammering rivets or cutting metal sheet corners to avoid sharp flying shards. Use a rotary punch sized appropriately for your rivets, as holes that are too large will cause the hardware to loosen over time with daily use.
Assembling a Gourmet Culinary or Home Bar Collection in Metal Vessels
For a partner who enjoys cooking, grilling, or mixology, a curated culinary gift provides immediate enjoyment while honoring the tin milestone. By hand-blending custom spice rubs, aging craft cocktail infusions, or creating customized bar accessories, you can tailor flavor profiles directly to his tastes while utilizing brushed aluminum and tin packaging.
Start by selecting food-safe seamless tin canisters with solid or clear-view lids. Blend custom dry rubs based on his favorite proteins, such as an espresso-chili rub for beef, a smoked paprika and brown sugar blend for barbecue, or a citrus-herb blend for poultry. Design custom labels for the tins, listing the ingredients, tasting notes, and suggested cooking pairings. To elevate the set, include hand-etched aluminum measuring spoons or a hand-stamped tin bottle opener attached with a leather cord.
Ensure all containers used for consumables are certified food-grade, as industrial metal cans may contain linings or lubricants not intended for direct contact with food or spices. If you are preparing infused spirits or simple syrups, package the liquids in airtight glass bottles and attach custom-stamped aluminum neck tags rather than storing acidic liquids directly in metal.
Creating Framed Aluminum Foil Tooling and Lyric Art
Metal tooling is a traditional craft technique where malleable metal sheets are embossed with styluses to create raised, three-dimensional designs. For a tenth anniversary, tooling your first-dance lyrics, wedding vows, or meaningful topographic contours into heavy aluminum tooling foil results in a striking piece of custom wall art that catches the light beautifully.
To create this piece, print your chosen text or graphic onto transfer paper at the desired final scale. Place a sheet of thirty-six-gauge aluminum tooling foil onto a soft backing pad, such as a stack of craft foam or dense felt. Tape the printed template over the foil and trace the lines with a ballpoint pen or a wooden stylus, applying steady downward pressure. Flip the metal over to push out the background areas, creating deep relief. To add contrast, apply black acrylic paint over the raised surface and gently wipe away the high points with a damp cloth, leaving pigment in the recessed crevices.
Mount the finished metal art onto a rigid foam core or wooden backing board using spray adhesive before placing it into a deep frame or shadowbox. Because metal tooling foil can dent or crease if touched, mounting the finished work behind glass protects the dimensional relief from accidental pressure over time.
Managing Your DIY Project Timeline and Materials
Executing a handmade anniversary gift successfully requires adequate planning to avoid rushed execution. Handcrafted items often involve trial and error, particularly when working with unfamiliar materials like sheet metal, leather dyes, or bookbinding adhesives. Establishing a clear production schedule ensures the finished piece looks polished and intentional.
Allow at least two to three weeks before the anniversary date to complete your project. Spend the first week gathering supplies and practicing your technique on scrap material. If you are stamping metal, practice spacing letters on extra aluminum tags until your hammer strikes produce uniform depth. If you are building a photo album, allocate dedicated time to sort and print photographs before assembling pages. Building in a buffer week accounts for shipping delays on specialized hardware or the need to restart a component if a mistake occurs.
Remember that minor handcrafting irregularities are a natural part of handmade gifts and distinguish them from mass-manufactured retail items. A slightly uneven letter stamp or a hand-stitched seam reflects real time and effort invested in marking ten years of shared life.
Frequently asked questions
What tools are needed to stamp aluminum at home?
You need a basic steel letter punch set, a heavy brass or steel mallet, a steel bench block, and masking tape to hold the metal in place. You can also use an enamel paint marker or black acrylic paint to darken the stamped lettering for better readability.
How can I incorporate tin if I am making a non-metal gift?
You can use vintage decorative tin containers, tea tins, or brushed aluminum canisters as the gift box or storage vessel for your handmade item. Alternatively, attach a small hand-stamped aluminum charm or tag to a handmade leather, fabric, or paper present.
What is a good low-cost DIY tenth anniversary gift for him?
A curated decade memory book or a hand-assembled date-night capsule in a repurposed tin container offers high sentimental value with minimal material costs. Both projects rely primarily on printed photos, cardstock, personal writing, and thoughtful curation rather than expensive tools.
Your next step
Choose one core project concept—traditional metalwork, decade storytelling, or an experiential date capsule—and order your base materials today to give yourself adequate time for testing and assembly.