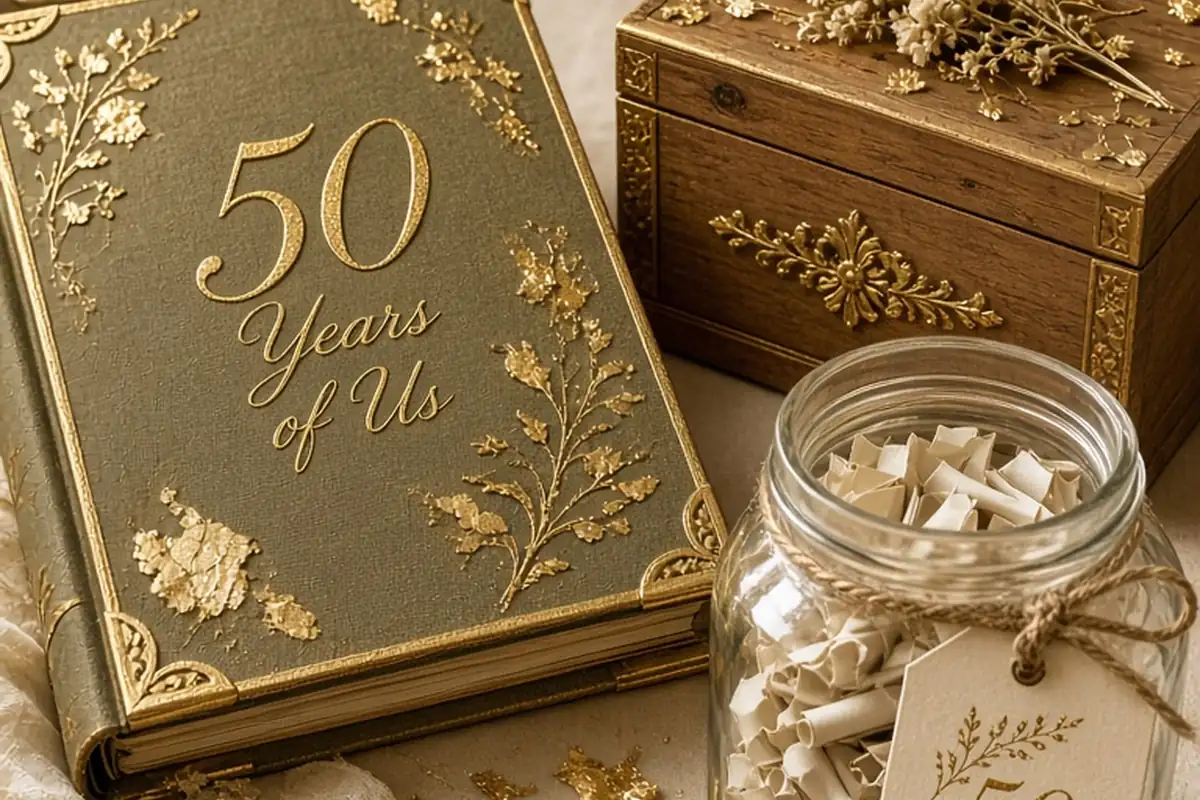
DIY 50th anniversary gifts for her celebrate half a century of devotion by blending personal history with the traditional golden theme. Thoughtful options include hand-bound memory books embellished with gold leaf, embroidered family trees stitched with metallic thread, customized jars filled with fifty handwritten tributes from loved ones, or restored vintage recipe collections in gilded wooden boxes. These projects honor shared milestones through tangible craftsmanship.
Reaching a golden wedding anniversary marks a profound milestone defined by decades of shared resilience, quiet moments, and enduring partnership. Crafting a handmade gift offers a deeply personal alternative to commercial presents, allowing you to tailor every design choice, color, and story specifically to her tastes and your family's unique journey.
Assembling an Archival Golden Milestone Book
A milestone album goes beyond a standard photo collection by organizing five decades of life into a cohesive, artistic narrative. To build a durable heirloom, begin with an acid-free, linen-bound album or create a custom screw-post binding that allows pages to lie flat when open. Organize the book chronologically by decade or thematically around core values such as travel, family traditions, and home life. Incorporate scanned reprints of vintage wedding portraits, handwritten letters, concert tickets, and newspaper clippings alongside modern photographs. Emphasize the golden milestone theme by applying gold leaf sizing along the page margins or using gold ink for chapter title lettering and dates.
When designing each spread, balance visual weight by pairing high-contrast black-and-white early images with warm, golden accent paper and brief contextual captions. Include reflections written by children, lifelong friends, and grandchildren to provide diverse perspectives on her enduring influence. A potential trade-off with scrapbooking is the fragility of vintage paper goods; always use archival adhesive runners or photo mounting corners rather than liquid glue, which can warp thin paper and yellow over time. Allow at least three to four weeks for gathering images, scanning originals, and assembling the layouts to prevent rushed work.
Crafting a Gilded Wooden Keepsake or Heritage Recipe Box
Woodworking and decorative decoupage offer an excellent way to create a functional daily object that carries deep sentimental value. Purchase an unfinished hardwood box made of oak, walnut, or pine, and sand it thoroughly with fine-grit sandpaper to create a smooth base. Stain the wood in a rich, warm tone like cherry or natural walnut, or paint it in her favorite color using matte acrylics. Using transfer paper or water-slide decals, transfer a reproduction of her original wedding invitation or a beloved handwritten recipe from her mother or grandmother directly onto the lid. Seal the transfer and highlight the beveled edges with genuine gold leaf or metallic gilding wax.
Inside the box, line the bottom with velvet or crushed gold satin fabric to protect stored treasures. Fill the interior with newly transcribed recipe cards of family signature dishes, index cards listing family folklore, or small trinkets from significant travels. A key consideration when working with wood finishes is proper curing time; polyurethane or varnish requires several days in a well-ventilated space to lose its strong odor before velvet lining or paper contents can be placed inside without absorbing chemical fumes.
Designing a Fifty Reasons Jar or Bound Tribute Folio
A written tribute project focuses purely on emotional resonance by collecting specific memories, character traits, and expressions of gratitude. Source a high-quality glass apothecary jar, clear cloche, or a handcrafted leather envelope folio. Cut fifty strips of high-grammage cotton paper, dipping the edges in liquid gold watercolor or gilding paint for a refined decorative edge. Reach out to family members, close friends, and neighbors to gather short reflections on what they admire most about her, her funniest moments, and the ways she shaped their lives.
Roll each written note and secure it with thin gold cord, satin ribbon, or metallic washi tape before placing it in the container. Alternatively, bind the fifty notes into a custom accordian-style booklet that expands outward when opened. This project requires minimal specialized crafting tools but demands thoughtful coordination and advance planning to ensure contributions arrive on time. It provides an immediate emotional connection on the anniversary day and serves as an uplifting repository she can revisit whenever she wants to reread loving sentiments.
Hand-Stitching an Embroidered Family Lineage Tapestry
Textile art provides a tactile, timeless medium for recording the generations that have grown from a marriage over fifty years. Using a stretched linen canvas or a bamboo embroidery hoop, sketch a stylized family tree starting with the original couple at the base and branching outward to children, grandchildren, and great-grandchildren. Use a variety of classic needlework stitches, such as backstitches for branches and French knots for leaves, employing a color palette of soft neutrals accented with metallic gold embroidery floss.
Embroider wedding dates, initials, or geographic coordinates alongside names to add layers of subtle detail. For makers who prefer sewing over surface embroidery, a miniature quilt block featuring gold-toned vintage cotton fabrics can frame a central printed fabric photograph of the couple. The primary limitation of textile projects is the investment of manual labor; intricate stitching takes dozens of hours. If you are new to embroidery, keep the design simple with clean silhouette lines and fewer lettering elements to ensure you finish without strain.
Creating Hand-Poured Scented Candles with Wedding Day Botanicals
Scent evokes memory more directly than almost any other sense, making custom candle crafting an intimate anniversary gift. Research the flowers used in her original bridal bouquet—such as gardenia, rose, orange blossom, or lily of the valley—and select pure botanical fragrance oils that mirror that scent profile. Melt natural soy or coconut wax using a double boiler, monitoring temperatures closely with a digital thermometer to blend fragrance oils and pour smoothly without tunneling or surface frosting.
Pour the wax into vintage amber glassware, repurposed crystal cut-glass vessels, or gilded ceramic jars. Before the top layer fully sets, carefully press dried, pressed botanical petals matching her bouquet onto the perimeter away from the wick. Complete the presentation with a custom letterpress label bearing the original wedding date and anniversary year. Ensure you follow candle-making safety standards: use lead-free cotton wicks, maintain proper wick centering, and avoid placing flammable botanicals directly next to the flame path.
Structuring a Golden Era Audio and Digital Story Capsule
Preserving voices, music, and spoken reflections captures personality in a way physical objects alone cannot. Compile a digital audio retrospective by recording interviews with children, siblings, and close friends sharing their favorite stories about her. Pair these spoken clips with digitized home video reels, restored reel-to-reel audio, or songs that topped the music charts during their courtship and wedding year. Edit the audio into a cohesive thirty-minute listening experience complete with ambient background music.
Present the final media in an elegant, tangible format rather than a generic digital link. Load the audio and accompanying digital photo slides onto a custom gold-plated USB drive housed in a personalized wooden box, or configure a mini retro-styled video booklet that automatically plays the recording upon opening. While this project requires digital editing software and scanning hardware, it bridges generational storytelling and permanently preserves memories that might otherwise remain inaccessible on obsolete media formats.
Managing Project Timelines and Matching Craft Complexity
The success of a handmade anniversary gift depends on honest assessment of your available time, crafting skill, and material budget. Complex undertakings like hand-pieced quilts or extensive wood carving require months of steady work, while paper-based scrapbooking, candle pouring, and tribute jars can be completed over two or three dedicated weekends. Select a project medium where you feel reasonably confident in basic techniques so you can focus on personalization rather than troubleshooting tool errors.
Create a backwards planning calendar starting from the anniversary date, assigning specific deadlines for gathering supplies, conducting interviews, assembling components, and wrapping. Build in a one-week buffer to account for shipping delays on specialized items like metallic leaf, bookbinding adhesives, or custom photo prints. Taking an organized approach eliminates stress and guarantees that the finished gift reflects care, composure, and polished craftsmanship.
Frequently asked questions
How can I incorporate the traditional gold theme into a handmade gift?
You can incorporate gold through metallic leaf accents on paper or wood, gold embroidery thread in textile pieces, gold calligraphy ink on custom cards, or gilded hardware on keepsake boxes. Using warm ochre, amber glass, and champagne silk ribbons also naturally complements the traditional golden aesthetic.
What if I do not have advanced crafting or woodworking skills?
Focus on high-sentiment, low-complexity projects such as a Fifty Reasons tribute jar, a curated memory book using archival photo sleeves, or digitizing vintage audio recordings. Sourcing quality raw materials like textured cotton paper, clear glass, and velvet ribbons ensures a polished look without complex technical demands.
How far in advance should I start making a DIY 50th anniversary gift?
Starting four to eight weeks before the celebration is recommended, especially if you need to gather notes or photos from other family members. This timeframe allows ample room for drying finishes, framing artwork, and fixing minor crafting mistakes without feeling rushed.
How do I protect old photographs when making a DIY anniversary album?
Always scan and print high-resolution replicas of original photographs rather than cutting or gluing original vintage prints. Use acid-free paper, archival mounting corners, and solvent-free adhesives to ensure the new album remains preserved for decades to come.
Your next step
Choose one gift concept that aligns with her passions and your crafting comfort, gather the necessary archival materials, and set your production schedule today.