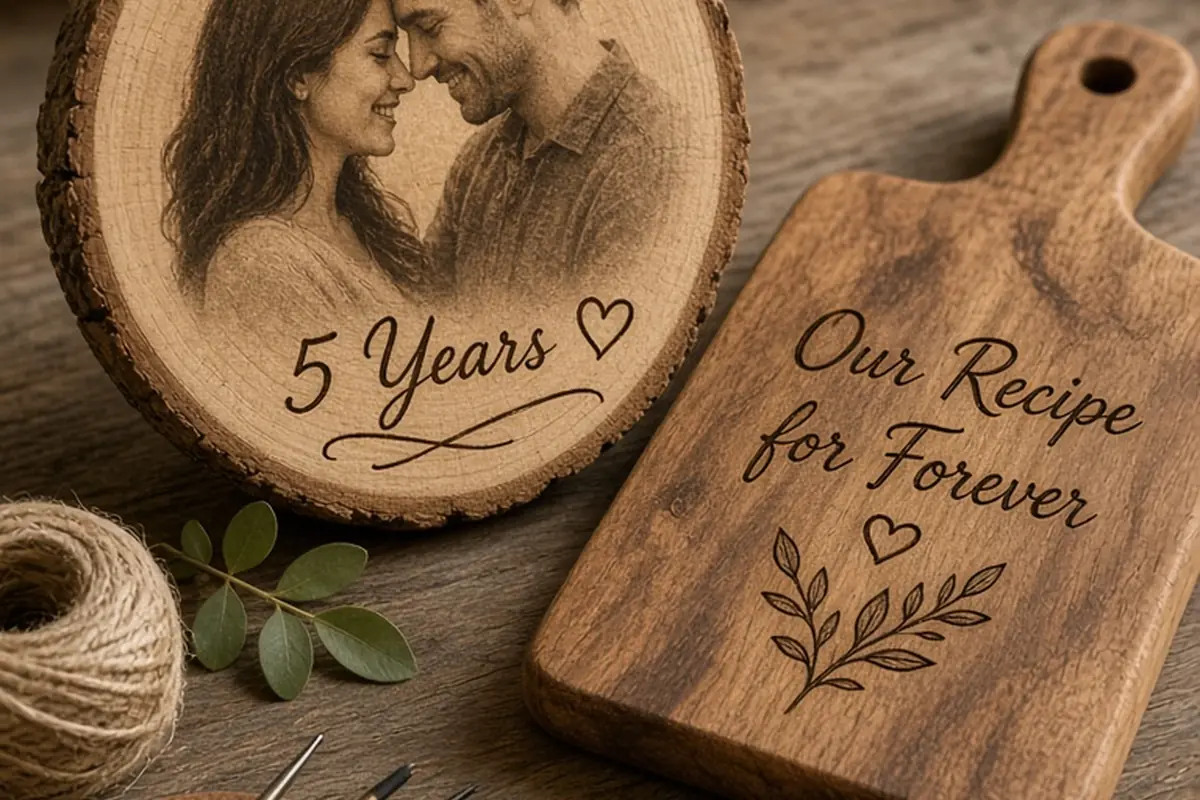
DIY fifth anniversary gifts for her traditionally center on wood, representing strength, durability, and rooted growth after five years of marriage. Popular handmade options include transferring a sentimental photograph onto a rustic wood slice, wood-burning a handwritten family recipe onto a hardwood cutting board, building a customized keepsake memory box, or assembling an engraved date-night token chest. Selecting a project matched to your current crafting tools ensures a durable, polished heirloom.
Reaching the five-year wedding milestone marks a transition from early adjustments into deep stability and shared routines. Crafting an anniversary present by hand allows you to embed personal milestones, shared private jokes, and sincere appreciation into a functional item she can hold and keep for decades.
Selecting the Right Wood and Matching Her Interior Aesthetic
Every species of wood brings its own character, density, and color profile, making the material selection process just as important as the design itself. A fifth anniversary traditionally honors timber because trees reflect deep roots and organic resilience, but your choice of species should mirror her personal design preferences rather than generic craft store stock. If her style leans toward contemporary minimalism, choose close-grained hardwoods like pale hard maple or warm American black walnut, which yield sleek lines and elegant, subtle grain patterns. For homes filled with vintage, farmhouse, or rustic accents, reclaimed barn wood, aromatic cedar, or rough-sawn white oak provide immediate texture and historical depth.
Beyond aesthetics, you must consider the structural integrity and workability of the timber before purchasing. Softwoods like pine and basswood are easy to carve, drill, and shape with basic hand tools, but they dent easily under daily use and can absorb liquid finishes unevenly. Hardwoods such as cherry and oak resist wear and tear over decades, though they demand sharp router bits, quality hand saws, and extra patience during sanding. A common pitfall is working with damp construction lumber from home improvement centers, which will warp, twist, or crack as it dries inside a heated home. Source kiln-dried boards or pre-surfaced craft blanks from local lumber yards to ensure your hard work stays flat and structurally sound over time.
Crafting a Personalized Photo Transfer onto Raw Wood
A photo transfer combines the emotional weight of a captured memory with the warmth of natural wood grain. Unlike placing a standard printed portrait into a glass frame, transferring image pigments directly into the wood pores creates a soft, weathered, fine-art appearance where the tree rings show subtly through lighter areas of the picture. Start by choosing a meaningful image from your past five years, such as an unposed wedding snapshot, a photograph from your honeymoon, or an exterior view of your first home. Print the photograph onto standard copy paper using a laser printer or dry-toner photocopier, making sure to reverse or mirror the image horizontally before printing so that text or orientation displays correctly on the wood.
To execute the transfer, brush a generous, even layer of matte acrylic gel medium across the sanded surface of a live-edge basswood round or smooth birch panel. Press the printed image face down into the wet medium, firmly smoothing out every air bubble and excess pocket of gel with a plastic scraper or old credit card from the center outward. Allow the piece to cure completely for a full twenty-four hours before wetting the back of the paper with a damp washcloth. Using light circular motions with your fingertips, gently rub away the wet paper pulp layer by layer until only the embedded ink remains on the timber. Rushing this final step can strip away the ink, so work patiently across multiple passes before sealing the transferred image with a satin clear coat.
Designing Wood-Burned Kitchen Boards and Recipe Heirlooms
Kitchen-centric gifts offer practical daily utility while preserving meaningful emotional moments. Pyrography, or the craft of decorative wood burning, allows you to permanently trace meaningful text onto durable serving pieces. One of the most cherished concepts is transferring an heirloom family recipe written in a loved one's original handwriting, an excerpt of your wedding vows, or the geographic coordinates of where you first met onto a solid maple or acacia cutting board. Because the recipient interacts with kitchen tools frequently, this project provides a consistent tactile reminder of your partnership during everyday meal preparation.
Begin by digitizing the handwriting sample or text and resizing it to balance naturally across the lower corner or handle area of the board. Using graphite transfer paper, trace the design firmly with a pencil to leave faint, accurate guidelines on the raw wood surface. With a heated wood-burning pen fitted with a universal or shading nib, follow the graphite lines using light, uniform pressure, allowing the heat rather than physical force to darken the wood fibers. A critical safety and longevity consideration involves food preparation: keep decorative wood burns restricted to serving areas or the reverse side of the board so food juices do not settle into charred grooves. Once finished, season the board thoroughly with pure food-grade mineral oil and organic beeswax rather than synthetic stains or chemical varnishes.
Building a Handcrafted Memory Box with Hidden Sentiments
A bespoke wooden keepsake box provides a dedicated sanctuary for sentimental items accumulated over five years of marriage, including plane tickets, concert stubs, handwritten notes, and dried flowers. If you possess basic joinery tools, you can build a four-sided box from cherry or walnut boards using simple mitered corners reinforced with contrasting hardwood splines for strength and visual charm. If extensive woodworking machinery is unavailable, you can purchase an unfinished, high-grade basswood or birch chest and focus your efforts on custom interior architecture, staining, hardware installation, and decorative detailing.
Elevate the interior of the box by lining the base with rich velvet, wool felt, or silk cut from an article of clothing that holds shared significance. You can install miniature brass quadrant hinges and an antiqued clasp for a refined feel, taking time to pre-drill pilot holes to prevent brittle hardwood from splitting. To incorporate an intimate element, carve, burn, or stamp a private dedication or milestone dates into the interior underside of the lid, keeping the message hidden until she opens the box. While building precise right-angle boxes demands exacting measurements and careful clamping, taking your time with alignment ensures the lid seats flush without rattling or sticking over changing seasons.
Assembling an Interactive Date-Night Token Chest
After five years of shared domestic routines, busy careers, and family logistics, deliberate date nights can sometimes fall by the wayside. A wooden date-night token box functions as both a decorative keepsake and an interactive commitment to future quality time together. The project consists of crafting a series of wooden disks, coins, or blocks, each stamped or etched with a specific activity, ranging from budget-friendly evenings at home to spontaneous weekend road trips and dining adventures. Storing these inside a personalized wooden container transforms routine planning into a playful, shared ritual.
Purchase smooth birch craft tokens or cut uniform wooden rounds from an oak dowel using a fine-tooth hand saw. Organize your ideas into distinct categories by staining the edge of each token with different natural tints or using color-coded text: quick weekday dates, creative culinary nights, outdoor daytime excursions, and celebratory escapes. Clearly write or burn specific outings on each token, such as setting up an indoor living room picnic, booking a scenic hike, or revisiting the restaurant where you celebrated your first anniversary. The primary limitation of this gift is that its real value relies entirely on your follow-through; presenting fifty tokens requires genuine willingness to schedule and honor those outings without treating them as an afterthought.
Shaping Wearable Wooden Jewelry and Delicate Accessories
Crafting wooden jewelry requires minimal workshop space while producing an intimate, portable accessory she can wear every day. Bentwood rings, sculpted hardwood pendants, and organic wooden hairpins highlight the warmth and silky tactile qualities of fine timber. A bentwood pendant or ring, crafted by steaming thin hardwood veneer strips and wrapping them tightly around a form, leverages the continuous grain of the wood, making it remarkably durable despite its delicate appearance. When polished to a high sheen, dense hardwoods like African blackwood, padauk, or figured olivewood resemble semi-precious stone while remaining lightweight and comfortable against the skin.
To shape a simple geometric pendant, cut an irregular or teardrop silhouette from a quarter-inch hardwood scrap using a jeweler's saw or coping saw. Work through progressive grits of sandpaper, beginning at 180 grit to define the edges and advancing up to 2000 grit micro-mesh pads to achieve a glass-like natural luster without heavy topcoats. Drill a clean hole using a small twist bit to accommodate a sterling silver bail or genuine leather cord. Be aware that wooden jewelry remains susceptible to water damage, harsh perfumes, and body lotions. Include a small care card advising her to remove the piece before swimming or showering, along with a tiny tin of natural finishing balm so she can replenish the luster whenever needed.
Applying Protective Finishes and Presenting the Finished Piece
The difference between an amateur weekend craft and an enduring family treasure comes down to meticulous surface preparation and finish selection. Sanding is the most critical stage: start with a coarse grit to level uneven joints, progress sequentially to medium grits, and finish with fine sandpaper along the natural direction of the wood fibers to eliminate surface swirls. Always wipe the timber clean with a microfiber tack cloth between stages to prevent stray abrasive particles from gouging the surface. For decorative and display pieces, penetrating drying oils like pure tung oil or boiled linseed oil deepen the natural color and bring out figure in the grain, while a paste wax buffed over the top adds a soft, tactile sheen.
Presentation completes the storytelling behind a handcrafted gift. Mark the underside or back of the completed piece with your initials, the fifth anniversary date, and a subtle five-tally wood burn to honor the milestone. Wrap the finished gift in natural materials that complement the organic theme, such as unbleached linen fabric, raw kraft paper, and jute twine accented with a sprig of fresh greenery or dried lavender. Accompany the item with a handwritten letter explaining why you chose to make her gift by hand, what steps were involved in bringing it to life, and your gratitude for the solid foundation you have built together across five years.
Frequently asked questions
Why is wood the traditional gift theme for the fifth wedding anniversary?
Wood represents the strength, durability, and deep roots a marriage develops after five years of shared life. Just as a young tree withstands seasonal storms by expanding its root system, a five-year marriage symbolizes resilient stability, natural growth, and an enduring foundation.
What tools do I need if I have no previous woodworking experience?
You do not need an elaborate workshop or power tools to create a meaningful fifth anniversary gift. Many compelling projects rely on basic hand tools like sand blocks, manual hand saws, inexpensive wood-burning pens, or simple craft brushes for acrylic photo transfers onto pre-surfaced craft rounds.
How do I ensure a wood-burned cutting board remains safe for food use?
Keep all pyrography burn marks localized to the serving side, perimeter borders, or handle areas so food particles do not get trapped in charred depressions. Seal the board exclusively with pure, food-grade mineral oil, walnut oil, or butcher block beeswax rather than synthetic wood stains, paints, or chemical varnishes.
Can I personalize a store-bought wooden item instead of building from raw lumber?
Yes, customizing a high-quality unfinished wooden box, bowl, or live-edge serving tray is an excellent approach for beginners. You can focus your efforts on custom pyrography, hand-rubbed oil finishes, velvet lining, upgraded brass hardware, or intricate photo transfers without needing specialized joinery equipment.
Your next step
Choose one project that naturally fits her lifestyle, gather your raw materials, and spend an afternoon practicing your sanding and detailing technique on scrap wood before crafting the final anniversary keepsake.