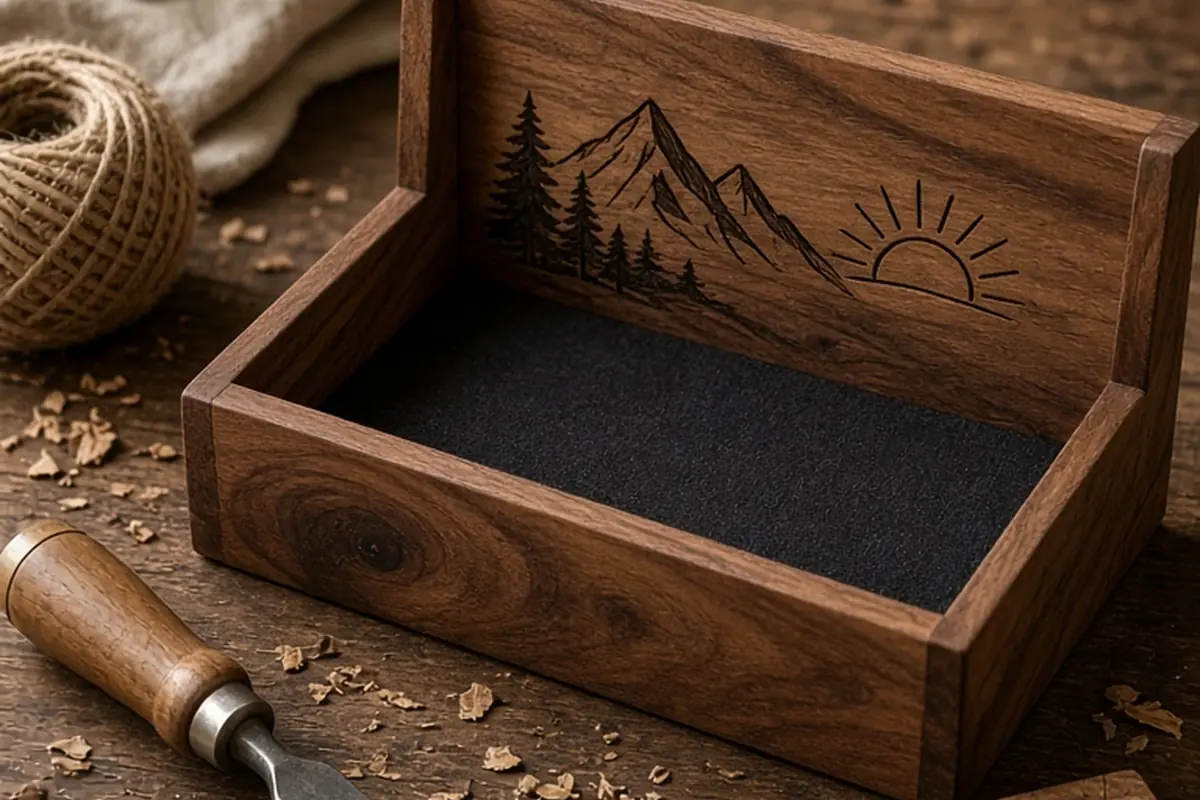
DIY 5th anniversary gifts for him honor the traditional wood anniversary milestone through thoughtful, handmade creations. Popular projects include custom wooden valet trays, engraved desk organizers, handcrafted photo panels, personalized beverage caddies, and reclaimed wood wall art. Selecting a project suited to your woodworking comfort level ensures a polished, durable gift that combines daily utility with sentimental value.
Reaching five years of marriage is a significant milestone, and the traditional gift material for this celebration is wood. Wood symbolizes deep roots, strength, enduring stability, and personal growth over time. Creating a handcrafted gift at home allows you to tailor the finished piece directly to his daily habits, tastes, and interests while building a tangible memory of your shared journey.
Understanding the Traditional Wood Theme and Selecting Materials
The fifth wedding anniversary traditionally highlights wood because a couple has established durable roots together by their fifth year. When approaching a handmade project, picking the right timber sets the foundation for both aesthetics and durability. Hardwoods such as walnut, maple, oak, and cherry offer rich natural grain patterns and superior longevity, making them ideal for items he handles daily. Softer woods like pine or cedar are easier to cut, sand, and carve if you are working with basic hand tools, though they may dent more easily over years of frequent use.
To make the material choice meaningful, consider sourcing wood with personal significance. Using salvaged timber from a past home renovation, a fallen branch from your first shared backyard, or offcuts from a local mill can imbue the raw material with a distinct story. If your access to specialized tools is limited, craft stores and lumberyards sell pre-surfaced planks with squared edges. This allows you to focus on assembly, detailing, and finishing rather than laborious initial lumber preparation. Balance the ambition of your design against your available workspace, ensuring you have adequate ventilation for sanding and sealing.
Building a Custom Wooden Valet Tray or Nightstand Dock
A wooden valet tray provides a dedicated, elegant resting spot for his everyday essentials, such as his watch, keys, wedding band, and phone. To create one, you can start with a solid hardwood board measuring roughly eight by ten inches. Use simple edge routing or attach raised perimeter trim to keep loose items from sliding off the surface. If he uses multiple electronic devices, you can measure his charging cables and carve or drill subtle pass-through channels along the back edge to create a tidy bedside docking hub.
Personalization elevates a basic tray into an anniversary keepsake. You can use wood-burning pens or precision hand gouges to etch your wedding date, his initials, or the GPS coordinates of your wedding venue onto the underside or inner corner. Line one section of the tray with genuine leather or felt to protect delicate watch crystals and metal bands from scratches. A potential trade-off with valet trays is that intricate cable cutouts can become obsolete if he changes device models, so keeping cable grooves slightly universal helps ensure longevity.
Crafting Handcrafted Coasters and Entertaining Accessories
If your partner enjoys entertaining, hosting weekend barbecues, or unwinding with a craft beverage, handmade wooden barware accessories make practical gifts. A set of four to six matching wood coasters can be crafted from cross-cut tree branches, hardwood offcuts, or geometric laminations of contrasting wood species like maple and walnut. Sand each coaster thoroughly through progressively finer grits up to 220 grit to create a silky, smooth surface that highlights the natural grain rings.
Another classic project in this category is a handheld wooden bottle caddy complete with a mounted cast-iron opener. Constructing a six-compartment caddy requires basic crosscuts, pocket hole joinery or dowels, and a sturdy wooden dowel handle. Finish the piece with water-resistant polyurethane or natural tung oil to prevent moisture rings and condensation damage. While coasters and caddies require relatively few complex tools, remember that high-moisture environments demand regular maintenance, so you may want to include a small jar of wood wax alongside the gift.
Designing Wood-Mounted Wall Art and Keepsake Photo Panels
Displaying visual memories on natural wood delivers a rustic, tactile aesthetic that traditional glass frames often lack. One accessible technique involves photo transfer to raw pine or birch plywood using acrylic gel medium. By printing a favorite wedding photo on regular laser paper, applying gel medium directly to the wood surface, smoothing the image face down, and gently washing away the paper pulp after drying, the ink permanently bonds into the wood grain. This creates a weathered, timeless portrait where the natural wood grain shows through lighter areas.
Alternatively, you can build a dimensional wood sign or multi-layered anniversary wall plaque. Cut five staggered wooden slats to represent your five years of marriage, fastening them together on the reverse side with brace strips. You can paint, stencil, or carve meaningful milestones across the slats, such as the date of your first home purchase, meaningful travel dates, or lyrics from your first dance song. Keep in mind that photo transfer techniques take some practice to avoid rubbing away fine facial details, so performing a small test run on scrap wood first is strongly recommended.
Assembling Reclaimed Wood Planters and Outdoor Enhancements
For a partner who takes pride in gardening, grilling, or outdoor relaxation, functional outdoor wooden projects blend durability with everyday utility. A desktop cedar planter box fitted with small succulents or kitchen herbs makes a lively addition to his home office or patio. Cedar and redwood are naturally resistant to rot, insects, and decay, making them the premier choices for outdoor woodworking projects without requiring harsh chemical treatments.
If you want to construct something geared toward relaxation, consider building a cedar grilling caddy or a custom cedar bench tailored to his favorite outdoor spot. When designing outdoor pieces, use stainless steel or exterior-rated coated screws to prevent unsightly rust stains over time. Ensure proper drainage holes are drilled in any planter design to protect both the timber and plant roots from standing water. While outdoor items naturally develop a silvery-gray patina over time, applying an exterior deck oil once a year will maintain the wood's original warm hue.
Essential Finishing Techniques, Safety, and Presentation Tips
The difference between an amateur craft and a cherished heirloom often lies in the quality of the finish and how the gift is presented. Proper sanding is the most crucial step in any woodworking project; skipping grit levels leaves visible swirl marks and rough patches. Work sequentially through 80, 120, 180, and 220 grit sandpaper, wiping away fine dust with a tack cloth between stages to ensure an even, professional finish.
Choose your sealant according to the intended use of the item. For decorative or desk items, Danish oil or paste wax provides a natural, low-sheen look that enhances grain contrast. For items that will see food contact, such as a carving board, use only pure food-grade mineral oil and beeswax blends. Always follow standard shop safety practices during your build process:
Wear an appropriately rated dust mask or respirator whenever sanding or using power tools to protect your lungs.
Apply finishes in a well-ventilated area away from open flames, and dispose of oil-soaked rags in a sealed, water-filled metal container to prevent spontaneous combustion.
Use safety glasses and secure hearing protection when operating power saws, drills, or routers.
Allow all sealants and topcoats to fully cure for several days prior to wrapping the gift so no lingering chemical odors remain.
- Wear an appropriately rated dust mask or respirator whenever sanding or using power tools to protect your lungs.
- Apply finishes in a well-ventilated area away from open flames, and dispose of oil-soaked rags in a sealed, water-filled metal container to prevent spontaneous combustion.
- Use safety glasses and secure hearing protection when operating power saws, drills, or routers.
- Allow all sealants and topcoats to fully cure for several days prior to wrapping the gift so no lingering chemical odors remain.
Frequently asked questions
What if I do not own advanced woodworking power tools?
You can purchase pre-cut, pre-sanded wooden craft blanks or unfinished boxes from local craft and hardware stores. Focus your creative efforts on hand carving, pyrography wood burning, image transfer, custom staining, or leather lining, which require only basic hand tools.
Which wood species is easiest for a beginner to work with?
Pine, poplar, and basswood are among the easiest woods for beginners due to their soft density and affordability. Basswood is especially well-suited for hand carving and burning, while poplar takes paint and dark stain evenly.
How far in advance should I start making a DIY 5th anniversary gift?
Begin planning and sourcing materials two to three weeks before your anniversary. This timeline gives you sufficient room to practice unfamiliar techniques on scrap wood and allows multi-coat finishes, stains, or oils to cure completely before presentation.
How do I make a wooden gift feel romantic rather than purely utilitarian?
Incorporate personal symbolism by engraving your wedding vows, wedding coordinates, or initials in a discreet spot like the underside of the base. Pairing the functional item with a handwritten letter explaining why you chose that specific project adds genuine emotional warmth.
Your next step
Choose one project that matches your current tool setup and his everyday routine, gather your materials this weekend, and take your time sanding and finishing the wood to produce a gift he will treasure for years to come.