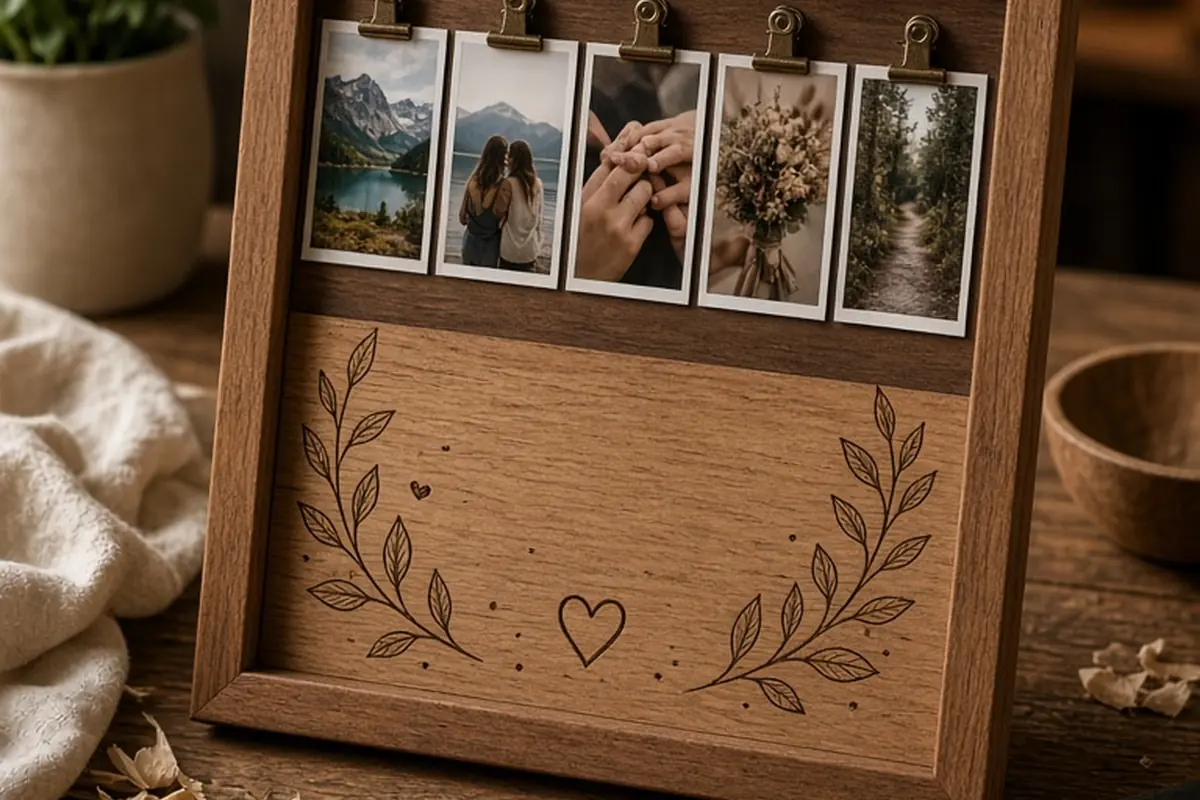
Meaningful DIY fifth anniversary gifts for your wife often celebrate the traditional wood milestone or your shared five-year journey. Practical options include handcrafted wooden photo displays, customized memory keepsake boxes, handwritten reflection letters bound in wood, or carved date-night tokens. Choosing a project suited to your real skill level ensures a polished, durable gift that demonstrates sincere effort without unnecessary frustration.
Reaching five years of marriage is a distinct milestone that honors resilience, deepening trust, and shared history. Making a gift by hand allows you to personalize that story directly, offering your wife a tangible reminder of your commitment that store-bought items rarely match.
Understanding the Traditional Wood Theme and Sentimental Value
The fifth wedding anniversary is traditionally associated with wood, a material chosen across cultures to symbolize strength, deep roots, and long-term durability. By the five-year mark, a marriage has typically moved past initial adjustments into a grounded, stable rhythm. Choosing to work with wood or incorporate botanical and organic elements directly reflects the time you have spent establishing a shared home and enduring life transitions together.
While wood is the customary material, the primary value of any do-it-yourself gift lies in personal relevance rather than strict historical adherence. If woodworking does not align with your wife's tastes or your resources, you can interpret the theme metaphorically through framed family trees, preserved botanical art, or paper keepsakes encased in wooden frames. The goal is to create something that feels intentional and reflective of her individuality, rather than forcing a project that feels disconnected from who she is.
Creating a Handcrafted Wooden Photo Display
A photo display crafted from quality timber offers a clean, elegant way to highlight your favorite memories together. You can start with a solid piece of hardwood, such as walnut, cherry, or oak, sanded down to a smooth grain. By installing subtle brass clips, recessed grooves, or routed channels along the top edge, you create a versatile display that allows your wife to rotate printed photographs from your wedding, travels, or daily life over time.
For a more customized touch, consider photo transfer techniques where an image is applied directly onto the wood surface using gel medium. This creates a rustic, slightly weathered look where the wood grain shows through the highlights of the picture. The trade-off with image transfers is that they require practice on scrap wood first to avoid tearing the paper during the removal phase. If time is limited, mounting a high-resolution archival print to a carefully beveled wooden plaque with an invisible hanging bracket delivers a refined, contemporary aesthetic with far less margin for error.
Designing a Custom Five-Year Memory Keepsake Box
A dedicated keepsake box serves as a secure, beautiful space to store mementos from your first five years, such as concert tickets, handwritten notes, travel boarding passes, and wedding artifacts. You do not need an extensive workshop to achieve a professional result; you can purchase an unfinished, high-grade wooden box and focus your efforts on custom joinery, custom staining, hardware upgrades, and interior personalization.
Begin by selecting an oil-based or water-based stain that matches your home decor, applying multiple light coats followed by a protective wax or polyurethane seal. Line the interior with self-adhesive velvet or linen fabric to protect fragile items and provide a luxurious tactile feel. You can personalize the lid with pyrography (wood burning) to etch your anniversary date, wedding coordinates, or a shared phrase. A practical limitation to keep in mind is internal volume: ensure the box is deep enough to store meaningful items without crowding them, balancing shelf footprint with everyday utility.
Crafting Interactive Wooden Date-Night Tokens
Long-term relationships thrive on intentional quality time, making interactive gifts both romantic and functional. A set of handcrafted wooden date-night tokens provides an ongoing system for spontaneous, shared experiences throughout the coming year. You can purchase pre-cut wooden discs or slice small rounds from a fallen branch, sanding each piece smooth before labeling them.
Use a fine-tip wood-burning pen or archival ink to write distinct date activities on each token, dividing them into categories like quiet evenings at home, outdoor adventures, cultural outings, or spontaneous weekend road trips. Present the finished tokens in a hand-stamped canvas pouch or a small turned-wood jar. The primary challenge with this gift is follow-through; an interactive gift only retains its value if you actively honor the tokens and participate enthusiastically when your wife draws one from the container.
Binding a Wooden-Covered Five-Year Reflection Book
A personalized book or journal combining thin wood veneer covers with heavy cotton paper offers a striking balance between craftsmanship and emotional depth. You can cut two matching pieces of thin birch plywood, drill corresponding binding holes along the spine, and hand-bind the pages using leather cord or waxed linen thread. Sand the edges until completely smooth and treat the wood with natural beeswax to highlight the organic grain.
Inside the book, you can write five distinct letters—one dedicated to each year of your marriage. Focus on specific challenges you overcame as a team, overlooked everyday moments that built your trust, and the qualities in her that you have come to respect more deeply over time. Avoid generic praise in favor of concrete observations. This project requires minimal complex tooling but demands substantial emotional clarity and honest reflection, making it one of the most lasting gifts you can offer.
Matching the Project to Your Toolset and Timeline
A common pitfall in DIY gift-making is selecting an overly complex project that leads to rushed work and elevated stress as the anniversary approaches. Honest assessment of your tools, workspace, and free time is critical. Projects involving multi-stage curing, such as epoxy resin pours or oil polyurethane coats, require several days of drying and sanding time that cannot be compressed into a single afternoon.
If you have limited tools, emphasize projects that rely on assembly, fine finishing, and written sentiment rather than heavy joinery or structural building. Prioritize safety by working in ventilated areas when using stains or adhesives, wearing appropriate eye protection, and testing finishes on hidden areas or scrap pieces. Giving yourself a realistic two-week buffer ensures that unexpected mistakes can be corrected smoothly without compromising the quality of the final piece.
Illustrative Scenarios
Scaling Down Ambition for Higher Craftsmanship
Julian wanted to build a solid walnut floating nightstand for his wife for their fifth anniversary. With only three days before the date and limited woodworking equipment, he realized the complex joinery would result in an unstable, rushed build. Instead of abandoning the DIY approach, Julian adjusted his plan and purchased a thick, pre-dimensioned slab of olive wood. He spent two evenings carefully shaping the live edge, sanding it through multiple fine grits, and applying a food-safe mineral oil finish to create an elegant serving board engraved with their wedding coordinates. His wife loved the polished quality and practical elegance of the board.
Key point: Refining your scope to match your real tools and timeframe produces a far better result than rushing a complicated build.
Choosing Emotional Depth over Elaborate Tools
Sam felt intimidated by power tools and worried that any project he made would look amateurish compared to professional home goods. Rather than attempting a complex build, he bought a simple unfinished wooden photo box. He stained the exterior to match their bedroom furniture and lined the interior with emerald velvet. Inside, he placed five handwritten letters detailing a specific way his respect and appreciation for his wife had grown during each year of marriage, along with five printed photos. When she opened the box, the depth and specificity of the letters mattered far more than complex carpentry.
Key point: Sincere, detailed vulnerability combined with neat finishing consistently outshines elaborate technical construction.
Frequently asked questions
What if I do not own any woodworking tools?
You can focus on projects that use pre-cut wooden blanks, unfinished wooden boxes, or wooden frames that only require sanding, staining, and interior assembly. Alternatively, combining wood-burning pens with pre-sanded wooden rounds creates personalized items with minimal upfront equipment.
How far in advance should I start a DIY anniversary gift?
Starting two to three weeks in advance is ideal for most beginner and intermediate projects. This timeline accounts for material delivery, practice runs on scrap wood, and essential drying or curing times for stains, glues, and clear finishes.
Is it appropriate to pair a DIY gift with a store-bought item?
Yes, pairing a handmade keepsake with a complementary store-bought item works very well. For example, a custom wooden keepsake box can hold a piece of fine jewelry, or a handcrafted wooden serving board can accompany ingredients for a special anniversary dinner.
What is the easiest protective finish for a wooden DIY gift?
A natural paste wax or a wipe-on oil finish, such as Danish oil or mineral oil, is generally the easiest option for beginners. These finishes apply smoothly with a lint-free cloth, dry relatively quickly, and rarely show brush marks or bubbles.
Your next step
Assess your current workspace, pick one project that matches your real skill level, and schedule your material purchases this week so you have plenty of time for finishing and curing.