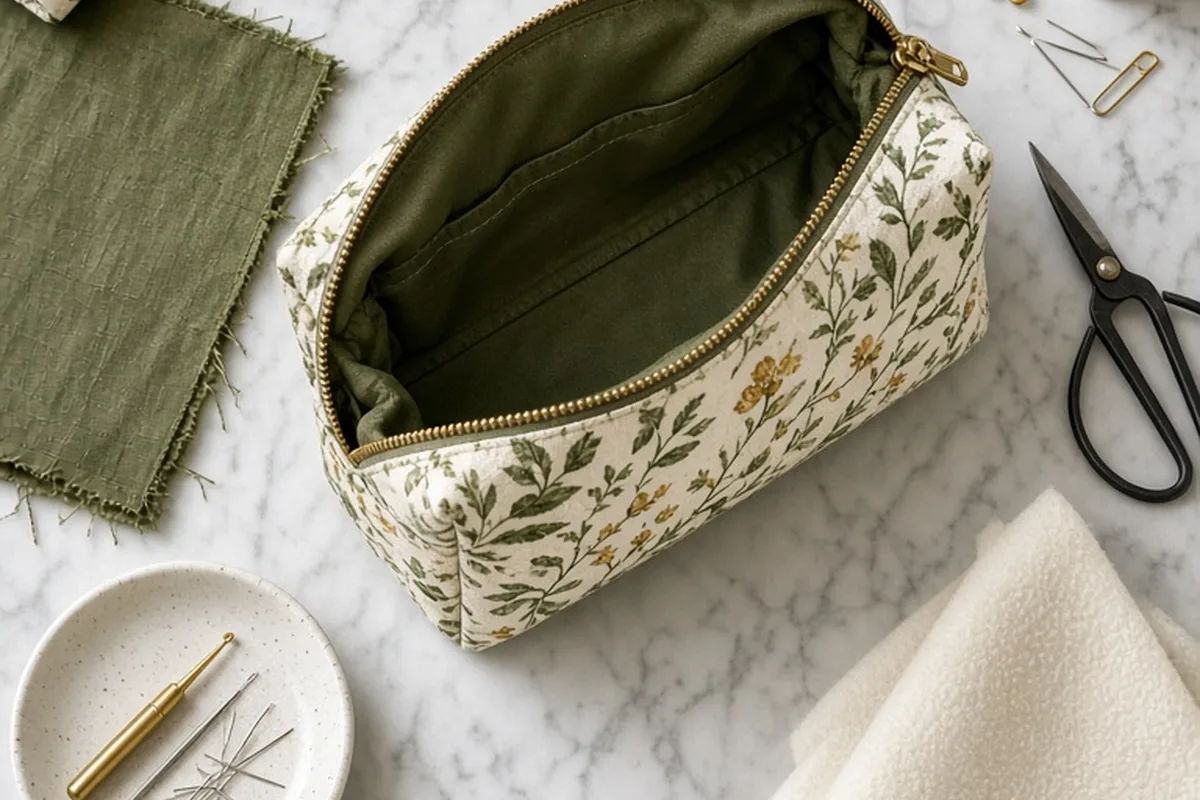
To make a makeup pouch, cut two outer fabric rectangles, two lining rectangles, and two pieces of fusible fleece to your desired dimensions, such as nine by six inches. Sandwich a closed zipper face down between one outer piece and one lining piece, stitch along the edge with a zipper foot, repeat on the opposite side, sew around the perimeter while leaving a turning gap in the lining, box the bottom corners, and turn right-side out.
Crafting your own cosmetics bag allows you to tailor both the dimensions and the interior structure to the specific beauty tools you carry daily, from compact powders to travel-sized brushes. With basic sewing supplies and an hour of focused construction, you can create a durable organizer suited to your personal routine.
Selecting the Right Exterior Fabric and Water-Resistant Lining
When planning a homemade makeup pouch, fabric choice determines both aesthetic appeal and practical longevity. Exterior fabrics must withstand daily friction inside handbags, travel totes, and frequent handling on moist bathroom counters. Mid-weight quilting cotton offers thousands of print choices and presses crisply, making it one of the most forgiving materials for beginner bagmakers. However, unreinforced cotton lacks natural structure and can show premature abrasion around the bottom edges over time. Medium-weight cotton canvas, linen blends, and denim provide natural stiffness and greater durability, creating a structured bag that holds its shape even when only partially filled. If you opt for heavier textiles like upholstery jacquard, corduroy, or faux leather, remember that multiple folded layers can strain domestic sewing machine motors and create bulky seam intersections that are difficult to press flat.
Lining selection requires equal practical care because cosmetic containers frequently leak liquid foundation, pressed pigments shatter under pressure, and lipsticks can lose their protective caps. Using standard untreated quilting cotton inside your pouch makes it vulnerable to permanent stains and liquid seepage that can ruin the exterior fabric. A practical alternative is waterproof canvas, lightweight ripstop nylon, or laminated polyurethane laminate fabric, all of which allow you to wipe away makeup spills using a damp microfiber cloth and mild soap. If you prefer using patterned cotton for the interior, you can bond a layer of clear iron-on gloss or matte vinyl to the right side of the fabric before cutting your pattern pieces. While laminated interiors simplify routine cleaning, they cannot withstand direct high-heat iron contact later during assembly, requiring low heat settings and protective pressing cloths.
Gathering Essential Tools, Zipper Types, and Interfacing
Assembling the proper tools and sewing hardware before beginning prevents mid-project frustration and crooked seamlines. A standard domestic sewing machine equipped with a universal size 80/12 or 90/14 needle handles most lightweight to medium-weight woven fabrics with ease. If you decide on heavier canvas or water-resistant synthetic linings, switching to a dedicated microtex or denim needle prevents skipped stitches and puckering. A zipper foot is indispensable for this project because it allows the machine needle to stitch closely alongside the raised zipper teeth without forcing the presser foot to ride unevenly over the coils. For closures, nylon coil zippers—such as standard size three or size five varieties—are far more forgiving than metal-tooth zippers. Nylon coils can be trimmed cleanly with ordinary shears and safely stitched over without breaking machine needles, eliminating the tedious need to pull teeth with pliers.
Stabilizing materials, collectively referred to as interfacing, transform limp fabric rectangles into a freestanding, resilient cosmetics pouch. Fusible fleece, such as Pellon 987F, adds a soft, padded layer between the exterior shell and the lining, providing vital shock absorption that cushions glass foundation bottles, ceramic compacts, and delicate pressed powders against everyday bumps. For an organizer with crisp lines and firmer walls, woven fusible interfacing like Pellon Shape-Flex SF101 reinforces fabric grain without adding spongy bulk. Many experienced makers combine both materials, adhering woven interfacing to the exterior cotton to stabilize the weave and fusing fleece to the lining panels for interior padding. The primary drawback of thick stabilizers is excess bulk along the perimeter seams; trimming the fusible fleece out of the quarter-inch seam allowances before stitching helps your sewing machine glide over multi-layered seams effortlessly.
Cutting Pattern Pieces and Prepping the Fabric Sandwich
Accurate cutting is essential for producing a balanced, symmetrical makeup pouch that zips open and closed without pulling or twisting. A versatile, beginner-friendly cut size is nine inches wide by six and a half inches tall, which yields a finished pouch measuring roughly eight inches wide, five inches tall, and two inches deep. Using an acrylic quilting ruler, a self-healing cutting mat, and a fresh rotary cutter guarantees clean ninety-degree corners that align precisely during pin-up. You will need two exterior fabric rectangles, two lining rectangles, and two matching pieces of fusible interfacing. If your selected fabric features a directional print—such as upright botanicals, animal illustrations, or vertical stripes—verify that the motif runs vertically along the six-and-a-half-inch measurement before making your cuts so the pattern does not appear sideways on your finished accessory.
After cutting your components, prepare the fabric sandwich by fusing the interfacing to the wrong side of the exterior panels using a dry iron according to the manufacturer's directions. Press firmly downward in overlapping sections rather than gliding the iron back and forth, which can stretch the heated fabric fibers out of square. If you want to include personal functional touches, such as an external slip pocket or a side grab tab made from folded cotton webbing, baste these pieces onto the right side of the exterior panel now within the seam allowance. Constructing fabric zipper tabs at both ends of your zipper tape is another helpful preparatory technique; encasing the cut zipper ends inside folded fabric squares prevents pinched, sunken corners and creates a clean, professional profile when the finished pouch is turned right-side out.
Stitching the Zipper and Topstitching for Clean Edges
Attaching the zipper can feel intimidating for beginners, but following a consistent layering order makes the process straightforward. Place one exterior fabric panel right side facing upward on your cutting table. Lay your zipper face down along the top nine-inch raw edge, centering it so that equal amounts of excess tape extend past both fabric sides. Next, lay one lining rectangle right side facing down directly over the zipper, aligning all three top raw edges and sandwiching the zipper tape between the two fabrics. Secure the layers with sewing clips or fine pins, mount your zipper foot, and stitch along the top edge using a quarter-inch seam allowance. When your presser foot nears the bulky zipper slider, stop with the needle down, raise the presser foot, carefully slide the pull backward past the needle, lower the foot, and continue stitching smoothly to the end.
Repeat this identical sandwiching process on the opposite side of the zipper tape with your remaining exterior and lining panels, double-checking that directional motifs match in orientation. Once both sides are stitched, fold both the exterior and lining fabrics away from the zipper coils so the wrong sides meet and the zipper teeth remain fully exposed. Finger-press the fabric folds firmly away from the coils, followed by a gentle press with an iron on a low synthetic setting, taking care not to touch nylon coils directly with hot metal. Topstitch one-eighth of an inch away from the fold through both the exterior and lining layers on each side of the zipper. This topstitching creates an attractive tailored finish while serving a critical mechanical function: it permanently locks the lining fabric down, preventing it from catching and jamming in the zipper pull during daily use.
Constructing the Body and Boxing Corners for Depth
Once topstitching is complete, you will transition the flat assembly into a three-dimensional container. The single most crucial step before pinning the perimeter is unzipping the zipper at least halfway across the pouch; omitting this step seals the pouch completely from the inside, making it impossible to invert without cutting stitches. Next, rearrange your fabric layers so the two exterior panels are pinned right sides together on one side of the zipper, and the two lining panels are pinned right sides together on the opposite side. Fold the zipper seam allowances toward the lining side and clip the outer perimeter thoroughly. Stitch around the entire outside edge with a three-eighths-inch seam allowance, leaving a gap roughly three to four inches wide unstitched along the bottom edge of the lining to serve as an inversion opening.
To give your pouch a flat base that rests securely on a vanity without tipping over, you need to box the bottom corners. While the pouch remains inside out, measure and cut a one-and-a-quarter-inch square from each of the two bottom exterior corners and two bottom lining corners, measuring inward from the stitched seams rather than the raw edge. Next, pull the front and back fabric layers apart at one corner cut-out, flattening the fabric so the bottom seam aligns directly over the side seam to form a straight line. Pin this newly aligned seam flat and stitch across the raw edge with a three-eighths-inch seam allowance, backstitching firmly at both ends to reinforce against pressure. Repeat this boxing technique on all four cut corners to create a balanced, structural base that accommodates bulkier cosmetics with ease.
Inverting, Closing the Lining, and Maintaining Your Pouch
With all perimeter seams and boxed corners secured, reach your hand through the gap left in the bottom lining, find the zipper opening, and gently draw the entire outer bag through the opening. Work patiently during inversion to avoid placing sudden strain on the delicate seam intersections adjacent to the zipper ends. Once the exterior emerges, use a smooth wooden point turner, a chopstick, or the dull end of a knitting needle to push out each boxed corner and zipper tab fully, avoiding pointed metal tools that could pierce the fabric. Reach into the lining opening, press the raw edges inward by three-eighths of an inch to match the surrounding seamline, and clip the fold closed. You can close this opening quickly by running a straight topstitch one-sixteenth of an inch from the folded edge, or stitch it invisibly by hand using a ladder stitch.
Push the finished lining into the interior of the exterior shell, smoothing the bottom corners into place with your fingertips, and apply a light burst of steam to the outer fabric to relax any turning creases. Long-term care and maintenance depend largely on the specific materials used during construction. Pouches made entirely from untreated cotton and washable fleece can be laundered safely on a gentle cycle inside a mesh garment bag and reshaped to air dry. Conversely, if your pouch incorporates water-resistant vinyl laminates, coated ripstop nylon, or rigid board interfacings, machine washing can cause permanent bubbling and structural breakdown. For these hybrid organizers, spot clean the exterior with a damp cloth and mild laundry soap, and wipe the interior lining periodically with a gentle makeup wipe to keep the pouch hygienic and visually pristine.
Frequently asked questions
What is the best zipper size for a beginner makeup pouch?
A nylon coil zipper in size three or size five is ideal for beginners because it is flexible and soft. Unlike metal zippers, nylon coils can be trimmed with standard craft scissors and sewn over safely without snapping machine needles.
How do I keep makeup leaks from ruining the fabric pouch?
Using a water-resistant lining material like ripstop nylon or laminated cotton creates an effective barrier against leaks. Alternatively, you can fuse a clear iron-on vinyl film to standard cotton before sewing to make the interior wipeable.
Why is my zipper wavy after sewing it to the pouch?
A wavy zipper usually happens when the fabric or zipper tape is pulled unevenly under the presser foot during stitching. Using sewing clips instead of pins and avoiding pulling the material while stitching helps keep the seam completely flat.
Can I make this makeup pouch without a sewing machine?
You can assemble this pouch entirely by hand using a sturdy backstitch for the main seams and zipper tape. While hand sewing takes more time, using durable polyester thread will yield a resilient pouch that holds up well to daily use.
Your next step
Select your exterior and lining fabrics, measure and cut your panels to nine by six and a half inches, and test your zipper foot on scrap fabric before beginning construction.