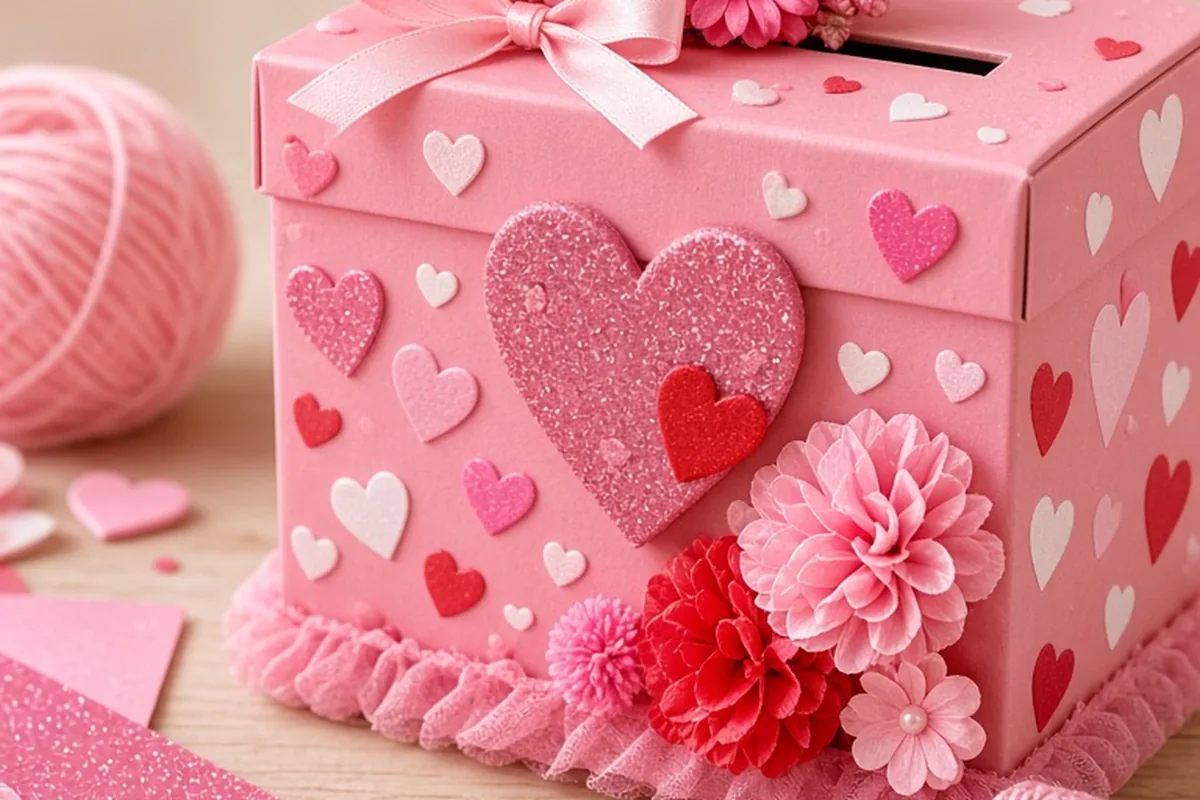
Valentine boxes for girls refer to both handmade classroom mailboxes used for card exchanges and curated holiday gift boxes filled with seasonal items. The most practical approach starts with identifying her favorite interests—such as animals, sports, or creative arts—and using durable base containers like shoe boxes or photo storage bins that keep their shape during transport.
Whether preparing for an elementary school exchange or assembling a holiday care package at home, creating a personalized box makes the celebration special. Balancing structural durability with creative design ensures the finished box looks attractive, protects its contents, and survives handling throughout the school day or celebration.
Understanding Classroom Mailboxes and Curated Gift Boxes
The term Valentine box describes two distinct projects that serve different practical purposes. Classroom card mailboxes are functional containers designed for school parties where peers deposit greeting cards and small treats. These boxes require an accessible mail slot, a secure base that fits standard school desks, and an easy opening mechanism so the child can retrieve cards at home without ripping the exterior artwork.
In contrast, curated gift boxes serve as presentation packages for holiday gifts given by parents, family members, or friends. These boxes do not need card slots; instead, they focus on aesthetic arrangement, interior lining, and packaging items like books, apparel, art supplies, and confections. Identifying which type of box you need determines your choice of container, decorating supplies, and overall construction strategy.
Popular DIY Themes for Classroom Card Collection
Successful DIY classroom boxes reflect the recipient's genuine interests rather than generic holiday symbols. Animal themes remain popular because basic box shapes easily convert into puppies, cats, unicorns, or woodland creatures using cardstock ears, yarn tails, and felt facial features. Hobby-inspired themes—such as miniature soccer goals, art studio paint boxes, music stages, or science laboratory kits—provide distinct personality and stand out on classroom desks.
Interactive designs add an engaging tactile element for classmates during card delivery. For example, a mailbox shaped like a retro payphone, a gumball machine with a turning knob, or a castle with a lowering drawbridge turns simple card delivery into a fun activity. When constructing interactive elements, ensure the main entry slot remains clear and unobstructed so standard and oversized greeting cards drop through smoothly.
- Animal and mythical creature designs built with felt ears, faux fur accents, and paper features.
- Hobby themes representing athletics, painting, music, gaming, or favorite storybook characters.
- Interactive concepts featuring moving flaps, mailbox flags, or gravity-fed drop chutes.
- Classic postal mailboxes constructed from cylindrical oatmeal containers or curved poster board.
Selecting Durable Base Materials and Craft Supplies
The structural foundation of a DIY Valentine box determines whether it holds up through transport and busy classroom parties. Thin cereal boxes often buckle when layered with heavy paint or glued objects. A corrugated cardboard shoe box, shipping box, or rigid photo storage box provides the necessary rigidity. Taping the interior seams with duct tape or packing tape reinforces corners against accidental crushing during the morning commute.
Selecting the right adhesives and surface coatings prevents last-minute repairs. Standard glue sticks work well for securing lightweight paper to cardboard, but dimensional accessories like plastic figurines, wooden craft sticks, or heavy ribbons require low-temperature hot glue or double-sided foam mounting tape. If applying acrylic paint to bare cardboard, coat the box with white primer or gesso first to prevent warping and ensure vibrant, opaque color coverage.
Curating a Themed Valentine Gift Box for Home
Assembling a personalized gift box at home allows for a practical mix of lifestyle accessories, creative supplies, and seasonal treats. Instead of relying solely on conventional sugar candies, focus on items that support her hobbies and daily routines. A well-balanced curation might include a new reading book, scented lip balms, plush lounge socks, gel pens, and a small specialty chocolate treat arranged within a reusable decorative container.
Presentation makes a significant difference in the final unboxing experience. Layer the bottom of the container with crinkle-cut paper or folded fabric to elevate smaller items and prevent them from shifting. Position taller items like books or water bottles at the rear of the box, placing smaller accessories and personal notes toward the front. Using a decorative wire basket or fabric storage bin as the container allows the box to serve as ongoing bedroom organization long after the holiday.
Age-Appropriate Design Considerations
A child's developmental stage influences both the assembly process and the box's functional requirements. For toddlers and preschoolers, boxes require wide card openings to accommodate developing motor skills. Decorations should rely on large, non-choking components securely glued to the surface. Engaging young children by letting them stamp paint, apply large stickers, or press precut shapes onto the box fosters participation without causing frustration.
Older children and teenagers have distinct preferences that lean toward autonomy or lifestyle curation. Upper elementary students often enjoy executing intricate, multi-step DIY projects independently with minimal adult guidance. For pre-teens and teenagers, classroom mailboxes are typically replaced by aesthetic care packages containing skincare products, cozy room decor, stationery, or gift cards presented in a clean, minimalist gift box.
- Toddlers and Preschoolers: Focus on large drop openings, bright colors, tactile felt, and secure sticker placement.
- Early Elementary: Combine simple box geometry with recognizable animal, nature, or character themes.
- Upper Elementary: Support independent crafting featuring complex structures, diorama scenes, or moving parts.
- Teens and Young Adults: Assemble curated lifestyle packages focusing on self-care, accessories, and cozy room items.
Budget-Friendly Approaches and Upcycling
Creating an impressive Valentine box does not require purchasing expensive specialty kits or premium storage boxes. Common household recyclables—such as tissue boxes with built-in top openings, cardboard egg cartons, paper towel tubes, and beverage cartons—can be reconfigured into castles, vehicle bodies, or robot limbs with minimal effort. Reversing leftover holiday wrapping paper provides clean white kraft paper ready for custom markers, paints, and stamps.
Fabric scrap bins and thrift store craft sections offer low-cost materials for adding texture and visual depth. Remnants of lace, burlap, yarn, and mismatched buttons turn plain cardboard into textured surfaces without the expense of full retail fabric bolts. Focusing on crisp structural folds, clean tape lines, and consistent color palettes elevates simple upcycled materials into polished finished projects.
Step-by-Step Construction for Classroom Mailboxes
Following an orderly assembly sequence prevents structural issues, such as accidentally covering a pre-cut mail slot or struggling to cut cardboard after decorating. Begin by deciding whether the lid should lift off or stay permanently taped shut. If the lid is permanently sealed, plan an access door on the side or rear. Next, measure and cut the mail entry slot with a utility knife, aiming for a slot that is at least one inch wide and six inches long to fit various card dimensions.
Cover the box with wrapping paper, cardstock, or paint once structural openings are established. When wrapping over the mail slot, slice through the paper along the opening and fold the raw edges inside, securing them with clear tape for a clean, snag-free edge. Finally, attach structural thematic elements from the base upward, securing heavy items with hot glue and adding the recipient's name clearly on the front or top for classroom identification.
- Step 1: Choose a sturdy container and establish whether access will be through a removable lid or a rear flap.
- Step 2: Measure and cut a generous card slot using a utility knife on a protective mat.
- Step 3: Cover the box smoothly with paper or paint, ensuring all exterior faces are evenly coated.
- Step 4: Neatly fold and tape paper edges into the mail slot to prevent cards from catching on raw cardboard.
- Step 5: Adhere large thematic features like ears, wheels, or signs using low-temperature hot glue.
- Step 6: Display the child's name prominently on the exterior to avoid mix-ups during the classroom exchange.
Managing Transportation and Durability Challenges
Transporting a finished Valentine box to school presents practical risks, especially if the child rides a school bus or walks in windy, wet weather. Delicate protruding features like paper antennas, tall cardboard towers, or extended wings can easily bend or break off during transit. Designing tall or wide components to be detachable using adhesive hook-and-loop dots allows them to travel flat inside a backpack and attach quickly upon arrival.
Weight distribution is another common point of failure. Tall or narrow boxes can become top-heavy and tip over once loaded with cards, candy, and party favors. To prevent tipping, secure a wider cardboard baseplate underneath the main box or add a small weight, such as a smooth flat stone taped securely into a bottom corner, to lower the center of gravity and keep the box upright on a crowded desk.
Frequently asked questions
What size should the mail slot be on a classroom Valentine box?
A standard mail slot should measure roughly one inch wide by six inches long. This size accommodates standard envelopes, homemade folded paper cards, and cards packaged with small novelty toys or candies without tearing the opening.
What glue works best for building cardboard Valentine boxes?
Low-temperature hot glue provides the strongest and quickest bond for structural parts, cardboard joints, and fabric trims. For attaching flat paper wrap to the cardboard base, standard glue sticks or double-sided craft tape offer smooth adhesion without wrinkling the paper.
How can I prevent a painted cardboard box from warping?
Cardboard warps when it absorbs excessive moisture from water-based paints. Applying a thin coat of white acrylic gesso or primer first creates a moisture barrier that helps subsequent layers of acrylic craft paint dry evenly and smoothly.
When is the best time to start making a classroom Valentine box?
Starting five to seven days before the school exchange allows ample time for paint and adhesives to cure completely between assembly steps. This timeline also leaves room to adjust dimensions or repair any parts without last-minute rush before the party.
Your next step
Determine whether you need a slotted classroom mailbox or a curated gift container, gather a sturdy cardboard base, cut your access openings first, and finish with durable personalized decorations that match her favorite interests.