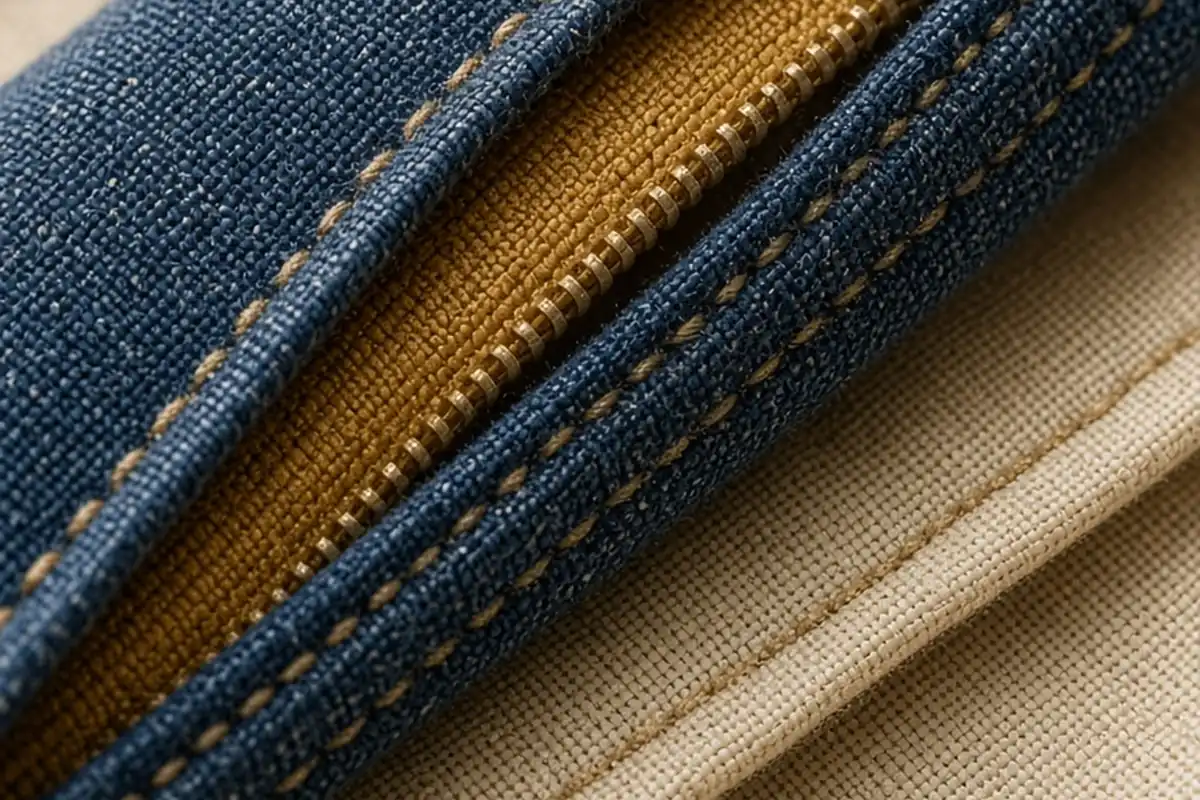
To sew a basic lined cosmetic bag, cut two outer fabric rectangles, two lining rectangles, and two pieces of fusible interfacing to your desired dimensions. Fuse the interfacing to the outer panels, sandwich the zipper right-sides-together between the outer and lining layers on both sides, topstitch the seams, sew around the perimeter while leaving an opening in the lining, box the bottom corners, and turn the pouch right-side out.
A handmade cosmetic bag offers practical storage tailored to the exact dimensions of your daily essentials, makeup brushes, or travel toiletries. By mastering a few core sewing techniques, including installing a zipper tape cleanly and boxing corners for structural depth, you can construct a durable, washable pouch in an afternoon.
Selecting Fabrics and Stabilizers for Durability
Choosing the right exterior and lining textiles determines how well your cosmetic bag holds its shape and withstands frequent handling. Medium-to-heavyweight fabrics like cotton canvas, linen blends, and quilting cotton work exceptionally well for the bag exterior because they provide visual interest and handle tension well under a sewing machine presser foot. For the interior lining, tightly woven quilting cotton is breathable and easy to press, while water-resistant options such as ripstop nylon, laminated cotton, or procare fabric offer wipeable surfaces that protect against spilled lotions and powders.
To prevent a soft pouch from collapsing into an unstructured puddle when placed on a bathroom vanity, pairing your exterior fabric with the right interfacing is essential. Fusible fleece adds a soft, padded structure that protects delicate cosmetic compacts, whereas medium-weight fusible woven interfacing (such as Pellon SF101) gives crisp stability without excessive bulk. If you choose a heavy canvas outer fabric, a lighter woven interfacing prevents the seams from becoming too thick for standard home sewing machines to penetrate cleanly, maintaining smooth feed dog movement throughout assembly.
Measuring, Cutting, and Applying Interfacing
Precise cutting lays the foundation for square corners, aligned zipper ends, and balanced side seams. For a standard everyday cosmetic pouch that accommodates lipsticks, travel bottles, and small palettes, cut two outer fabric pieces measuring 9 inches wide by 6 inches tall, two lining fabric pieces of the exact same dimensions, and two matching pieces of fusible interfacing. Using an acrylic quilting ruler, a self-healing cutting mat, and a rotary cutter ensures every edge is cut precisely at ninety-degree angles, preventing twisted seams during assembly.
Once your pieces are cut, trim approximately one-quarter inch of interfacing away from all four outer edges of each interfacing rectangle. Trimming this slight border reduces bulk in your seam allowances, which allows your finished bag corners to poke out cleanly rather than bunching up inside. Place the adhesive, textured side of the interfacing against the wrong side of your exterior fabric panels, cover with a damp pressing cloth or use dry heat according to manufacturer directions, and press down firmly with an iron for ten to fifteen seconds per section without sliding the iron across the fabric.
Preparing and Installing the Zipper Sandwich
Installing a zipper can intimidate beginners, but the sandwich method eliminates exposed raw edges and guarantees a professional finish. A standard number three or number five nylon coil zipper measuring at least nine inches in length is ideal for cosmetic bags because nylon teeth can be safely sewn across without breaking sewing machine needles. Avoid metal zippers for your first few projects, as accidentally striking a metal tooth can bend your needle, damage the bobbin case, or disrupt machine timing.
To assemble the first side of the zipper sandwich, place one outer fabric rectangle right-side facing up on your work table. Lay the zipper face-down along the top raw edge so the right side of the zipper tape meets the right side of the exterior fabric, aligning the top edges flush. Next, place one lining fabric rectangle right-side facing down on top of the zipper, creating a sandwich where the zipper is trapped between the two fabric layers. Pin or clip the layers together securely along the top edge, install your sewing machine zipper foot, and stitch along the edge using a one-quarter-inch seam allowance from end to end.
Topstitching the Zipper for Jam-Free Movement
Topstitching around the zipper is not merely a decorative detail; it serves a crucial functional purpose by anchoring the fabric away from the zipper track. After sewing both outer and lining panels to the first side of the zipper tape, flip both fabrics away from the zipper teeth so the wrong sides touch and the right sides face out. Press the fabric folds firmly away from the zipper using an iron, taking care not to touch nylon zipper coils directly with high heat to prevent accidental melting.
Repeat the sandwiching and stitching process for the second side of the zipper using the remaining outer and lining panels. Once both sides are attached, press the second side flat and sew a neat line of topstitching along both sides of the zipper tape, roughly one-eighth of an inch from the fabric fold. Increase your stitch length slightly from 2.5 millimeters to 2.8 or 3.0 millimeters for a clean, elongated topstitch appearance. This step ensures that the lining never bunches up and catches in the zipper pull when you open and close the bag during daily use.
Sewing the Perimeter and Leaving a Turning Gap
Before pinning the perimeter together, there is one non-negotiable step: unzip the zipper at least halfway. If the zipper remains fully closed when you sew around the perimeter, you will lock yourself out of the bag and have no way to turn the project right-side out without seam ripping your work. Once the zipper is partially opened, separate the fabrics so the two outer panels face each other right-sides-together, and the two lining panels face each other right-sides-together.
Align the perimeter edges, paying close attention to the points where the outer fabric and lining meet at the zipper junction. Pinch the seam allowances toward the lining side and secure the perimeter with sewing clips or pins. Sew around the entire perimeter using a half-inch seam allowance, beginning along the bottom edge of the lining. Leave a three-to-four-inch opening along the bottom edge of the lining for turning, backstitching securely at the start and stop points so the seams do not unravel under tension when the bag is turned.
Boxing the Corners for Stand-Up Volume
A flat pouch works well for pencils or sheet masks, but boxing the bottom corners transforms a flat envelope into a three-dimensional bag that stands upright on flat surfaces. To create boxed corners, use a clear ruler and tailor chalk to mark a square measuring one and a quarter inches from each bottom corner of both the outer fabric shell and the lining. Measure this distance from the stitched seam lines rather than the raw edges to ensure equal depth on all four corners.
Cut out the marked squares through all fabric layers using sharp fabric shears. Next, take one corner, open the fabric, and pull the front and back seams away from each other until the side seam and bottom seam align directly on top of one another, forming a straight line across the opening. Pin the flattened opening securely, matching the seam intersections perfectly, and sew straight across using a half-inch seam allowance. Repeat this alignment and stitching process on all four cut corners (two on the outer bag and two on the lining) to establish uniform base volume.
Turning, Closing the Lining, and Final Pressing
With all perimeter seams and boxed corners secured, reach your hand through the gap left in the lining, grasp the outer fabric at the farthest corner, and gently pull the entire bag right-side out through the opening. Take your time working the bulky outer layers through the gap to avoid tearing the backstitches at the seam edges. Once the bag is right-side out, use a bamboo point turner or a dull wooden chopstick to push the outer corners into crisp, well-defined points without puncturing the seams.
Pull the lining out of the bag opening and fold the raw edges of the turning gap inward by a half-inch so they align flush with the sewn bottom seam. Press the fold flat with an iron, then stitch the gap closed by edge-stitching one-sixteenth of an inch from the folded edge with your sewing machine, or hand-sew it using an invisible ladder stitch for a seamless finish. Push the completed lining back down inside the outer shell, shape the boxed base with your fingers, and apply a final steam press along the exterior edges for a crisp, store-bought finish.
Frequently asked questions
What sewing machine needle size should I use for sewing a lined cosmetic bag?
A size 80/12 or 90/14 universal needle handles medium-weight cotton and standard interfacing effectively. If you choose heavier fabrics like duck canvas or faux leather for the exterior, switch to a size 90/14 or 100/16 jeans or heavy-duty needle to prevent skipped stitches.
How can I shorten a zipper that is longer than my cut fabric pieces?
Measure the required length along the zipper tape, mark it with chalk, and sew a tight zigzag stitch across the nylon teeth several times at the mark to create a new bottom stop. You can then trim the excess zipper tape one half-inch past your stitched stop with regular craft scissors.
Why is my sewing machine jamming when stitching across the zipper ends?
Bulky seam intersections can cause presser feet to tilt backward, preventing smooth fabric feeding. Place a folded piece of cardboard or a leveling tool under the back of the presser foot to level it before stitching across thick zipper junctions, or turn the handwheel manually for precise needle placement.
Can I clean a handmade cosmetic pouch in the washing machine?
Pouches made with cotton fabric and washable fusible interfacing can be washed on a gentle cycle in cold water inside a mesh laundry bag. Air dry the pouch flat and steam press to restore structure, avoiding high-heat machine drying which can warp the internal interfacing.
Your next step
Select your exterior and lining fabrics, cut test pieces from scrap fabric to practice zipper installation, and assemble your first lined cosmetic bag step by step.