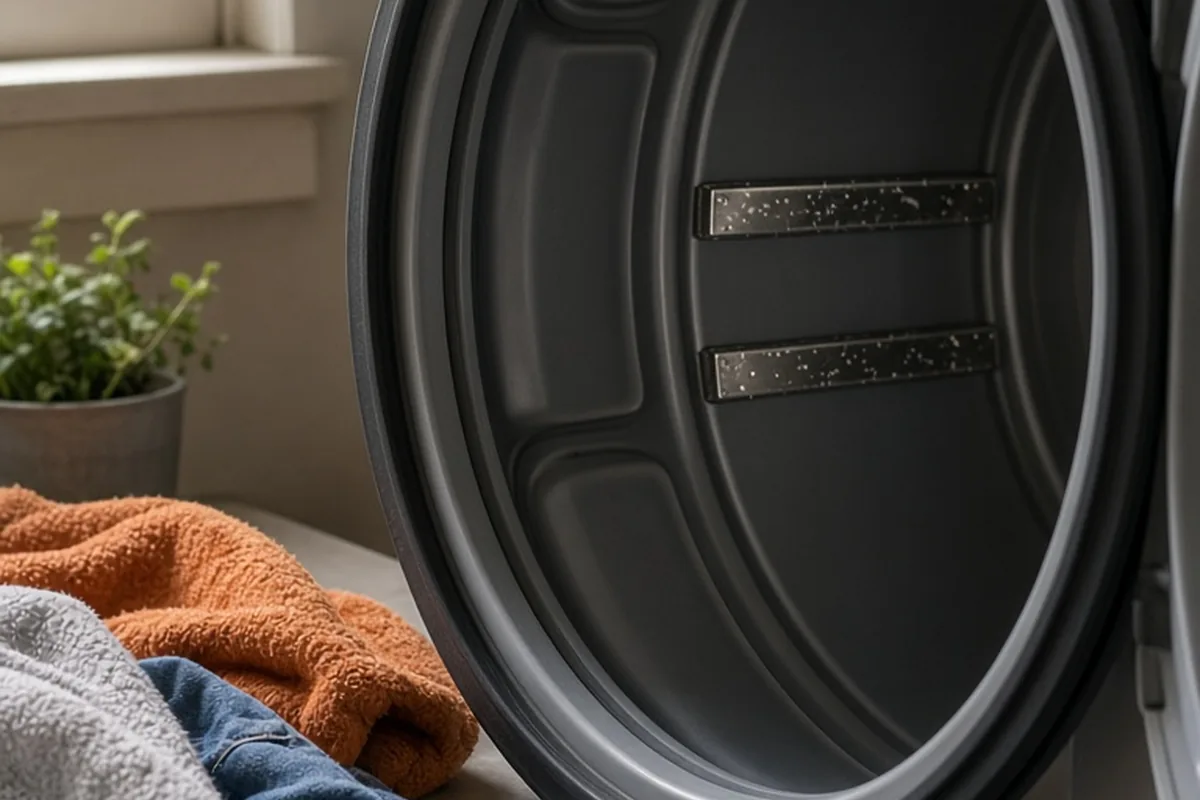
You can tell a dryer moisture sensor is bad if your dryer shuts off after only a few minutes on sensor-dry cycles, leaving laundry damp, while timed dry works normally. Another sign is continuous running without ever shutting down. You can confirm sensor failure by rubbing a wet cloth across the two metal sensor bars inside the drum while running a diagnostic check or testing continuity with a multimeter.
Modern clothes dryers rely on automatic drying settings to save energy and protect delicate fabrics from overheating. When the sensor system fails, laundry day quickly turns into an exercise in frustration, leaving you guessing whether the issue lies in the heating element, the vent line, or the small metal strips inside the drum.
Primary Symptoms of a Bad Dryer Moisture Sensor
The most recognizable sign of a failing moisture sensor is an automatic cycle that terminates prematurely. You might load several damp towels, select a normal auto-dry setting, and return twenty minutes later to find the machine completely silent while the laundry remains damp and cool. When you switch the machine over to a standard timed dry cycle for forty minutes, the dryer warms up and finishes the job without interruption. This stark contrast between timed dry and sensor dry is the single clearest behavioral symptom that the thermal fuses, heating element, and drive motor are functional, but the sensing mechanism is failing to report dampness.
The opposite extreme can also point directly to a bad moisture sensor assembly. In this scenario, the dryer continues to tumble and heat indefinitely on an automatic cycle, running long past the point where clothes are bone-dry and exposing delicate garments to unnecessary thermal stress. This constant running happens when an electrical short circuit or conductive debris bridges the two metal sensor bars, tricking the electronic control board into believing the drum is perpetually full of wet laundry. If your dryer exhibits either of these extremes exclusively during automatic moisture-sensing cycles, the sensor system requires immediate attention.
How Dryer Moisture Sensor Bars Work
Moisture sensor bars are remarkably simple physical components designed around electrical conductivity. In most front-loading and top-loading dryers, the sensor consists of two parallel curved stainless steel strips mounted just inside the drum door, integrated into the lint screen housing. As wet clothing tumbles inside the rotating drum, the wet fabric periodically brushes across both metal strips simultaneously. Because damp fabric contains moisture and dissolved mineral ions, it acts as a conductor that completes an open low-voltage electrical circuit between the two strips.
Each time wet laundry brushes against both plates, a tiny pulse of electrical current travels back to the main control board. The dryer microprocessor does not measure moisture as a continuous scale; rather, it tracks the frequency and resistance of these intermittent contact pulses. As clothes lose water and dry out, they contact the sensor bars less frequently and with higher electrical resistance. Once the interval between electrical contacts exceeds a predetermined threshold, the dryer control logic concludes that the load is dry and initiates the cool-down phase before shutting down.
Differentiating Between a Dirty Sensor and a Failed Component
Before assuming a sensor has failed electronically, it is essential to understand that physical component failure is actually less common than surface contamination. The most frequent culprit behind sensor malfunction is the widespread use of liquid fabric softeners and dryer sheets. These laundry products work by depositing a thin, waxy coating of silicone oils and softening agents onto clothing fibers. Over several months of drying cycles, this oily chemical residue transfers directly onto the stainless steel sensor strips, forming an invisible, non-conductive barrier.
Once a waxy layer covers the metal bars, damp clothes sliding across them can no longer make direct electrical contact with the steel. The control board interprets this total lack of electrical continuity as dry air, leading it to terminate the automatic cycle within three to ten minutes. Homeowners often replace expensive electronic boards or purchase new sensor assemblies when the existing metal strips simply need a thorough surface cleaning. A sensor is only truly bad if cleaning fails to restore normal conductivity or if the electrical wiring behind the drum has sustained physical damage.
Testing Sensor Continuity and Resistance with a Multimeter
Using a digital multimeter provides definitive proof of whether a moisture sensor and its wiring harness are operating correctly. Always begin by unplugging the dryer from the wall outlet or flipping the dedicated double-pole circuit breaker in your electrical service panel to eliminate any risk of electrical shock. Depending on your dryer brand, you may need to loosen a few screws on the front lint chute or lower access panel to reach the two insulated wire leads connected to the back of the sensor strips.
Set your multimeter to measure resistance in ohms or turn the dial to the audible continuity setting. Touch one multimeter probe to the exposed metal face of one sensor bar and the second probe to its corresponding wire terminal behind the bracket; the meter should display zero to one ohm, confirming the physical bar connects cleanly to the harness. Next, place one meter probe on the left metal strip and the other probe on the right metal strip while the bars are clean and dry. The meter should display an open circuit reading, indicating no electrical connection between them. Finally, press a clean, damp finger or a wet cotton swab across both bars simultaneously; your meter should immediately register a drop in resistance into the measurable kilo-ohm range. If the reading remains completely open while bridged, or shows continuous zero resistance while dry, the sensor or harness is defective.
Performing the Wet Towel Test and Built-In Diagnostics
If you do not own a multimeter, you can perform a practical operational test using items already in your home. Take two clean hand towels, soak them with tap water, wring them out until they are merely damp rather than dripping, and place them inside the empty dryer drum. Select a regular automatic sensor dry cycle and start the machine. Stand nearby and time the operation. If the dryer runs continuously for twenty to thirty minutes and produces warm air until the towels dry, the moisture sensor is functioning correctly. If the cycle shuts off in less than eight minutes while the towels are still clearly wet, the sensor circuit is not registering moisture.
Many digital dryers from manufacturers like Whirlpool, GE, LG, and Samsung also feature an integrated technician diagnostic mode that allows real-time sensor verification. You can usually access this mode by turning the machine on and pressing a specific sequence of buttons, such as pressing two cycle keys alternately three times in five seconds. Once in diagnostic mode, opening the door and bridging the two sensor strips with a damp rag will trigger an audible chime or cause the numeric display to change numbers. If the diagnostic readout fails to react when you bridge the metal strips, the sensor circuit is disconnected or broken.
How to Clean Moisture Sensor Bars Correctly
Cleaning your dryer moisture sensor bars is a fast, inexpensive maintenance step that often resolves the issue entirely. Moisten a clean microfiber cloth or cotton rag with standard rubbing alcohol, preferably a 90 percent or higher isopropyl alcohol solution. Vigorously rub the length of both stainless steel strips to break down and lift the stubborn wax films left behind by fabric softener sheets. You may notice a faint yellowish or grey residue transferring onto your rag as the protective chemical buildup dissolves.
For heavy buildup that does not yield to rubbing alcohol alone, apply a small drop of mild liquid dish soap to a damp cloth and scrub the strips firmly. Alternatively, use a non-scratch synthetic scouring pad to gently buff away baked-on minerals and lint binder. Avoid using steel wool, wire brushes, or abrasive sandpaper under all circumstances. Harsh metal abrasives can gouge the stainless steel, strip protective coatings, and shed tiny conductive metal splinters into the plastic housing that can cause permanent electrical shorts. Allow the sensor area to air dry completely for fifteen minutes before running a test load.
Replacing a Damaged Sensor Assembly
When physical cleaning and wire inspections fail to restore sensor operation, or if the plastic mounting bracket has cracked from drum heat, replacing the moisture sensor assembly is the final corrective step. Fortunately, replacement sensor bars are among the least expensive appliance parts available, typically costing between fifteen and forty dollars. Before ordering, locate your dryer model number on the frame inside the door opening to ensure you purchase an original equipment manufacturer assembly that matches your specific wiring harness connectors.
To perform the replacement, disconnect power to the dryer, pull out the lint filter screen, and remove the retaining screws securing the lint screen housing to the front bulkhead. Gently tilt the housing forward to expose the backside of the sensor bracket and release the wire harness locking tabs. Pry the old metal strips out of their plastic retaining clips, press the new stainless steel sensor bars into place until they snap securely, and reconnect the wire terminals. Reinstall the housing screws, seat the lint filter back into position, and restore power to test the repair.
Frequently asked questions
Can I continue using my dryer if the moisture sensor is bad?
Yes, you can safely use your dryer by selecting a Timed Dry cycle instead of an automatic or sensor setting. Timed Dry relies entirely on a mechanical or digital countdown clock and ignores the moisture sensor bars completely, allowing you to dry laundry until you can inspect or replace the component.
Where are the moisture sensor bars located on most dryers?
On the vast majority of residential dryers, the moisture sensor bars are located on the front bulkhead just inside the drum opening, integrated directly into the plastic lint filter housing. On a few older or commercial drum designs, they may be mounted on the rear stationary wall of the drum.
Will a bad moisture sensor prevent a dryer from producing heat?
A bad moisture sensor does not prevent the heating element or gas burner from working, but it can make it look like the dryer has stopped heating by cutting cycles short within minutes. If your dryer fails to generate heat even on a Timed Dry setting, the problem lies with the heating element, thermal fuse, or high-limit thermostat rather than the moisture sensor.
Your next step
Clean both moisture sensor bars thoroughly with rubbing alcohol today, and run a test load on an automatic cycle to see if normal drying times return before purchasing replacement parts.