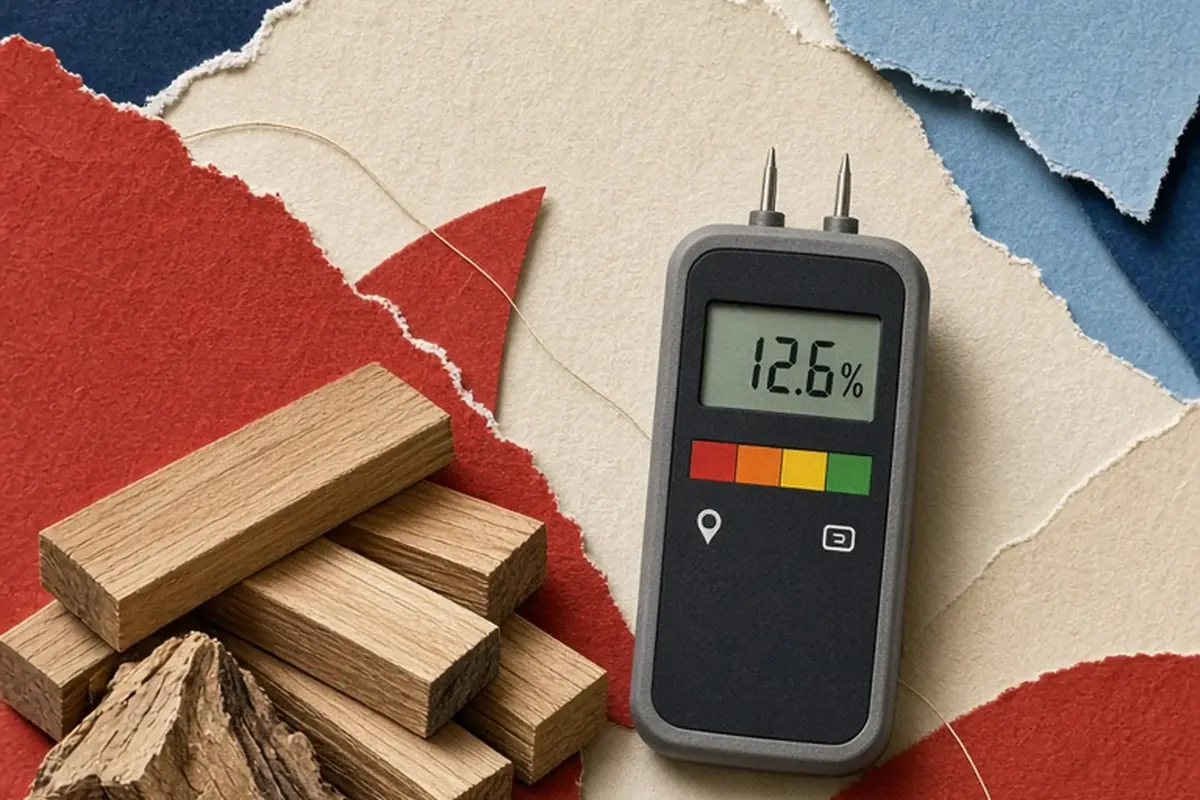
To use a wood moisture meter, select your meter mode and adjust for the specific wood species if prompted. For a pin meter, push the metal probes firmly into the grain along the board. For a pinless meter, press the sensor pad flat against a clean surface. Read the displayed percentage, test multiple spots along the board, and compare the result against your project requirements.
Working with wood requires knowing how much water is trapped inside the fibers. Excess moisture leads to warping, splitting, and joint failure once lumber dries indoors. A wood moisture meter offers a reliable way to check that boards, firewood, or subfloors have reached a stable equilibrium before you start building, finishing, or installing.
Selecting Between Pin and Pinless Meter Modes
Wood moisture meters rely on two distinct technologies to evaluate water content: electrical resistance or electromagnetic wave scanning. Pin-type meters use two sharp metal probes that penetrate the surface of the timber. As electrical current travels between the pins, the meter measures the resistance of the wood fibers. Because water conducts electricity much better than dry cell walls, higher conductivity corresponds to a higher moisture percentage. Pin meters excel at pinpointing gradients across a board, allowing you to measure both the surface moisture and the deeper core moisture by driving insulated probes into different depths. However, they leave two tiny holes in the stock, which makes them less desirable for finished surfaces or delicate furniture faces.
Pinless meters utilize an electromagnetic sensor pad placed directly against the lumber. The pad generates an electromagnetic field that penetrates roughly three-quarters of an inch into the wood without breaking the surface. This non-destructive method allows you to scan broad areas, such as an entire hardwood floor or a large tabletop, in a fraction of the time. The trade-off is that pinless meters require a flat, smooth contact area to produce accurate readings. Rough-sawn boards with significant cupping, saw marks, or bark will create air gaps beneath the sensor pad, resulting in artificially low moisture readings.
Configuring Species and Temperature Settings
Lumber species vary significantly in density, cellular structure, and chemical composition. A meter reading taken on soft white pine will not reflect the true moisture content if the device is calibrated for a dense hardwood like red oak or hard maple. Most digital moisture meters include built-in species correction tables or group settings labeled with letters or numbers. Before taking a measurement, consult your meter manual to locate the specific gravity or species code for your board, then toggle the device menu to match that group. Skipping this adjustment can cause the meter to misread actual moisture levels by several percentage points.
Temperature also alters electrical conductivity and dielectric properties in wood. When lumber is stored in freezing temperatures, moisture mobility drops, which causes resistance meters to show lower readings than the wood actually contains. Conversely, hot lumber fresh from a solar kiln or sitting in direct sunlight often reads slightly higher. Many mid-tier and professional meters include automatic temperature compensation or let you manually enter ambient temperature. If your meter lacks this feature, allow cold or hot boards to sit in a room-temperature environment until the core stabilizes before running your assessment.
Step-by-Step Procedure for Pin Meters
To take an accurate reading with a pin meter, start by inspecting the board for a clean, sound spot free of knots, pitch pockets, and surface dirt. Turn on the device and verify that the pins are straight, sharp, and firmly screwed into the housing. Align the two pins parallel to the grain rather than across it. Electrical current flows more predictably along the longitudinal orientation of wood fibers, which provides a consistent baseline for the meter's internal calibration. Press the pins firmly into the timber until they penetrate at least one-eighth to one-quarter of an inch into the wood.
Hold the meter steady until the digital display settles on a specific percentage. To evaluate whether the board has dried evenly, take readings across several different zones. Test near the ends of the board, in the middle section, and along both edges. Lumber frequently dries from the outside in, so checking both the surface and the core gives you a realistic profile of the drying state. For thick slabs exceeding two inches, standard built-in pins may only reach the outer shell; in those cases, using hammer probes with insulated shafts lets you sample the core moisture without interference from surface humidity.
Step-by-Step Procedure for Pinless Meters
Operating a pinless moisture meter requires complete physical contact between the scanning plate and the wood face. Begin by wiping away any sawdust, loose debris, or surface condensation from the board. Position the sensor pad flat against the timber, applying firm, even hand pressure. The meter needs continuous contact without rocking or tilting, as any pocket of trapped air beneath the plate will dilute the electromagnetic field and distort the output value. Read the number once the display locks onto a stable value.
Pay careful attention to the thickness of the board when scanning with a pinless device. Because the electromagnetic field projects three-quarters of an inch deep, scanning a thin half-inch board will cause the signal to pass through the wood and detect whatever material sits underneath. If you place a thin board on a metal workbench or a damp concrete floor while testing, the meter will read the metal or concrete rather than the wood alone. To prevent false readings on thin stock, elevate the board so that only open air sits behind the target scanning area.
Target Moisture Content by Woodworking Application
The ideal moisture percentage for wood depends entirely on its intended environment and function. For indoor furniture, cabinetry, and interior millwork, target a moisture content between six and eight percent across most climate regions. Wood built at this moisture level remains stable within typical heated and air-conditioned homes, minimizing the risk of drawer binding, seam separation, or tabletop cracking. For exterior projects like decks, pergolas, and outdoor benches, lumber stabilizes naturally between twelve and fifteen percent depending on regional humidity levels.
Subflooring and hardwood flooring installations demand close moisture alignment between adjacent materials. Before fastening solid hardwood planks to a plywood subfloor, both materials should typically sit within two to four percentage points of each other. If you install bone-dry hardwood over a damp subfloor, the planks will absorb moisture from below and buckle upward. For firewood, the goal is reaching twenty percent or lower. Burning firewood with higher moisture wastefully expends heat energy boiling off internal water, producing excessive smoke and creosote buildup in chimneys.
Troubleshooting Inconsistent and False Readings
Inconsistent readings are often caused by surface moisture rather than true internal wetness. If a stack of dried boards is caught in a brief rain shower or stored in high morning humidity, the outer cellular layers will register fifteen to twenty percent moisture on a pin meter, even though the internal core remains at seven percent. To verify whether moisture is skin-deep, cut a few inches off the end of a board and measure the freshly exposed cross-section immediately. The end-grain cross-section reveals whether water has penetrated the heart of the timber.
Preservative treatments, glues, and metallic minerals can also skew moisture readings. Pressure-treated lumber contains chemical salts that dramatically boost electrical conductivity, causing pin meters to produce readings far higher than actual levels until the chemicals fully cure and dry. Similarly, testing directly over glue lines in laminated panels or plywood can create erratic spikes because synthetic resins alter dielectric response. Always take readings on solid wood away from joint lines, metal fasteners, and resin pockets to ensure reliable figures.
Illustrative Scenarios
Illustrative Flooring Acclimation Scenario
A DIY builder planned to install wide-plank white oak flooring directly over a plywood subfloor. Before opening the boxes, she used a pinless meter to test both the subfloor and the new boards. The subfloor registered twelve percent moisture, while the oak planks measured seven percent. Rather than fastening the flooring immediately, she left the planks stacked with spacer sticks in the conditioned room for two weeks. Re-testing showed the subfloor had dropped to nine percent and the planks had stabilized at eight percent.
Key point: Testing both surfaces and allowing time for moisture equilibrium prevents post-installation floor cupping and joint separation.
Frequently asked questions
Where is the best spot on a board to test moisture content?
Test at least six to twelve inches away from the board ends, as exposed end grain dries faster than the rest of the timber. For a complete picture, take measurements along the center, near both edges, and on opposite faces of the board.
Can I use a wood moisture meter on drywall or concrete?
Many multi-material meters include dedicated drywall and masonry reference scales. However, standard wood-specific scales rely on timber calibration curves and will not give an accurate percentage for gypsum or masonry materials.
How do I check if my moisture meter is functioning accurately?
Many meters include built-in calibration check points in the protective cap or a dedicated test block. Touching the pins to the calibration points should return a specific baseline percentage listed in your user manual.
Your next step
Inspect your meter settings for the correct species group, test multiple locations across your lumber, and ensure boards reach the appropriate moisture target before cutting or assembling your project.