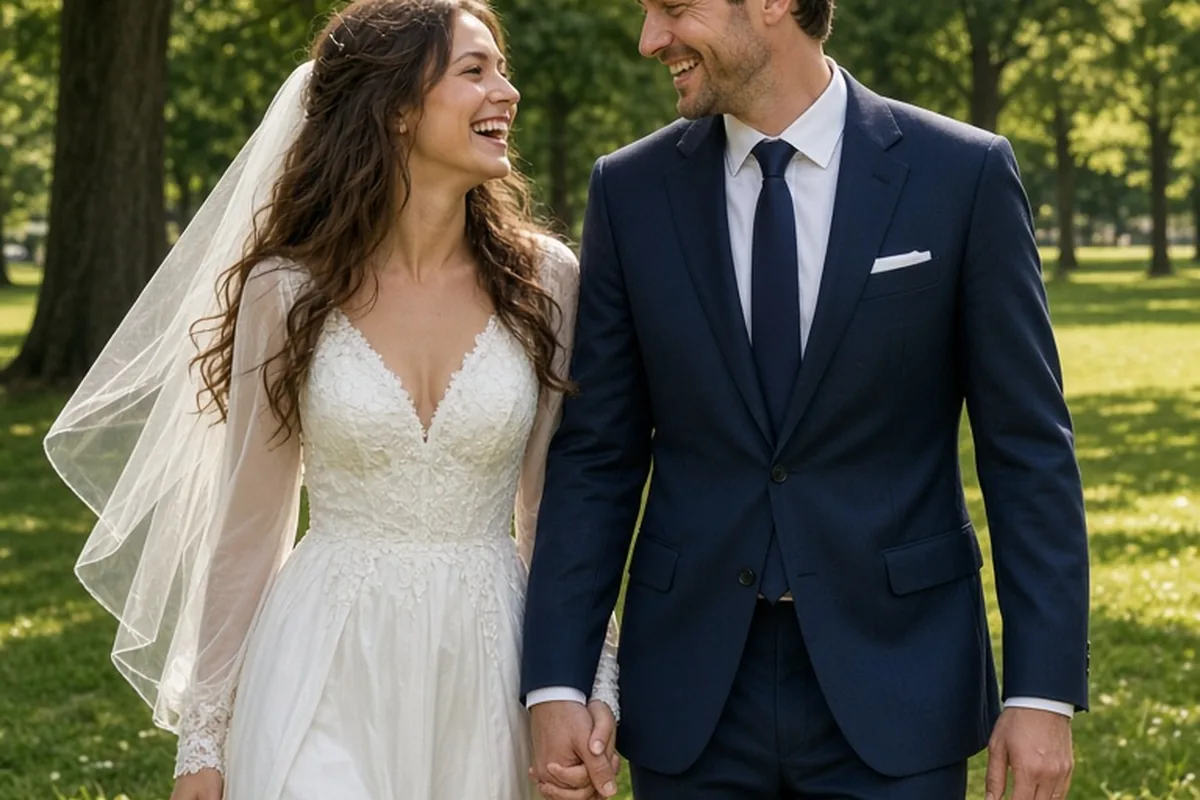
Natural wedding photography posing relies on continuous micro-movements, gentle physical contact points, and guided prompts rather than rigid, frozen stances. Couples achieve authentic photos by angling their bodies slightly toward each other, keeping hands intentionally engaged, shifting weight to the back foot, and using motion—such as walking, whispering, or slow dancing—to relax facial expressions and create flattering, dynamic compositions.
Stepping in front of a professional camera on a wedding day can feel intimidating, especially for couples who do not spend their daily lives modeling. Understanding basic compositional foundations and simple movement cues turns stiff portrait sessions into relaxed, enjoyable moments that reflect genuine connection.
Core Couple Poses: Building Connection from the Ground Up
The most flattering couple portraits begin with base positioning, specifically how your feet and hips align relative to each other and the camera lens. A flat, square-to-camera stance often feels stiff and creates visual blocks. Instead, adopting an angled foundation, often called the V-up or open stance, immediately creates natural warmth. In this setup, both partners stand side by side, angle their inner hips toward one another at roughly a forty-five-degree angle, and touch their inner shoulders. This geometry naturally pulls the couple together while keeping both faces comfortably oriented toward the primary light source.
From this basic stance, transitioning into a full chest-to-chest embrace creates intimacy without feeling forced. One partner wraps an arm around the other's waist or lower back, while the other rests a hand gently on the partner's chest, collarbone, or upper shoulder. The key to keeping this embrace authentic is avoiding a tight, tense grip. Fingers should remain softly curved and relaxed. Leaning in from the hips rather than just bending the neck ensures your posture remains elongated and natural.
Another versatile foundation is the wrap-around embrace, where one partner stands behind the other. The partner in the back can gently drape their arms around the front partner's waist or ribcage, resting their chin gently near the temple or shoulder. The person in front can bring one hand up to softly rest over their partner's fingers. This setup naturally creates depth in the frame, provides a comforting sense of warmth, and allows both individuals to look in different directions—one toward the camera and the other toward their partner—without breaking the visual narrative.
Solo Bridal and Groom Portraits: Working With Attire, Hands, and Posture
Individual wedding portraits require thoughtful attention to posture, wardrobe details, and hand placement. For bridal portraits featuring a dress, the way the fabric falls dictates the best stance. Shifting body weight predominantly to the back leg creates an elegant curve through the torso, dropping the front hip slightly and preventing the body from looking rigid. Holding a floral bouquet correctly is one of the most common challenges: bouquets should always be held around hip or belly-button level with relaxed elbows, rather than carried high near the chest, which tenses the shoulders and obscures neckline details.
Veils and trains offer built-in opportunities for dynamic texture and soft framing. A long cathedral veil can be caught in a gentle breeze, draped lightly over one shoulder, or held delicately by the fingertips as the bride turns her head toward soft directional window light. If the gown has pockets, slipping one hand into a pocket while extending the opposite leg forward creates a modern, editorial aesthetic that balances formal bridal wear with relaxed confidence.
For groom portraits, tailoring and subtle hand adjustments define the look. Standing directly facing the camera with arms dangling at the sides can appear stiff and formal. Instead, turning forty-five degrees away from the light, unbuttoning or buttoning the jacket with one hand, or adjusting a cufflink provides natural purpose for the hands. Resting one hand casually in a trouser pocket—keeping the thumb out to maintain clean lines—instantly relieves upper-body tension. When seated on a structured chair, leaning slightly forward with forearms resting on the knees creates an approachable, grounded presence.
Prompts and Guided Movement Over Static Posing
Static poses often result in frozen smiles after several minutes of shooting. Professional photographers frequently replace rigid positioning with dynamic prompts—verbal cues that inspire organic movement and spontaneous reactions. A walking prompt is among the simplest and most effective: holding hands and strolling slowly toward the camera while talking, looking at each other, and laughing naturally softens gait, creates movement in skirts and veils, and removes self-consciousness.
Auditory and touch prompts also generate authentic micro-expressions that cannot be rehearsed. Asking one partner to whisper an absurd grocery list or their favorite memory into the other's ear in a dramatic tone consistently breaks nervous tension, producing genuine laughter followed by an affectionate, quiet smile. These in-between seconds, when the laughter subsides and the couple looks at one another, often yield the most memorable frames of the day.
Slow dancing without music is another dependable movement tool. Having the couple sway gently in place, turn each other slowly, or initiate a gentle twirl encourages natural physical rhythm. Movement naturally prevents muscles from locking up and keeps the couple engaged with each other rather than staring nervously at the camera lens.
Posing the Wedding Party and Family Groups with Balance and Depth
Large group photos easily become chaotic or resemble a sports lineup if everyone stands shoulder-to-shoulder in a flat horizontal line. Creating visual hierarchy through staggering heights, layering depth, and varying body orientations transforms standard group portraits into balanced, cohesive compositions. Placing some individuals seated on vintage chairs, stairs, or stone ledges while others stand behind or lean naturally against architectural elements immediately adds visual interest.
For the full wedding party, alternating how individuals hold their bouquets, tuck hands into pockets, or turn their bodies breaks visual monotony. Instead of demanding that all ten or twelve attendants hold identical postures, encourage small variations within a coordinated structure. The newlyweds should remain the clear visual anchor at the center or slightly off-center along a golden ratio line, with friends angled inward toward them to draw the viewer's eye back to the couple.
Family formal portraits require a calm, structured approach because family members may have varying mobility needs and comfort levels with photography. Seat grandparents and older relatives comfortably first, then arrange parents and siblings around them. Ensure that heads are not directly stacked on top of one another; staggering eye levels slightly creates a far more pleasing, organized portrait that honors everyone without feeling rigid.
Flattering Angles and Micro-Adjustments for Every Body Type
Small, intentional physical adjustments make an enormous difference in how comfortable and confident people look in wedding portraits. One universal adjustment involves creating space between the upper arms and the torso. When arms are pressed firmly against the sides of the body, they flatten against the ribcage and can look wider than they are. Holding arms slightly away from the torso—whether holding flowers, resting a hand on a hip, or holding a partner's jacket—creates clean silhouettes and highlights natural waistlines.
Jawline definition and neck posture are equally critical. Pushing the chin slightly forward and down toward the lens (a subtle movement often described as extending the forehead forward) tightens the jawline and eliminates unflattering under-chin shadows without looking awkward from the camera's perspective. It is also helpful to remind subjects to lower their shoulders, exhale slowly through the mouth, and unclench their teeth before the shutter clicks.
When couples have a noticeable height difference, posing should embrace their natural proportions while maintaining balanced framing. Placing the taller partner on a slightly lower step, posing while seated together on a sofa or bench, or having the shorter partner step slightly closer to the foreground naturally harmonizes the composition without the need for unnatural posturing.
Adapting Poses to Challenging Lighting, Weather, and Limited Time
Wedding timelines rarely go entirely according to schedule, and outdoor conditions can shift from harsh midday sun to sudden rain or wind within hours. When direct, overhead sun is unavoidable, side-by-side posing can cause harsh shadows across the eyes and nose. Turning the couple with their backs to the sun (backlighting) and bringing them into a close forehead-to-forehead touch or an embrace prevents squinting and creates a soft rim of light around their silhouettes.
Windy weather can be turned into an artistic asset rather than an obstacle. Positioning the couple so the wind blows hair and dresses away from their faces creates dramatic, editorial motion. If rain forces portraits under a narrow covered porch or inside a historic hotel corridor, close-up seated poses, architectural framing through doorways, and intimate window-lit portraits allow you to capture stunning imagery within a compact footprint.
When unexpected delays compress your portrait session into a brief ten-minute window, sticking to a streamlined pose flow minimizes transition time. Start with an open V-up pose, move immediately into a chest-to-chest embrace, have one partner turn into a back embrace, and conclude with a short walk toward the reception venue. This progression provides four distinct looks without requiring major location changes or complex direction.
Frequently asked questions
How can couples who feel unphotogenic prepare for wedding poses?
Schedule an engagement session with your wedding photographer to practice moving together in front of the camera before the big day. Focus on interacting with your partner rather than staring at the lens, and communicate any personal insecurities or preferred angles to your photographer in advance.
What should we do with our hands during couple portraits?
Always give your hands an intentional contact point rather than letting them hang loosely at your sides. Softly hold your bouquet at hip level, rest fingers on your partner's lapel or waist, slip one hand into a pocket, or hold your partner's hand with relaxed fingers.
How much time should be scheduled for wedding couple portraits?
Allocating thirty to forty-five minutes of dedicated time for couple portraits ensures a relaxed pace without rushing through poses. If you want golden-hour portraits near sunset, schedule an additional fifteen-minute mini-session during dinner or between reception events.
How do we avoid looking stiff during formal family group photos?
Stagger standing heights across rows, place some individuals in comfortable chairs, and ask everyone to angle their bodies slightly toward the center couple. Remind family members to breathe, relax their shoulders, and interact naturally between group variations.
Your next step
Review three or four favorite posing styles with your photographer before the wedding day so you can move smoothly through your portrait session with minimal direction.