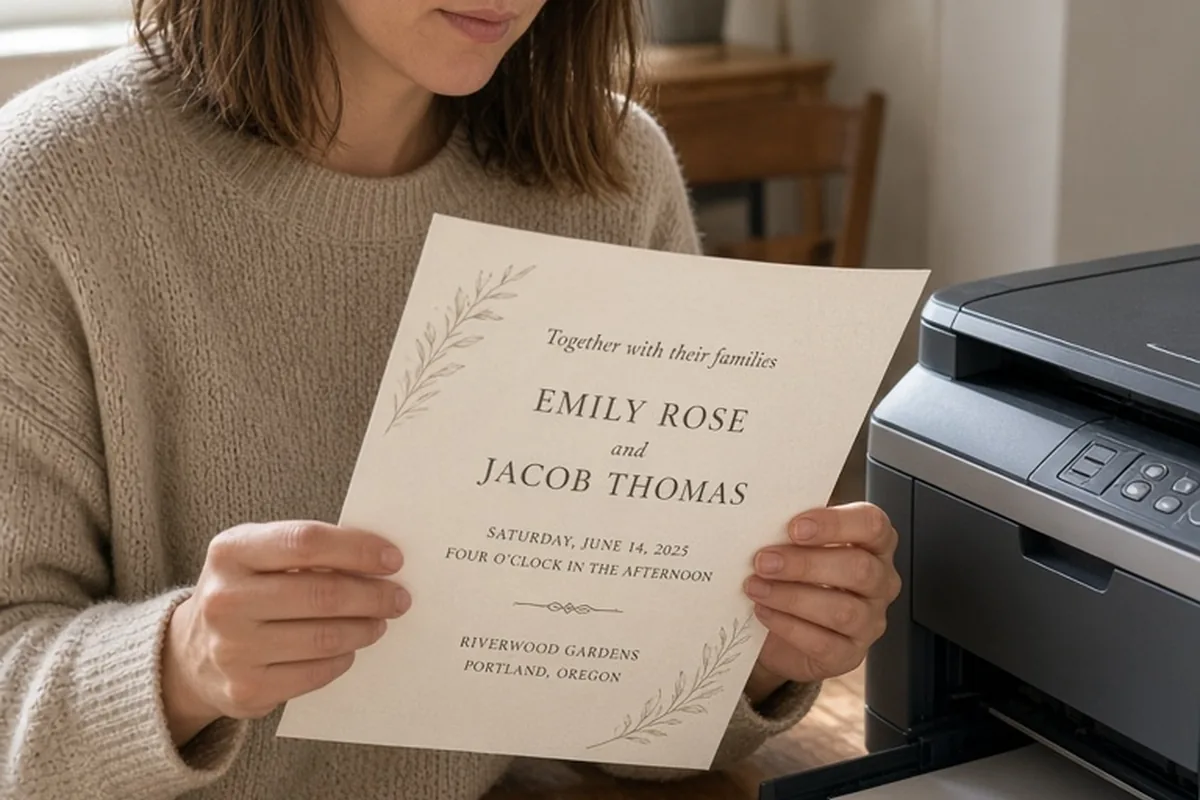
To create personalized wedding programs with free templates, select a customizable layout from platforms like Canva, Google Docs, or specialty stationery sites that fits your ceremony length. Populate the template with your order of events, wedding party names, cultural explanations, and acknowledgments. Adjust typography and color palettes to match your wedding aesthetic, run a physical test print on your chosen cardstock to check margins and legibility, and assemble your finished copies two to three weeks before the ceremony.
A wedding program serves as both a practical roadmap for your guests and a tangible keepsake that reflects the personal tone of your celebration. Building one yourself using free digital templates gives you complete creative control over the wording, design hierarchy, and cultural explanations without straining your stationery budget.
Selecting the Right Layout for Your Ceremony Flow
The structure of your wedding ceremony is the primary factor in determining which program format will work best. A brief, secular ceremony with five basic components—such as a processional, welcome remarks, vow exchange, ring exchange, and recessional—can comfortably fit onto a single double-sided flat card measuring five by seven inches or four by nine inches. This minimalist approach keeps printing costs low, requires no folding or binding, and gives guests an uncluttered overview of the proceedings. It works particularly well for outdoor, garden, or modern urban weddings where guests appreciate a lightweight, easy-to-hold format.
For complex ceremonies involving multiple religious rites, multi-language translations, choral selections, extended bridal parties, or memorials, a folded booklet format provides the necessary page real estate. A standard eight-and-a-half by eleven-inch sheet folded horizontally in half yields a four-page booklet that cleanly divides your content: a decorative cover, an inside left page for the order of service, an inside right page for participant names, and a back cover dedicated to acknowledgments, directions to the reception, and honorariums. For warm outdoor summer ceremonies, you can also consider paddle or fan layouts, where double-sided heavy cardstock is mounted onto a wooden stick, serving a dual practical and informational purpose.
Essential Content Sections to Include in Your Wedding Program
Every successful wedding program balances practical logistics with personal sentiment. At minimum, the cover or header should state the full names of the couple, the wedding date, and the ceremony location or venue name. Directly following the title, organize your order of events chronologically. List musical preludes, processional tracks, readings, musical interludes, message or homily titles, vows, the declaration of marriage, and recessional music. If you are including specific scripture passages, poems, or secular excerpts, naming the piece and its author or reader helps guests follow along with intentional focus.
The second foundational component is the acknowledgment of your wedding party and key contributors. Clearly list the officiant, parents, grandparents, maid or matron of honor, best man, bridesmaids, groomsmen, attendants, flower girls, ring bearers, ushers, and readers. Include their full names and, if desired, their relationship to the couple. The final panel or section should feature a brief thank-you note from the couple to their guests and families, reception logistics such as cocktail hour start times and parking instructions, and an optional in memoriam note honoring deceased loved ones who are present in spirit.
Where to Find and How to Evaluate Free Program Templates
Dozens of online graphic design platforms and stationery resource hubs offer downloadable or browser-editable wedding program templates at zero cost. Cloud-based tools like Canva provide extensive libraries of pre-formatted designs categorized by aesthetic themes such as botanical, modern minimalist, vintage, or classic formal. Standard word-processing platforms like Google Docs and Microsoft Word also feature basic template galleries that require no specialized design software. When sourcing a template from an independent design blog or stationery printable repository, verify that the file download format—such as editable PDF, DOCX, or SVG—is compatible with the software you own.
When evaluating a free template, look beyond the placeholder imagery and assess its foundational design grid. Pay close attention to whether text boxes can be expanded or rearranged without breaking the visual balance of the document. Check that the template is constructed at standard trim dimensions—such as standard letter size, half-letter, or standard five-by-seven dimensions—which prevents scaling distortion when sending the file to print. Templates that utilize free, open-source web fonts or standard system typefaces are preferable, as they eliminate the risk of missing-font errors or unintended text reflows when transferring files between devices.
Customizing Typography, Colors, and Visual Hierarchy
Customization transforms a generic template into a cohesive extension of your broader wedding suite. Begin by establishing a disciplined typographic hierarchy: use no more than two to three font families across the entire program. A decorative script, calligraphy, or bold serif typeface works well for the couple's names and section headers, while a clean, legible sans-serif or transitional serif font at nine- to eleven-point size should be used for body copy, names, and musical titles. Ensure there is sufficient contrast between the font weight and the background paper color so older guests or those reading in dim sanctuary or twilight lighting can read the text without difficulty.
Align your color palette with your wedding theme by updating header text, dividing rules, or decorative flourishes to match your signature swatches. Avoid using saturated, full-bleed color backgrounds if you plan to print the programs at home, as this consumes excessive ink and frequently leads to paper buckling or streak marks. Instead, utilize white, cream, or light neutral digital canvases and introduce color through typography, subtle line dividers, or custom monogram icons. Maintain generous negative space—at least half an inch of margin around all borders—to prevent the layout from appearing cramped and to ensure text does not get clipped during the trimming phase.
Explaining Cultural, Faith-Based, and Unconventional Traditions
One of the most valuable roles of a wedding program is demystifying cultural rituals, religious customs, or unique ceremonial elements for guests who may be experiencing them for the first time. For instance, in a Jewish wedding ceremony, including a short two-sentence explanation of the Chuppah, the signing of the Ketubah, the Seven Blessings (Sheva Brachot), and the breaking of the glass helps all attendees appreciate the historical and spiritual meaning behind each action. Similarly, in a Hindu ceremony, brief notes explaining the exchange of floral garlands (Jai Mala), the walk around the sacred fire (Saptapadi), and the significance of the Mangalsutra foster inclusive guest participation.
If you are incorporating interfaith elements, modern blending traditions such as a unity candle, sand pouring, handfasting, or a community ring-warming ceremony, use the program to clearly outline what is happening and whether guest interaction is invited. For example, if a ring warming involves passing the wedding bands through the congregation for silent blessings, explain the procedure concisely so guests are prepared when the ring pouch reaches their row. Thoughtful explanations eliminate confusion, prevent awkward interruptions, and allow every guest to feel engaged in the solemnity and celebration of the moment.
Paper Selection, Home Printing, and Professional Print Sourcing
The physical tactile quality of your program depends entirely on paper stock selection. Standard twenty-pound copy paper is too thin and will feel insubstantial, bleed double-sided ink, and crease easily. For self-printing, choose an eighty-pound to one-hundred-pound cardstock or an eighty-pound text weight sheet with a smooth, linen, or matte finish. If you intend to use a standard home inkjet or laser printer, check your printer's manual for maximum supported media weight, as cardstock over eighty pounds can sometimes jam standard consumer feed trays. Always feed heavy paper through the manual bypass tray one sheet or small stack at a time.
If printing at home becomes technically challenging or ink-prohibitive, exporting your customized template as a print-ready PDF with embedded fonts and crop marks allows you to use a local commercial copy shop or print retailer. Commercial digital presses produce crisp, consistent type, accurate color reproduction, and offer precision guillotine trimming that is difficult to replicate with a handheld craft blade. When requesting quotes from local printers, ask whether scoring and folding are included in the per-unit cost, and request a single physical proof before authorizing the full production run.
Proofreading Protocols, Timelines, and Ceremony-Day Logistics
Typographical errors on printed stationery can be distressing and costly to fix. Establish a rigorous three-step proofreading protocol before sending your file to final print. First, verify the exact spelling of every individual's name with them directly, paying special attention to hyphenated surnames, middle initials, and clergy or honorary titles. Second, have your officiant or ceremony coordinator review the chronological order of service to ensure no readings, rituals, or musical transitions have been inadvertently swapped or omitted. Finally, recruit a fresh set of eyes—such as a trusted friend who was not involved in the design process—to review the document strictly for punctuation consistency, capitalization rules, and alignment anomalies.
Complete your program design and test-printing four to six weeks prior to the wedding date, and finalize the complete print run no later than two weeks before the ceremony. This timeline creates a comfortable buffer for any unexpected reprints caused by last-minute bridal party changes or paper stock delays. For day-of distribution, calculate one program per guest for smaller gatherings, or roughly eighty-five programs per one hundred guests for larger events, as couples and families often share a single copy. Assign your ushers or venue hosts the clear task of handing them out at the entrance, or place one neatly on each ceremony chair before doors open to ensure seamless distribution.
Frequently asked questions
How many wedding programs should we print for our guest count?
A reliable guideline is to print approximately seventy-five to eighty-five programs for every one hundred invited guests, because many couples and families share one copy. However, if your program features a fan design for an outdoor summer ceremony or a personalized keepsake element, aim for one program per individual seat.
When should we finalize and print the wedding programs?
Finalize your design and wording about four weeks before the ceremony once your officiant, musical selections, and bridal party are fully confirmed. Execute the final printing and assembly two to three weeks prior to the wedding day to allow adequate time for proofing, folding, and packing without last-minute rush stress.
Can I print double-sided wedding programs on a standard home printer?
Yes, standard desktop printers can produce double-sided programs if you use eighty-pound cardstock that prevents ink show-through. Run single-sheet manual tests first to confirm proper page orientation, margin alignment, and print feed direction before running the full batch.
What is the best way to mention deceased family members in the program?
Place a dedicated 'In Loving Memory' or 'In Remembrance' section on the back cover or final page of the program. List their names and their relationship to the couple with a simple, respectful sentence acknowledging their enduring love and presence in your hearts.
Your next step
Download an editable program template that matches your ceremony complexity, draft your text in a separate document to verify all name spellings with your officiant, and run a single test print on eighty-pound cardstock today to check margin alignment and readability.