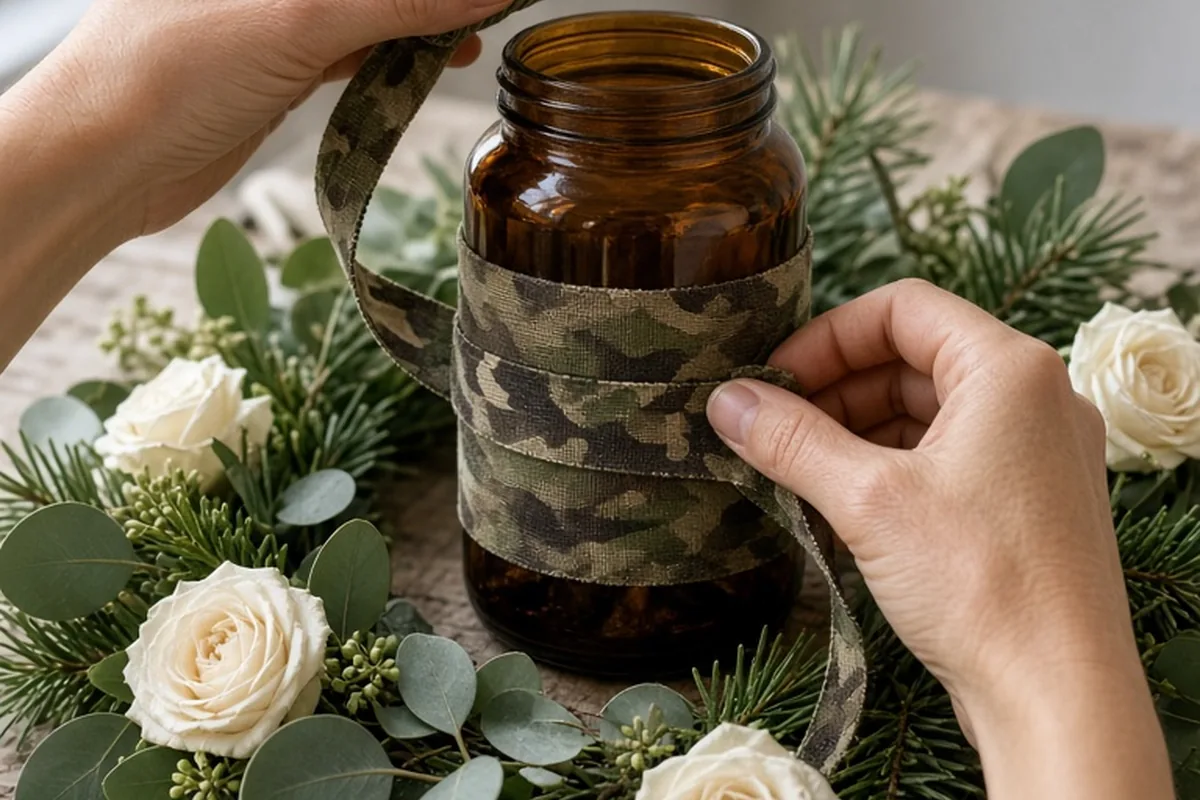
To design tasteful DIY camo wedding centerpieces, balance bold camouflage patterns with neutral foundations and organic textures. Start with a structured base such as weathered wood rounds, matte-painted lanterns, or amber jars wrapped in narrow camouflage ribbon or canvas. Layer in fresh or dried greenery like eucalyptus, pine sprigs, and neutral florals such as cream roses or baby's breath. Keep camouflage to roughly twenty to thirty percent of each arrangement to maintain visual harmony across your reception tables.
Couples who love the outdoors often look for meaningful ways to weave their shared lifestyle into their wedding day decor. Camouflage can feel deeply personal, but translating hunting patterns and field gear into a polished reception design requires careful proportion, deliberate material pairings, and structured assembly.
Balancing Camo Wedding Centerpieces with Refined Reception Textures
The primary challenge when building camouflage centerpieces is keeping the visual weight balanced across the tabletop. Camouflage patterns, whether traditional woodland or branch-heavy photographic prints, carry dense visual information. When surrounded exclusively by casual materials, the pattern can quickly dominate the tablescape and distract from the overall atmosphere. Pairing camo with classic wedding textures creates an intentional, elevated contrast that feels celebratory rather than utilitarian.
Begin by selecting two or three stabilizing textures to anchor every centerpiece. Smooth ceramics, unpolished stoneware, brushed brass, etched clear glass, and natural linen all soften the utilitarian edge of outdoor fabric. For example, a heavy canvas duck-cloth runner in an oak foliage pattern gains instant elegance when placed under warm brass candleholders and clear glass flutes. Conversely, a plain cream linen runner provides a quiet, clean resting place for an arrangement featuring patterned wraps or antler mounts. Deciding in advance whether the camouflage serves as the focal hero or an accent layer will prevent your finished tables from looking crowded.
Selecting Base Containers, Wraps, and Pattern Scales
The scale of your pattern dictates how it reads across a large banquet room. Broad-scale brushstroke prints and wide woodland patterns work well on larger, flat elements such as table runners or box planter sides, where the entire design repeat can be appreciated. Smaller, tightly cropped foliage prints and micro-pixelated patterns work far better on cylindrical items, such as wrapped glass cylinders, narrow ribbon ties, or small votive collars. When a wide pattern is wrapped around a narrow vessel, the details often get clipped awkwardly, making the fabric look random rather than deliberate.
When choosing containers, look for materials with sufficient mass to anchor the design physically and aesthetically. Amber glass jugs, galvanized steel pails with a muted zinc finish, reclaimed wooden ammo boxes, and dark wooden dough bowls make excellent vessels. If you are wrapping glass containers with fabric, use heavy-weight twill, cotton duck, or canvas ribbon instead of thin synthetic satin. Synthetic materials tend to slip, fray along cut edges, and reflect harsh camera flashes. Securing fabric bands with permanent fabric glue or double-sided industrial adhesive tape ensures the seams stay flat and invisible throughout the evening.
Constructing Wood Slabs, Lanterns, and Box Bases
A raised or grounded platform gives homemade centerpieces the clean, deliberate perimeter expected of professional event design. Slices of untreated hardwood, such as cedar, pine, or birch, offer a flat, stable platform that protects table linens while tying directly into a rustic woodland theme. Before assembling your pieces, make sure your wood rounds have dried completely to prevent warping or sap leakage. A light coat of matte wood sealant seals the grain and prevents damp floral foam or condensation from staining the natural timber.
If you prefer an enclosed centerpiece that protects naked flames from hall drafts, metal lanterns make a reliable structural centerpiece. Choose lanterns in matte black, antique bronze, or distressed ivory to harmonize with the earth tones present in hunting patterns. You can weave a narrow length of camo canvas ribbon through the top hanging loop or wrap the interior candle base with a neat fabric collar. If using real flame, verify that fabric wraps and greenery sit well below the top of the glass chimney, or substitute high-grade wax LED pillar candles with realistic flickering wicks to eliminate fire hazards entirely.
Layering Florals, Foraged Foliage, and Shed Antler Accents
Greenery serves as the visual bridge connecting camouflage print to the rest of the reception palette. Deep forest greens, olive tones, silvery sage, and warm ochre can all be pulled directly from the printed fabric and mirrored in living foliage. Silver dollar eucalyptus, seeded eucalyptus, olive branches, and Italian ruscus provide soft, cascading lines that break up the rigid silhouettes of metal cans and wooden crates. Incorporating feathery textures like pampas grass, bleached wheat stems, or dried lagurus adds lightness and movement.
Fresh florals should be selected to lift the palette rather than compete with it for attention. Clean whites, soft ivories, warm creams, and blush tones provide high contrast against dark camouflage motifs, ensuring the floral elements remain radiant under indoor lighting. If your aesthetic favors autumn tones, burnt orange roses, burgundy dahlias, and copper foliage create a rich, grounded harmony. For couples incorporating shed deer or elk antlers, secure them with concealed floral wire directly to wood bases or tuck them securely into floral foam blocks to prevent accidental shifting when guests bump the table.
When sourcing natural accents like pine cones, tree pods, or shed antlers, inspect each piece thoroughly for cleanliness. Foraged items should be gently brushed clean of soil, treated for moisture, and permitted to air thoroughly so they do not release earthy or organic odors near dinner plates. Combining real shed antlers with fresh garden roses creates an effortless balance between rustic wilderness and classic romance.
Managing Table Proportions, Sightlines, and Guest Comfort
One of the most frequent oversights in DIY wedding decor is creating centerpieces that obstruct face-to-face conversation. Guests spend several hours seated at their tables, and tall, dense arrangements that sit directly at eye level force people to crane their necks to talk across the table. For round banquet tables measuring sixty to seventy-two inches across, keep low arrangements strictly below fourteen inches from the tabletop, or elevate high elements on slender pedestals that lift all foliage above twenty-four inches.
Table shape also dictates how you should arrange multiple elements. Round tables require three-hundred-and-sixty-degree symmetry or balanced triangular groupings so the centerpiece looks complete from every chair. Place your wood slab in the center, set your primary lantern or floral vessel in the middle, and arrange three small votives and organic greenery evenly around the perimeter. For long rectangular farm tables, abandon single cluster centerpieces in favor of a low, continuous garland or a rhythmic series of smaller vessels spaced eighteen to twenty-four inches apart, alternating floral jars with camo-accented candleholders.
Step-by-Step Assembly for Long-Lasting Floral Arrangements
Building dozens of centerpieces yourself requires an assembly-line system that preserves flower freshness while keeping construction manageable during wedding week. Begin production two to three weeks before the event by preparing all non-perishable structures. Cut your camo fabric strips, finish raw edges with pinking shears or fabric sealant, adhere wraps to jars, and prepare wood bases with felt pads underneath to prevent them from scratching rented tablecloths or timber tables.
If you are using fresh cut flowers, schedule your floral assembly for the day before the wedding. Cut flower stems at a sharp angle under cool water and let them hydrate in flower food solution for several hours before arranging. If using wet floral foam, soak the bricks passively in a bucket of treated water rather than pushing them down, which creates dry air pockets that dehydrate stems. Fit the soaked foam snugly into watertight plastic trays inside your wooden boxes or planters. Insert heavy greenery first to build a solid framework and hide mechanics, follow with secondary filler flowers, and place delicate focal blooms last to prevent petal bruising.
Testing Mockups, Transport Logistics, and Venue Rules
Never wait until the morning of your reception to see how all your components assemble in real life. Construct one complete sample centerpiece at home at least a month prior to the ceremony. Set it on a kitchen or dining table under standard indoor lighting, take photographs with a smartphone camera from both seated and standing perspectives, and assess whether the camouflage pattern feels subtle, cohesive, and easy to photograph. Check the stability of the design by nudging the table firmly; loose antlers, unstable taper candles, or wobbly jars should be immediately reinforced with museum putty or wire.
Transport logistics can make or break a DIY wedding morning. Centerpieces containing water or loose rocks are notoriously prone to sloshing and tipping in transit. Use sturdy plastic storage totes or divided cardboard liquor boxes padded with bath towels to transport assembled glass vessels safely. If your centerpieces feature tall greenery or fresh blooms, transport the water separately in sealed jugs and fill floral reservoirs on-site after placing containers on the tables. Finally, confirm your venue's policies regarding open flames, real foliage, and wax drips well in advance, as many historic or indoor venues require completely enclosed candles or flameless LED alternatives.
Frequently asked questions
How can I keep camouflage decor from looking too casual or overwhelming?
Limit camouflage patterns to twenty to thirty percent of the overall table design, using it as an accent trim, napkin wrap, or base runner rather than covering every surface. Pair the pattern with elevated textures like clear glass, crisp neutral linens, brushed metal, and classic white or cream florals to maintain a formal wedding aesthetic.
What floral colors look best alongside camouflage patterns?
Crisp whites, creams, and ivory offer the best contrast to lighten and brighten dark foliage patterns under reception hall lighting. If your wedding palette embraces warm earth tones, deep burgundies, blush pinks, and burnt terracotta pair naturally with brown and green camo backgrounds.
How far in advance can I build DIY wedding centerpieces?
All structural and non-perishable elements, including wood slicing, lantern detailing, and fabric wrapping, can be completed several weeks ahead of time. Centerpieces incorporating fresh cut flowers should be assembled no earlier than twenty-four to thirty-six hours before the reception to ensure the blooms stay hydrated and vibrant.
What adhesive works best for attaching camouflage fabric to glass jars?
Heavy-duty double-sided craft tape, hot glue, or clear silicone adhesive work reliably depending on fabric weight. For smooth glass surfaces, high-tack fabric tape prevents messy glue lines and allows you to reposition wraps easily without damaging the fabric or showing through the weave.
Your next step
Build one full centerpiece mockup on your home table this week, take seated photos under warm lighting, and verify your venue's flame and decor regulations before purchasing bulk materials.