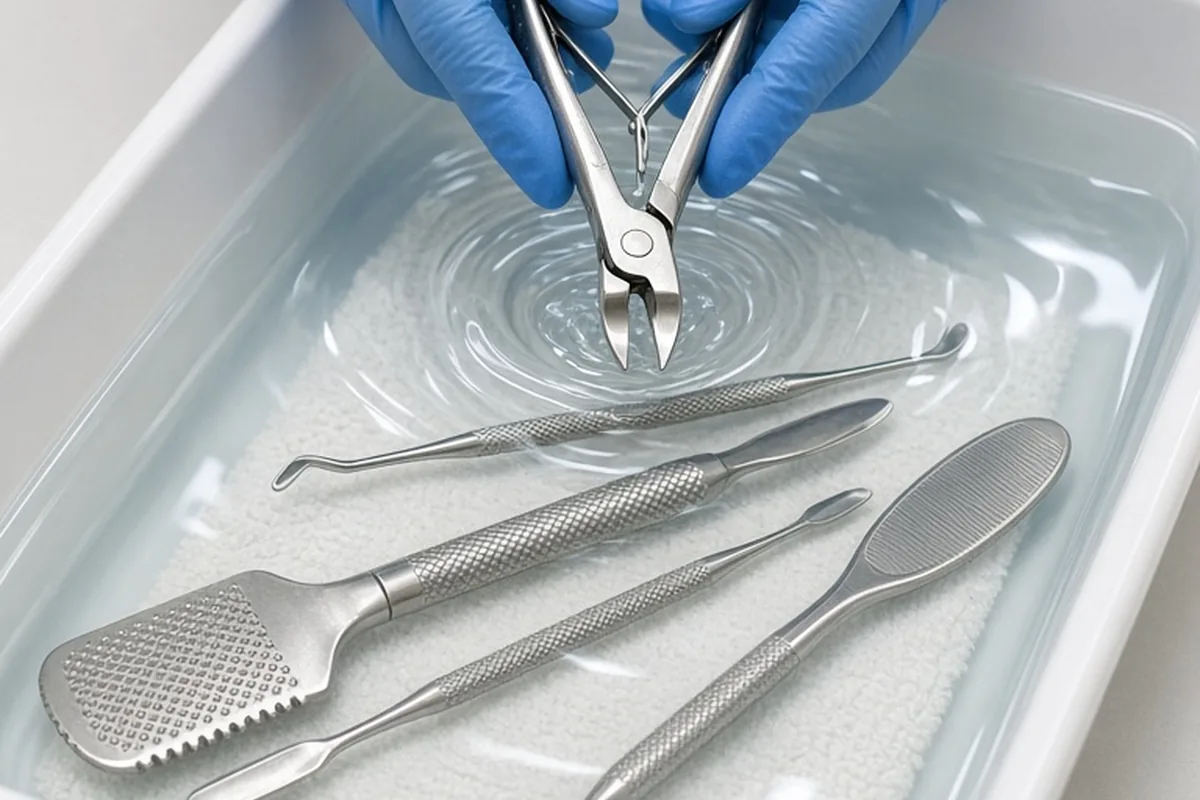
To disinfect pedicure tools for a wedding, first wash all non-porous stainless steel implements with warm water and antibacterial liquid soap to remove physical residue. Completely submerge the cleaned tools in an EPA-registered hospital-grade disinfectant solution for the full contact time listed on the product label, typically ten minutes. Rinse thoroughly with clean water, allow them to air-dry on a fresh towel, and store them in individual airtight containers until wedding morning prep.
Organizing a DIY pedicure party or preparing mobile nail kits for bridesmaids requires strict hygiene practices so everyone enjoys smooth, polished feet without the risk of contracting skin or nail infections right before the big day.
Distinguishing Cleaning from Disinfection and Sterilization
Achieving clean-looking nail equipment is only the initial phase of maintaining sanitary standards for a group pampering session. Cleaning simply refers to the physical removal of visible debris, skin flakes, dust, and product residues from the surface of an item using warm water, liquid detergent, and a clean scrubbing brush. While cleaning lowers the overall microbial load on an instrument, it does not reliably eliminate microscopic bacteria, viruses, or fungal spores that could transfer between bridal party members sharing tools.
Disinfection represents the next mandatory step, utilizing approved chemical solutions to destroy virtually all pathogenic organisms on clean, hard surfaces. For everyday home nail maintenance or group wedding prep, immersion in a professional-grade disinfectant is practical and effective when performed correctly. Complete sterilization, which destroys all microbial life including tough bacterial spores via pressurized heat or autoclaves, is the standard in medical environments and high-end spas. Understanding these differences ensures you do not mistake a simple soapy rinse for genuine germ control.
Choosing the Right Disinfectant Solution and Workspace Setup
Selecting an appropriate chemical agent is vital for preventing cross-contamination among attendants. Look for an Environmental Protection Agency registered broad-spectrum disinfectant designed for salon or hospital use, frequently formulated with quaternary ammonium compounds or accelerated hydrogen peroxide. Standard household bleach can be corrosive to precision stainless steel cuticle nippers and nail clippers, while standard rubbing alcohol evaporates too rapidly to guarantee the required wet contact duration unless tools remain continuously submerged in an enclosed tray.
Designate a clean, well-ventilated staging area away from bridal hair styling products, makeup palettes, and catered food. Lay down clean paper towels or a medical tray cover, and wear protective nitrile gloves to shield your hands from concentrated chemicals. Always measure disinfectant concentrates precisely according to the manufacturer guidelines, as adding extra water dilutes the active germicides, whereas making the mixture overly concentrated can leave sticky chemical films on precision hinges and accelerate tool dulling over time.
Step-by-Step Immersion and Contact Time Protocol
Before any chemical soak can work effectively, every metal implement must undergo a thorough pre-wash. Scrub nail clippers, stainless steel foot rasps, cuticle pushers, and precision nippers under warm running water using a designated nylon brush and liquid soap. Pay close attention to textured handles, hinge mechanisms, and serrated grooves where skin oils and dead tissue collect. Rinse the soapy residue away completely and lightly pat the implements dry so excess water does not dilute your prepared disinfectant bath.
Next, place the open, unclamped tools into your disinfectant tray, ensuring that all metal surfaces are entirely submerged beneath the liquid. Set a kitchen timer for the exact contact time specified on the manufacturer label, which is generally ten full minutes. Cutting this immersion period short prevents the chemical from neutralizing stubborn fungi or viral pathogens. Once the timer finishes, retrieve the tools using clean tongs or gloved hands, rinse them thoroughly with fresh tap water to remove chemical residues, and place them on fresh lint-free paper towels to dry completely.
Handling Porous Versus Non-Porous Pedicure Items
A critical safety distinction during wedding preparations involves separating porous items from non-porous tools. Metal implements, glass files, and hard plastic handles are non-porous, meaning they possess smooth, impermeable surfaces that can be safely scrubbed, submerged in liquid germicides, and reused across multiple attendants. These items can be treated reliably through the multi-step washing and chemical immersion process without trapping contaminated moisture inside micro-crevices.
Conversely, porous items absorb moisture and trap dead skin cells within fibrous textures, making reliable disinfection impossible with standard liquid soaks. Items in this category include foam toe separators, standard emery boards, wooden cuticle sticks, pumice stones, and disposable buffing blocks. To ensure complete safety for your bridal party, purchase these disposable items in bulk packs and assign individual, single-use sets to each participant. Never attempt to wash and share an emery board or wooden stick between bridesmaids, as doing so introduces a high risk of spreading nail fungus.
Sanitizing Foot Basins and Soaking Equipment
Foot baths and soaking tubs represent another common vector for microbial transmission if multiple people share water or soak sequentially without intermediate sanitation. If using portable plastic foot basins for the wedding party, select models without internal pipes or circulating jets, as internal plumbing lines can harbor biofilm and fungal colonies that resist surface scrubbing. Smooth, non-plumbed basins are significantly simpler to clean and disinfect thoroughly between uses.
Between each bridesmaid pedicure, drain the basin completely and scrub the interior basin walls with hot water and liquid soap using a dedicated cleaning sponge. Rinse away all suds, then spray or wipe the entire interior surface with an EPA-registered disinfectant spray, ensuring the surface stays visibly wet for the required label contact time. Alternatively, using single-use disposable plastic tub liners for each person provides a reliable physical barrier that simplifies sanitation between attendants during a tight wedding morning schedule.
Safe Storage and Transport on the Wedding Morning
Disinfecting your pedicure gear days in advance offers little benefit if tools become contaminated during transport to the bridal suite or venue dressing room. After your implements are fully disinfected, rinsed, and completely air-dried, package them immediately into individual clean pouches. Using self-sealing sterilization pouches, breathable clean cotton bags, or dedicated hard-shell plastic cases keeps ambient dust, pet dander, and hair styling overspray from settling on clean surfaces before contact with toes.
Label individual tool packs for specific attendants if you are customizing personal grooming kits as part of the bridesmaid gifts. Keep your sanitized tool containers separate from used tools during the pampering session by designating a clear plastic bin labeled for dirty implements. As soon as a tool is finished being used on one person, drop it directly into the soiled bin so no one accidentally picks up an unwashed instrument to touch another attendant's feet during the festive rush.
Frequently asked questions
Can I use standard rubbing alcohol instead of salon disinfectant?
Rubbing alcohol containing seventy to ninety percent isopropyl alcohol can kill surface germs, but it evaporates rapidly and can rust precision hinges if left standing. For group events like weddings, an EPA-registered hospital-grade disinfectant soak provides more consistent broad-spectrum protection against stubborn nail fungi and viruses.
How far in advance of the wedding should I disinfect the tools?
You can thoroughly wash, disinfect, and dry your metal tools three to five days before the wedding festivities begin. Once completely dry, seal them inside airtight pouches or clean plastic containers so they remain clean and ready for immediate use on wedding morning.
Can we share nail polish bottles among the bridal party safely?
Nail polish formulas contain solvent bases that generally inhibit microbial growth, making shared polish bottles reasonably safe for healthy nails. However, avoid applying shared polish to any attendant who exhibits broken skin, inflamed cuticles, or signs of an active nail infection.
Your next step
Assemble your non-porous tools and disposable items today, and purchase an EPA-registered disinfectant solution to prepare individual hygiene kits well ahead of your wedding prep timeline.