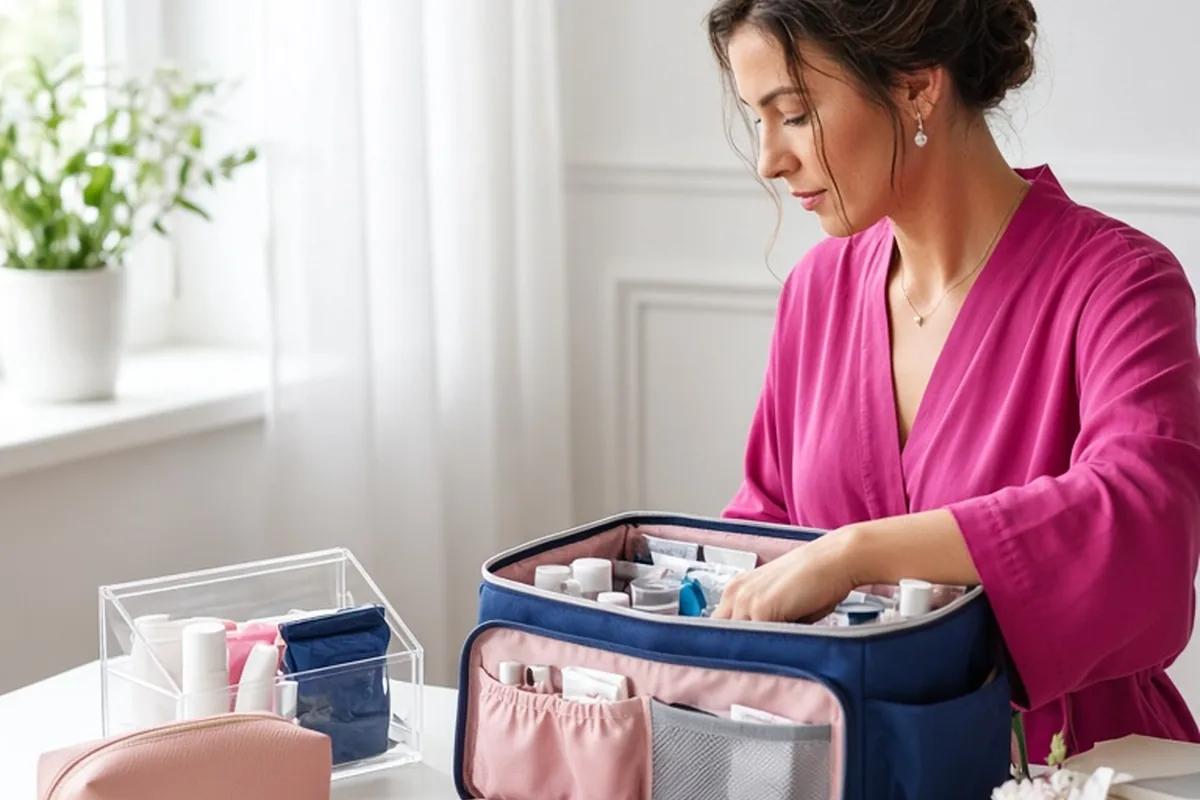
A wedding day emergency kit planning timeline breaks down preparation into four stages: inventorying what you already own at two to three months out, purchasing travel-sized health, garment, and beauty supplies at four to six weeks, assembling and organizing categorized containers at one to two weeks, and assigning kit custody to a trusted attendant or coordinator during rehearsal week. This prevents last-minute shopping stress and ensures quick fixes for wardrobe malfunctions, minor injuries, and weather changes.
Preparing for unexpected wardrobe tears, blistered heels, or sudden headaches requires more than tossing random items into a tote bag the night before your ceremony. Building an effective kit over a structured timeline ensures you avoid duplicate purchases, maintain fresh products, and delegate custody so critical items are instantly accessible when seconds count.
Two to Three Months Out: Auditing Attire, Venues, and Existing Supplies
Starting your planning two to three months before the wedding allows you to evaluate your specific celebration environment without competing against final vendor confirmations. Begin by examining your wedding party attire and venue layout. Different fabrics demand distinct repair tools; delicate silks and satins require fine sewing needles, thread that precisely matches dress tones, and double-sided apparel tape that will not leave adhesive residue, whereas heavy wool suits and structured tuxedos benefit from sturdier needles, replacement cuff links, and heavy-duty safety pins. Outdoor venues with natural turf or gravel require heel protectors and insect relief, while historic indoor properties may have strict rules prohibiting open aerosol sprays or liquid adhesives inside dressing suites.
Use this early milestone to audit travel-sized toiletries, first-aid basics, and grooming tools you already own at home. Check expiration dates on over-the-counter medications, evaluate whether your mini scissors are sharp enough to cut heavy ribbon or fabric, and note which items need to be purchased new. Creating a central checklist at this stage prevents accidental over-purchasing and gives you ample time to order specialized items online, such as clear earring backs, anti-static spray, or fabric-specific stain wipes that local convenience stores rarely stock in travel dimensions.
Four to Six Weeks Out: Sourcing Garment, Beauty, and Personal Care Essentials
Around the one-month mark, purchase the remaining non-perishable components across three foundational categories: apparel care, personal wellness, and cosmetic maintenance. For apparel care, assemble pre-threaded sewing needles in white, ivory, black, and your wedding party palette, alongside seam rippers, hem tape, garment shields for perspiration, safety pins in varied sizes, a lint roller, and chalk to mask unavoidable grease or water spots on light fabric. For personal wellness, gather single-dose pain relievers, antacids, anti-diarrheal tablets, non-drowsy allergy medication, blister prevention bandages, eye drops, electrolyte powder packets, and personal hygiene supplies.
Beauty and grooming essentials should support both skin and hair under varied environmental conditions. Source blotting papers to remove shine without disturbing camera-ready makeup, translucent powder, a pocket comb, extra bobby pins in shades matching your wedding party's hair, travel hairspray, clear nail polish to halt stocking runs or secure loose embellishments, nail clippers, an emery board, and cotton swabs for precision cleanup. Purchasing these items weeks in advance eliminates rush shipping fees and guarantees that you have travel-appropriate sizes that fit neatly into organized pouches.
Two Weeks Out: Compartmentalizing and Packing the Bridal Emergency Kit
Tossing all emergency supplies into a single large tote bag creates chaotic delays during high-stress moments. At the two-week mark, purchase clear zippered pouches, a tiered tackle organizer, or a multi-compartment cosmetic case to sort items into distinct, clearly visible categories. Dividing your supplies into labeled zones—such as Wardrobe Hardware, First Aid and Medication, Beauty and Hair, and Hardware and Tools—allows anyone assisting you to locate a safety pin, blister patch, or lint roller in seconds without dumping out the entire bag.
During this assembly phase, pack non-fabric tools that solve physical venue complications. Include a multi-tool or miniature screwdriver for loose eyewear or accessories, a lighter to seal frayed ribbon ends, portable fabric shears, extra earring backs, floral tape to reinforce boutonnieres, and extra phone charging cords paired with fully powered external battery banks. Inspect all liquids and creams to ensure caps are tightly sealed, and place liquid stain removers and mini perfumes in leak-proof plastic bags to protect dry goods like bandages and sewing thread.
One Week Out: Adding Perishables, Custom Touch-Ups, and Tech Items
The final week before the wedding is dedicated to incorporating individualized, time-sensitive supplies that could not be packed weeks earlier. Coordinate with your makeup artist and hair stylist during your final confirmation calls to obtain the exact lip shade, lip liner, and sample pots of setting powder or foundation used during your trial. If you wear contact lenses, pack a fresh backup pair, a clean lens case, and travel-sized saline solution. Add prescription medications in their original labeled containers alongside any specific skin ointments you regularly rely on.
Incorporate clean, non-perishable sustenance and tech preparation into the kit at this time. Pack non-melting, protein-dense snacks like raw almonds, energy bars without chocolate coatings that could melt on clothing, mints instead of chewing gum, and breath spray. Verify that all external battery banks are fully charged to capacity and compatible with current phone models used by the couple and the wedding party. Place a printed copy of your vendor contact list and day-of timeline inside the kit lid for instant offline reference if mobile reception drops.
Wedding Eve and Morning: Designating Kit Custody and Transport Logistics
An emergency kit provides no benefit if it remains locked in a dressing suite while an issue occurs during off-site formal portraits or prior to the ceremony processional. On wedding eve, formally designate a specific person to take full custody of the kit. The bride or groom should never manage the kit directly. Entrust this responsibility to a professional day-of coordinator, maid of honor, best man, or organized family member who will remain present across all transitions from getting-ready suites to transportation vehicles, portrait locations, and the reception hall.
Establish a clear transit plan for the kit throughout the day. During morning preparations, place the organizer on an open, dry table away from hair washing stations and makeup sinks. When leaving for formal photos, transfer a curated mini-pouch containing lip color, blotting paper, safety pins, garment tape, and tissues into the transport vehicle. Ensure the main kit is deposited under the head table, behind the DJ booth, or inside the secure venue bridal suite where key wedding party members know how to access it immediately without searching through venue storage closets.
Weather-Specific Adjustments for Outdoor and Destination Weddings
Outdoor environments and non-traditional venues require specific modifications to the standard emergency kit checklist. For warm-weather celebrations, outdoor garden ceremonies, or beach settings, incorporate clear broad-spectrum sunscreen that will not stain light fabrics, oil-absorbing face sheets, thermal water facial mist to cool flushed skin, portable mini hand-held fans, and fragrance-free insect repellent wipes rather than aerosol sprays that could damage wedding gown fabrics or irritate nearby guests.
For cool-weather, mountain, or winter celebrations, swap in single-use air-activated hand warmers, rich clear lip balm to counteract windburn, static cling eliminator spray, and spare neutral-toned thermal undergarments. If your venue involves lawn walking, include wide-base silicone heel protectors to stop shoes from sinking into grass and clear adhesive sole grips to prevent slips on slick dance floors, polished stone steps, or wet decking.
Post-Wedding Disassembly and Product Repurposing
Once the wedding reception concludes, the emergency kit should be packed alongside personal luggage during venue teardown. Assign the kit custodian or a family member to pack the organizer into a designated vehicle before late-night cleanup begins, ensuring high-value tech accessories, sewing shears, and personal makeup are not accidentally left behind or discarded by venue maintenance crews.
In the days following your celebration, conduct a brief sorting session to repurpose unused supplies. High-utility items like sewing notions, first-aid supplies, blister treatments, and travel-sized grooming tools make excellent permanent additions to personal travel toiletry bags, guest bathroom baskets, or home emergency storage. Return any borrowed tools promptly and dispose of opened perishable beauty samples or medication packaging that was exposed to humidity during the event.
Frequently asked questions
Can I buy a pre-made wedding emergency kit instead of building one from scratch?
Pre-made kits provide a solid foundation for generic needs like safety pins, basic bandages, and mini sewing supplies. However, they almost always lack personal essentials such as your exact lipstick shade, specific prescription medications, fabric-appropriate thread, and backup tech chargers. If you purchase a pre-assembled kit, do so two months out and supplement it with custom personal and beauty items.
Who should pay for the wedding day emergency kit?
The emergency kit is typically funded by the couple as part of their overall wedding decor and miscellaneous personal budget. In some cases, the bridal party or maid of honor prepares the kit as a supportive gift for the couple. Wedding planners often bring an extensive professional kit as part of their contracted service package, though personal items must still be provided by the couple.
How large should the emergency kit container be?
Aim for a medium-sized cosmetic case, a soft-sided compartmentalized travel bag, or a craft tackle box that measures roughly twelve to fifteen inches wide. It should be compact enough to fit unobtrusively beneath a table or in a car trunk, yet structured enough to hold clear labeled pouches so supplies remain separated and immediately visible under pressure.
Your next step
Draft a personalized supply checklist this week by reviewing your wedding wardrobe fabrics and venue rules, then begin gathering non-perishable travel items into your first labeled pouch.